

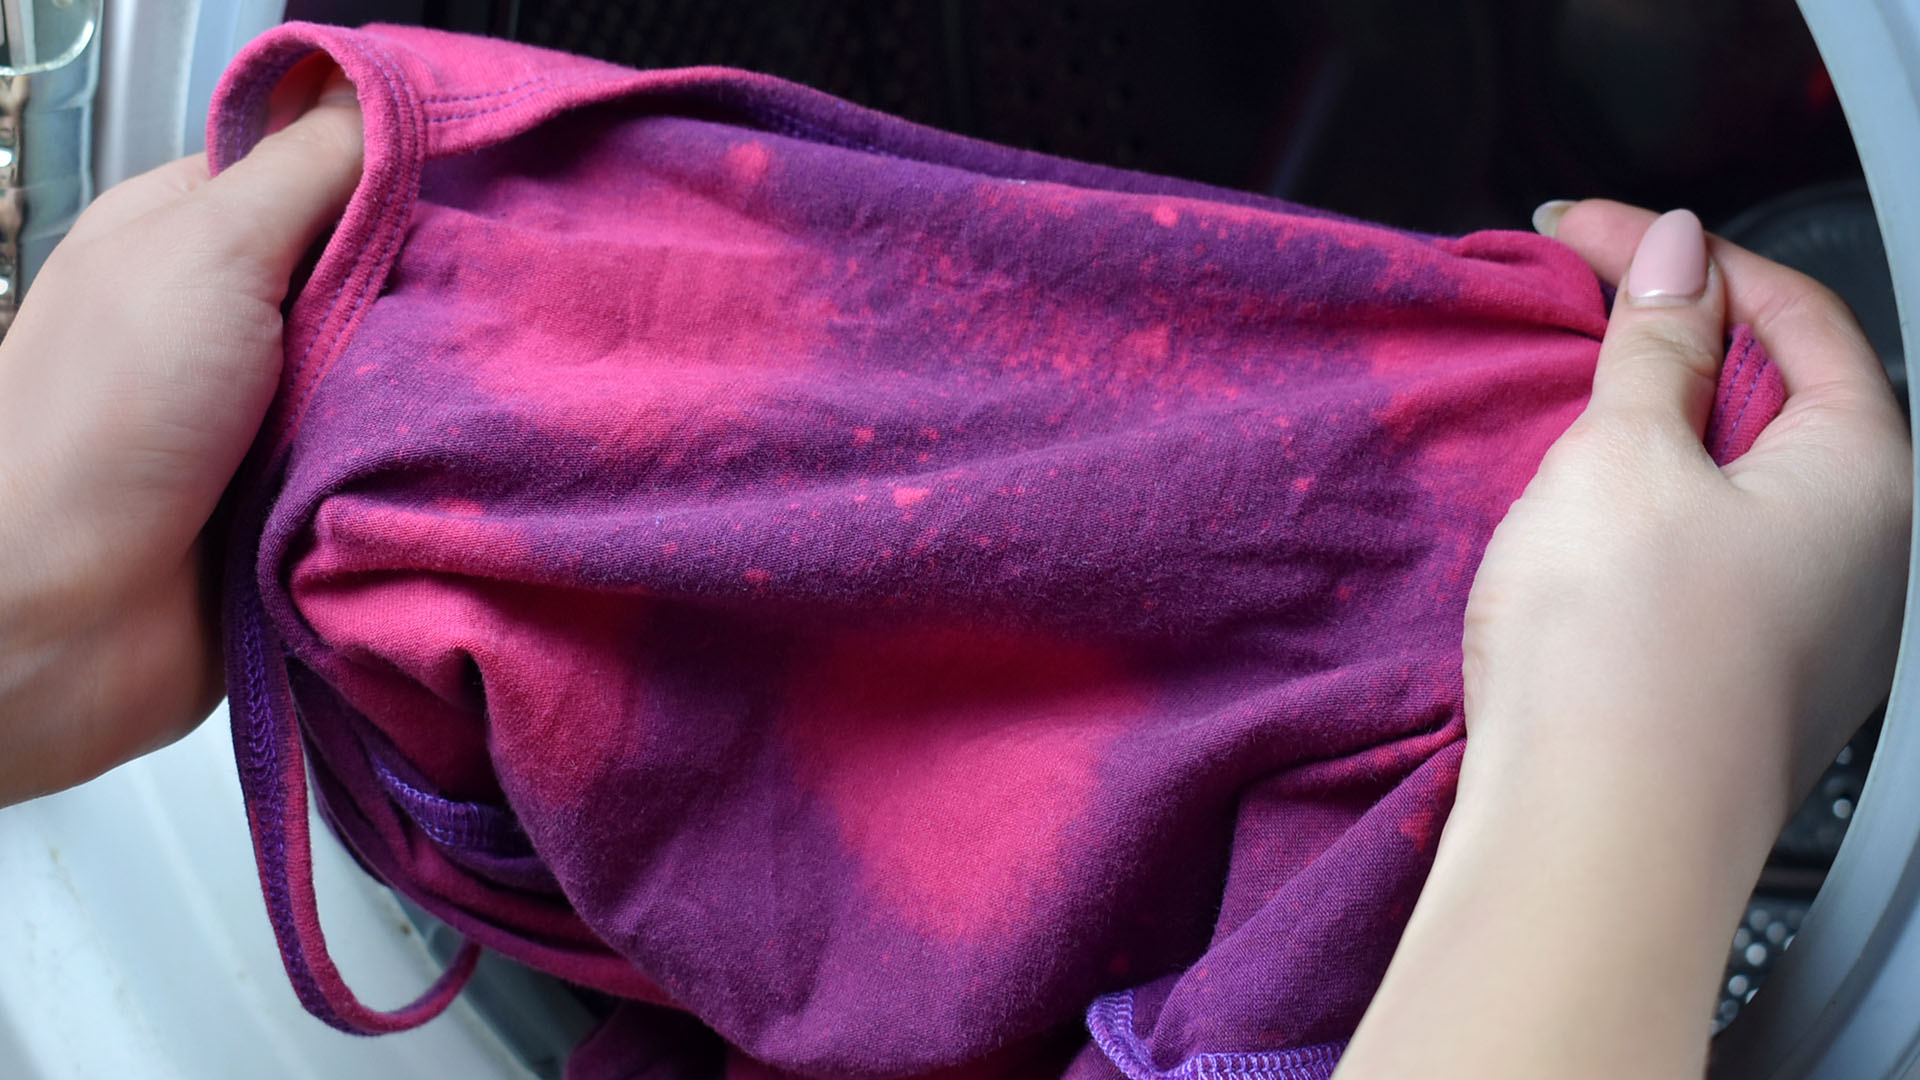
That dark shirt hiding at the back of your closet may not need to become a cleaning rag just yet. With carefully diluted chlorine bleach, you can fade an entire garment, create a soft ombré effect, or add a deliberately distressed design. The process is inexpensive and surprisingly quickbut bleach is less forgiving than an aunt with strong opinions about laundry.
The two easiest methods are an all-over bleach soak for uniform fading and a controlled application for gradients, patterns, and selected areas. Both work best on bleach-safe cotton clothing. Because fibers, dyes, and bleach concentrations vary, always treat the garment-care label and product directions as the final authority.
What Bleach Actually Does to Colored Clothing
Household chlorine bleach typically contains sodium hypochlorite. Instead of covering the existing color, it oxidizes dye molecules so they absorb and reflect light differently. That is why bleach can lighten clothing rapidlyand why the final shade is not always predictable.
A black cotton shirt may turn rust, orange, peach, or tan before approaching cream. Navy can become pinkish, purple, or pale blue. Red may shift toward coral, while green sometimes wanders into yellow territory. Bleach is performing chemistry, not taking requests from your color chart.
Oxygen bleach, also called non-chlorine or color-safe bleach, behaves differently. It is useful for brightening dingy clothing and removing stains, but it generally will not strip a strong garment dye fast enough to create a dramatic faded design. For intentional color removal, this guide focuses on liquid chlorine bleach.
Check the Garment Before You Begin
Read the bleach symbol
Look for a triangle on the care label. An empty triangle means bleach is permitted. A triangle containing two diagonal lines means only non-chlorine bleach should be used. A crossed-out triangle means do not bleach. Ignoring that last symbol turns a DIY project into a very small memorial service for your shirt.
Choose a compatible fabric
One hundred percent cotton usually gives the clearest and most responsive results. Linen and rayon may also lose color readily, although they require cautious handling. Polyester, acrylic, and nylon may fade slowly, unevenly, or barely at all because their dyes and fibers often resist chlorine bleach.
Do not use chlorine bleach on wool, silk, mohair, leather, or clothing containing spandex. Even a shirt labeled 97 percent cotton and 3 percent spandex can lose elasticity or develop weak areas. Decorative stitching, printed graphics, linings, and sewing thread may also react differently from the main fabric.
Run a hidden color test
Never assume that two black cotton shirts will fade alike. Dye chemistry and manufacturing methods matter as much as the color printed on the tag.
- Check the bleach label for its recommended colorfastness-test formula. For some standard household bleaches, the manufacturer’s test uses 2 teaspoons of bleach in 1/4 cup of water.
- Apply one small drop to an inside seam, hem, or pocket lining.
- Wait one minute, then rinse and blot the area dry.
- Inspect both the new shade and the fabric. Test every color separately if the garment is multicolored.
If nothing changes, the dye may be bleach-resistant. If the fiber becomes rough, thin, or damaged, choose another garment. If you like the revealed shade, the project has passed its audition.
Bleach Safety Rules You Should Not Skip
- Work outdoors or in a room with open windows and strong airflow.
- Wear chemical-resistant gloves, old clothing, and eye protection when splashing is possible.
- Keep children and pets away from the work area.
- Protect counters and floors with a bleach-safe covering.
- Use plastic containers and tools reserved for nonfood projects.
- Measure the bleach rather than estimating a heroic-looking splash.
- Never apply full-strength bleach directly to clothing.
- Never mix bleach with ammonia, vinegar, acids, hydrogen peroxide, rubbing alcohol, toilet cleaner, or another household cleaner. Dangerous gases or reactions can result.
Prewash the garment with regular detergent to remove finishes, dirt, and oils, but rinse it completely before starting. Do not add vinegar or another improvised “neutralizer.” If fumes cause burning eyes, coughing, wheezing, or difficulty breathing, leave the area immediately for fresh air and contact Poison Control or emergency services as appropriate.
Method 1: Use a Diluted Bleach Soak for Even Lightening
This method is best when you want to fade most or all of a cotton shirt, pair of jeans, or other sturdy, washable garment. It provides more even coverage than spot application, although seams and heavy areas may still retain additional color.
What you need
- A bleach-safe garment
- Regular unscented liquid chlorine bleach
- Cool water
- A plastic dishpan or bucket
- Protective gloves
- A measuring cup and timer
- Access to clean running water
Step 1: Prepare the garment
Prewash and rinse the clothing. For a softer, more even fade, work with the garment clean and slightly damp. Unbutton it, open pockets, and untangle sleeves so the solution can reach every surface.
Step 2: Make the solution
Follow the dilution and soaking instructions printed on your bleach bottle. Bleach products come in different strengths, so one universal recipe is not appropriate for every formula. As an example, some current laundry instructions use 1/4 cup of regular bleach per gallon of cool water for a short soak of no more than five minutes.
Add the water to the container first, followed by the measured bleach. Prepare enough solution for the garment to move freely. A cramped shirt produces folds, dark patches, and the artistic energy of a dropped sandwich.
Step 3: Submerge and agitate
Place the garment in the solution and use gloved hands to submerge it fully. Move it gently and continuously so trapped air and folds do not create unwanted dark areas. Start the timer immediately.
Check the color after 30 seconds and continue checking frequently. Wet fabric appears darker than dry fabric, and a little additional fading can occur before the bleach is completely rinsed away. Remove the garment slightly earlier than the shade you think you want.
Step 4: Rinse and wash
Remove the garment when you like the color or when the label’s maximum exposure time is reachedwhichever comes first. Rinse it several times in cool running water until the bleach odor has substantially diminished. Wash it alone with detergent using the temperature and cycle recommended on its care label. An extra rinse is helpful.
Air-dry the garment before deciding whether it needs another treatment. Repeating a brief, controlled process is safer than leaving fabric in a strong solution for too long.
Method 2: Create an Ombré, Distressed, or Patterned Effect
Controlled application is ideal when you want to lighten only part of a garment. You can produce a faded hem, stripes, lettering, stars, splatters, or a reverse tie-dye design. A sponge gives excellent control and produces fewer airborne droplets than a spray bottle.
What you need
- A clean, bleach-safe cotton garment
- Diluted chlorine bleach prepared according to its label
- A plastic bowl and sponge or a labeled trigger bottle
- Cardboard, painter’s tape, stencils, or rubber bands
- Gloves, eye protection, and a timer
- Clean water for immediate rinsing
Step 1: Protect the back layer
Lay the garment flat on a protected surface. Slide thick cardboard inside a shirt or pant leg so the solution cannot bleed through to the opposite side. Smooth out wrinkles before applying tape or stencils.
Step 2: Plan the effect
For stripes, press painter’s tape firmly against the fabric. For reverse tie-dye, twist or fold the garment and secure it with rubber bands. To make an ombré effect, decide where the lightest section will begin and work gradually toward the untouched color.
Step 3: Apply diluted bleach
Use the dilution specified by your product for fabric art or color removal. One manufacturer’s controlled-application example combines 1/2 cup of regular bleach with 2 cups of water, but product strengths vary. Never copy a ratio without comparing it with your bottle’s directions.
For an ombré look, dab the strongest coverage along the hem and use progressively less solution as you move upward. Blend the boundary with a damp sponge. For a distressed effect, tap irregular areas lightly rather than saturating the fabric. If using a trigger bottle outdoors, keep the nozzle close to the garment, aim away from your face, and avoid creating a fine airborne mist.
Step 4: Watch the color develop
Changes may appear within seconds or take several minutes. Check constantly, including beneath folds and stencils. Do not extend the contact time simply because a polyester blend refuses to cooperate; extra exposure may damage the cotton portion without meaningfully fading the synthetic fibers.
Step 5: Rinse promptly
As soon as the desired color appearsor the product’s maximum treatment time is reachedremove tape and bands with gloved hands and rinse the garment thoroughly in cool water. Then machine-wash it alone with detergent and an extra rinse. Air-dry it before wearing or washing it with other clothes.
What Results Can You Expect?
| Material or color | Likely response | Best approach |
|---|---|---|
| 100% cotton | Usually fades quickly and visibly | Soak, ombré, or patterned application |
| Dark denim | May fade unevenly at seams and thick areas | Brief soak with frequent movement |
| Black fabric | Often reveals orange, rust, peach, or tan | Patch-test to preview the undertone |
| Polyester-rich blend | May show little change | Consider a commercial color remover approved for the fiber |
| Spandex blend | Elastic fibers may weaken | Do not use chlorine bleach |
| Wool, silk, or leather | Can suffer serious permanent damage | Choose a professional or fiber-specific alternative |
How to Fix Common Bleaching Problems
The garment looks blotchy
Blotches usually come from folds, trapped air, uneven saturation, or undiluted bleach. After the garment is washed and dry, a second short all-over treatment may soften the contrast. It can also weaken the fabric, so test again and accept that “vintage texture” may be the most fashionable diagnosis.
The fabric turned orange instead of white
This is a dye reaction, not necessarily a mistake. Many dark colors contain warm underlying pigments. Repeated chlorine treatments may damage the fibers before producing white. Keep the warm shade, overdye the garment later, or use a commercial color remover compatible with its fiber content.
Nothing happened
The garment may contain synthetic fibers or bleach-resistant pigments. Confirm that the product is fresh, the solution matches its label, and the test area was fully saturated. Do not compensate by pouring undiluted bleach onto the clothing.
The fabric feels thin or rough
Stop bleaching it. Excess concentration, long exposure, or repeated treatments can weaken fibers. Rinse and wash the garment thoroughly, then retire it from future bleach experiments.
Frequently Asked Questions
Can bleach turn any colored shirt white?
No. The result depends on the fiber, original dye, printing method, and bleach concentration. Some garments reach cream or pale beige, while others stop at orange or show almost no change.
Should clothing be wet or dry before bleaching?
Slightly damp fabric generally encourages a softer, more even fade. Dry fabric is useful for crisp stencils and controlled marks. Follow the selected technique and test first.
Can I use bleach in a washing machine to fade one item?
You can use a machine’s bleach dispenser if both the washer manual and garment label allow it, but a separate soak provides better control over intentional color removal. Never pour liquid bleach directly onto clothing in the drum.
Does oxygen bleach remove garment color?
It usually brightens and cleans without dramatically stripping color. That makes it a better choice for routine colored laundry, but a less effective choice for reverse dyeing or strong fading.
Conclusion
Learning how to lighten clothing with bleach is mostly an exercise in restraint. Choose a bleach-safe garment, test the hidden fabric, dilute the product accurately, and watch the color instead of wandering away to make coffee. Use a short soak for an overall fade or controlled application for an ombré or patterned finish.
The safest creative rule is simple: you can repeat a mild treatment after the garment dries, but you cannot persuade dissolved fibers to return from the laundry afterlife.
Practical Experience Notes: What Real-World Bleach Projects Teach You
The first useful lesson is that the patch test is not a ceremonial step. Imagine two apparently identical black cotton T-shirts from different manufacturers. The first reveals a warm copper shade within a minute. The second becomes dusty pink, while its polyester stitching stays completely black. Both labels may say “100% cotton” because that description applies to the main fabric, not necessarily every thread, graphic, or trim. Testing provides a preview of those mismatched reactions before they cover the front of the garment.
A second common experience involves impatience. A dark denim shirt appears to be changing too slowly, so the DIYer leaves it submerged while answering messages. By the time it is removed, the body is pale blue, the seams are dark, and several folded areas have sharp navy shadows. The safer approach is continuous movement and observation. Turning the garment every 20 to 30 seconds feels fussy, but it prevents five minutes of treatment from becoming five years of regret.
Ombré projects reveal another small truth: less liquid often produces a better gradient. Saturating a hem and then drawing a nearly dry sponge upward creates a natural transition. Repeatedly spraying the boundary tends to create a hard horizontal line. Working from the lightest area toward the untouched area also makes it easier to control the fade. Cardboard inside the garment is essential; without it, a beautiful design on the front can quietly become an accidental inkblot on the back.
Dark dyes also teach humility. A person may begin with visions of a crisp black-and-white shirt and discover that the bleach exposes pumpkin orange instead. That result is not evidence that the solution was “too weak.” It is the undertone of the dye. Continuing to bleach may produce a lighter peach, but it may also make the cotton fragile. Once the fabric reaches an attractive intermediate color, stopping is often the smarter design decision.
Repeated projects show why drying before making another adjustment matters. Wet fabric hides its true brightness, and bleach-treated material can look darker while saturated. After rinsing, washing, and air-drying, an apparently subtle fade may become exactly right. If it is still too dark, a second brief treatment offers more control than one marathon soak.
Finally, successful bleach projects benefit from realistic garment selection. An inexpensive, sturdy cotton thrift-store shirt is a forgiving first experiment. Stretch leggings, a sentimental silk blouse, or an expensive polyester jacket are not. Starting with an item you can afford to transformor losemakes the process more enjoyable. Creativity thrives when nobody is staring at a designer price tag while holding a bucket of sodium hypochlorite.