

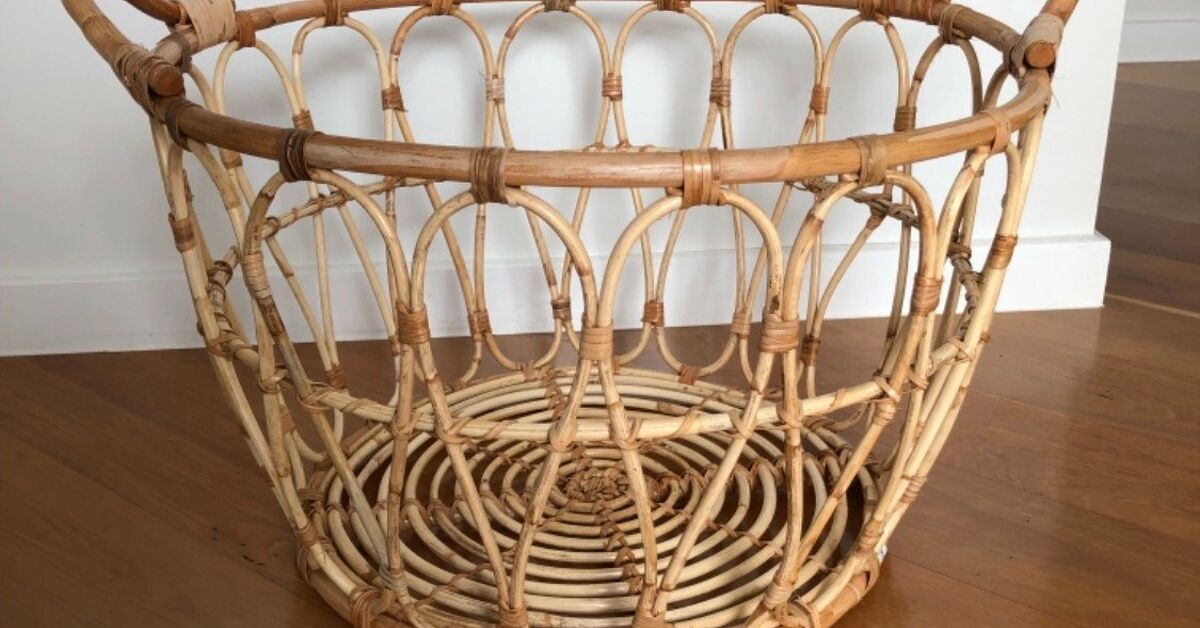
A basket coffee table is one of those DIY projects that makes people say, “Wait, you made that?” while you try to act casual and not immediately tell them it cost less than dinner for two. It is warm, textural, practical, and wonderfully forgiving. A slightly imperfect woven basket? Charming. A thrifted tray with tiny scratches? Character. A living room that needs storage for blankets, remotes, magazines, toys, or that one mystery charging cable nobody claims? Perfect candidate.
This guide shows you how to make a basket coffee table on a budget using affordable materials, beginner-friendly tools, and smart design tricks. The basic idea is simple: use a sturdy basket, hamper, planter-style base, or woven storage bin as the table base, then add a flat top made from wood, a tray, plywood, or a ready-made round board. With the right proportions and a little finishing work, you can create a DIY basket coffee table that looks like it came from a boutique home store instead of your weekend “I can totally do this” phase.
The best part? You can customize it for farmhouse, boho, coastal, modern organic, cottage, Japandi, rustic, or small-apartment style. Your coffee table can also double as hidden storage, which is basically furniture doing chores. We love furniture that pulls its weight.
Why a Basket Coffee Table Is a Smart Budget DIY
A basket coffee table works because it combines three big decorating wins: texture, function, and flexibility. Woven materials such as rattan, seagrass, wicker, water hyacinth, jute, bamboo, and rope bring instant warmth to a room. They soften hard surfaces, break up too much metal or painted wood, and add that cozy “someone here owns a linen throw” energy.
It is also practical. A large basket base can hide throw blankets, board games, kids’ toys, pet supplies, seasonal pillow covers, or extra magazines. If your living room has ever become a landing zone for every object in your home, hidden storage is not a luxury; it is emotional support.
Budget-wise, this project can be very affordable. A thrifted basket may cost $10 to $25. A pre-cut wood round from a home improvement store or craft store can run $15 to $45 depending on size and thickness. Add sandpaper, stain or paint, adhesive, screws, felt pads, or a simple sealant, and many versions land around $35 to $95. That is far less than many designer woven coffee tables, which often cost several hundred dollars.
Choose the Right Basket Base
The basket is the soul of the project, so choose carefully. You want a basket that is wide, sturdy, flat enough to support a top, and attractive from every angle. Since the basket will become the visible base of your coffee table, avoid flimsy laundry baskets that collapse if you look at them sternly.
Best Basket Types for This Project
Round lidded storage baskets are ideal because their shape naturally works as a coffee table base. If the lid is strong and flat, you may even be able to use it as part of the tabletop system.
Large wicker hampers can work if they have a wide footprint and solid sides. Avoid tall, narrow hampers unless you plan to add weight at the bottom for stability.
Seagrass belly baskets look beautiful, but many are soft-sided. They are better for decorative side tables than daily-use coffee tables unless reinforced inside.
Wire baskets create a modern industrial look and can be very sturdy. Add a wood top for warmth and attach it securely with brackets or clips.
Planter baskets can be excellent bases, especially if they have rigid walls. Just make sure they are clean, dry, and not lined with material that traps moisture.
Size Guidelines That Actually Matter
A coffee table should feel comfortable with your sofa, not like a tiny island floating in a furniture ocean. A good rule is to choose a table that is roughly two-thirds the length of your sofa. Height matters too: aim for a finished table close to the height of your sofa seat cushions, or about one to two inches lower. Most coffee tables fall around 16 to 18 inches tall, but your sofa is the boss here.
Leave enough room to move around the table. A comfortable gap between sofa and coffee table is typically about 12 to 18 inches. This gives you room to reach snacks without performing yoga and enough space to walk without bruising your shins into a dramatic memoir.
Materials and Tools You Will Need
You can keep this project simple or make it more polished depending on your budget and comfort level. Here is a beginner-friendly shopping list.
Basic Materials
- One large sturdy basket, wicker hamper, rattan basket, wire basket, or woven storage bin
- One round or square wood top, wood tray, plywood circle, or pre-made tabletop
- Medium-grit and fine-grit sandpaper
- Wood stain, paint, or clear sealer
- Wood glue, construction adhesive, or heavy-duty adhesive suitable for the materials
- Small screws, washers, mending plates, clips, or L-brackets if mechanically attaching the top
- Felt pads or rubber feet
- Optional: handles, casters, rope trim, cane webbing, leather pulls, or a glass topper
Helpful Tools
- Measuring tape
- Pencil
- Drill or screwdriver
- Clamps or heavy books for holding pieces while adhesive cures
- Paintbrush, foam brush, or lint-free cloth
- Jigsaw or circular saw if cutting your own tabletop
- Safety glasses and dust mask when sanding or cutting
If you do not own power tools, do not panic. Many stores sell pre-cut wood rounds, serving trays, and tabletops. You can also ask a home improvement store whether they offer cutting services for plywood. The no-power-tools version is very real, and your weekend deserves peace.
Budget-Friendly Design Options
There is more than one way to make a basket coffee table. Pick the version that fits your style, budget, and patience level.
Option 1: The Flip-and-Top Method
This is the easiest method. Turn a sturdy basket upside down and attach a wood round or tray to the top. This works especially well with baskets that are wider at the bottom and narrower at the top, because flipping them creates a wider base. The result is stable, sculptural, and fast.
Use this method if you want a table that looks like a woven pedestal. It is great for boho, coastal, organic modern, and small living rooms. The downside is that you lose hidden storage because the basket opening faces the floor.
Option 2: The Removable Lid Method
For storage, keep the basket upright and make the tabletop removable. Cut or buy a wood top slightly wider than the basket opening. Add small wood blocks or rubber bumpers underneath the top so it stays centered and does not slide around.
This version is ideal for blankets, toys, pillows, and clutter control. You get a table and storage in one project. That is the DIY equivalent of finding money in a jacket pocket.
Option 3: The Tray Top Method
Use a large round tray instead of a wood board. This is perfect if you want a no-saw, no-stain project. A tray with raised edges also keeps books, candles, cups, and remotes from wandering away. Choose a tray that is wide enough to cover the basket opening and heavy enough to feel stable.
Option 4: The Reinforced Basket Method
If your basket is beautiful but slightly soft, reinforce it. Place a round piece of plywood inside the bottom. Add a second support ring or wood cross brace near the top opening. This helps the basket hold shape and support weight more evenly. It is a smart solution for flexible seagrass baskets that look amazing but were not born dreaming of becoming furniture.
Step-by-Step: How To Make a Basket Coffee Table On A Budget
Step 1: Measure Your Sofa and Living Room
Before buying anything, measure your sofa seat height, sofa length, and the available floor space. Decide whether you want a small accent-style coffee table or a full-size centerpiece. For most living rooms, a tabletop diameter of 24 to 36 inches works well. Smaller apartments may prefer 20 to 28 inches. Large sectionals may need a bigger top or even two basket tables grouped together.
Step 2: Test the Basket for Stability
Set the basket on the floor and gently push it from different sides. If it wobbles, rocks, or collapses, keep shopping or plan to reinforce it. A coffee table does not need to hold a person, but it should hold books, drinks, decor, and the occasional snack plate without drama.
If you have children or pets, be extra cautious. Choose a wide base, avoid heavy loose glass tops, and do not create a tall narrow table that can tip easily. A basket coffee table is not usually anchored like tall furniture, so its stability comes from proportion, weight distribution, and common sense.
Step 3: Choose or Cut the Tabletop
The tabletop can be a pre-cut round board, plywood circle, wood tray, butcher-block round, thrifted tabletop, or even a salvaged cabinet door cut to size. For a polished look, choose a top that overhangs the basket by about one to three inches on each side. Too little overhang can look awkward; too much can make the table unstable.
If cutting plywood, mark your circle carefully and use a jigsaw. Sand the edge until smooth. If you want a more finished look, add iron-on edge banding or rope trim around the edge. This hides plywood layers and makes the top look intentional instead of “garage experiment, version three.”
Step 4: Sand the Wood
Sand the top with medium-grit sandpaper first, then finish with fine-grit sandpaper. Move with the grain when possible. Smooth the edges especially well, because coffee tables are hand magnets. Everyone touches them. Everyone notices splinters. Nobody compliments splinters.
Wipe away dust with a clean cloth before staining or painting. Dust left on the surface can create a gritty finish, which is not rustic; it is just annoying.
Step 5: Stain, Paint, or Seal the Top
For a natural look, use clear polyurethane, water-based topcoat, or furniture wax. For warmth, choose a wood stain such as natural oak, honey, walnut, or driftwood. For a modern look, paint the top matte black, warm white, sage, clay, navy, or greige.
Apply stain with a cloth or brush, let it penetrate according to product directions, then wipe off excess. For paint, use primer first if the wood is raw or porous. For durability, seal the top after staining or painting, especially if the table will hold drinks. Coasters are lovely, but sealant is the responsible adult in the room.
Step 6: Attach the Top
Your attachment method depends on whether you want storage access.
For a permanent top: Apply heavy-duty adhesive to the contact points between the basket and tabletop. Center the top carefully. Add weight on top while the adhesive cures. If the materials allow it, reinforce from underneath with small brackets, washers, or screws.
For a removable top: Do not glue it down. Instead, attach small wood blocks, rubber bumpers, or short dowels underneath the tabletop so they sit just inside the basket opening. This keeps the lid centered while allowing you to lift it off for storage.
For a wire basket: Use clips, small U-brackets, zip ties hidden underneath, or screws with washers to connect the top to the wire rim. Make sure no sharp ends are exposed.
Step 7: Add Floor Protection
Add felt pads or rubber feet to the bottom of the basket. This protects hardwood, tile, laminate, and vinyl floors. It also helps level the table if the basket is slightly uneven. If the table sits on carpet, larger rubber pads may work better than felt.
Step 8: Style It Like You Meant It
A basket coffee table already brings texture, so keep the styling simple. Try a stack of two books, a small bowl, a candle, a plant, and one useful item like a tray or coaster set. The magic formula is height, texture, and breathing room. Do not cover the whole top unless your design style is “yard sale in a windstorm.”
How To Keep the Project Cheap Without Making It Look Cheap
The secret to a high-end budget DIY is restraint. Choose one beautiful basket, one clean tabletop, and one finish that works with your room. Avoid adding every decorative idea at once. Rope trim, handles, paint, stencils, casters, gold accents, and tassels can all be great, but not necessarily on the same table unless your coffee table is auditioning for a parade.
Shop Secondhand First
Check thrift stores, Facebook Marketplace, yard sales, estate sales, Habitat for Humanity ReStores, discount home stores, and clearance aisles. Look for large baskets, old hampers, wood trays, damaged side tables with usable tops, and round tabletops from outdated furniture. A scratched table can donate its top to a much cooler second life.
Use a Tray Instead of Cutting Wood
A tray can save time, tools, and finishing supplies. Search for oversized wood trays, bamboo trays, rattan trays, metal trays, or serving trays with handles. If the tray already has a sealed surface, your project becomes almost instant.
Choose Paint When Wood Quality Is Not Great
Stain highlights wood grain, which is wonderful if the wood is attractive. Paint hides imperfections, mismatched patches, and plywood that is trying its best. A painted top can still look stylish when paired with natural wicker or rattan.
Upgrade With Small Details
Small details make a budget coffee table look custom. Add leather pulls to a removable lid. Wrap the tabletop edge with jute rope. Use a slightly larger top for a more substantial silhouette. Place a thin round glass topper over the wood for easier cleaning. Add a hidden plywood disk inside the basket bottom to improve weight and stability.
Common Mistakes to Avoid
Using a Basket That Is Too Small
A tiny basket under a large tabletop can look top-heavy and tip easily. Choose a base that feels proportional. When in doubt, go wider and lower.
Skipping the Sealant
Coffee tables deal with cups, snacks, condensation, sticky fingers, and the occasional “I swear I used a coaster” moment. Seal the wood top so it can survive daily life.
Making the Table Too Tall
If the table is much taller than your sofa seat, it may feel awkward. A basket that looks perfect in the aisle may become too tall once you add a thick tabletop. Measure before you fall in love.
Attaching the Top Off-Center
An off-center top looks odd and affects stability. Mark the center of the tabletop and basket opening before attaching. Step back and check from multiple angles before the adhesive sets.
Expecting It to Hold Heavy Weight
A DIY basket coffee table is for decor, drinks, books, remotes, and light storage. It is not a bench, ladder, workout platform, or emergency stage for a toddler concert.
Style Ideas for Different Rooms
Boho Living Room
Use a rattan or seagrass basket with a warm wood top. Style it with a ceramic vase, a candle, and a small stack of travel or design books. Add a textured throw nearby to echo the woven base.
Modern Organic Space
Choose a simple round basket with clean lines and pair it with a pale oak or matte black top. Keep decor minimal: one sculptural bowl, one book, and one plant.
Coastal Cottage Room
Use a whitewashed basket or natural water hyacinth base. Choose a driftwood-style stain for the top. Add shells sparingly. One shell is coastal. Forty shells is a beach gift shop having a personal crisis.
Farmhouse Family Room
Use a sturdy lidded hamper or rectangular basket with a stained wood top. Make the lid removable so you can store blankets, toys, and games. Style with a tray, coasters, and a small faux plant for low-maintenance charm.
Real-Life Experience: What This Project Teaches You
Making a basket coffee table on a budget is one of those projects that seems almost too simple at first. You look at a basket, look at a board, and think, “Surely furniture cannot be this easy.” Then you start measuring and realize that furniture is mostly proportions wearing a cute outfit. The first big lesson is that size matters more than price. A $12 thrifted basket can look amazing if it has the right width and shape, while a brand-new expensive basket can look awkward if it is too narrow, too tall, or too flexible.
The second lesson is that stability is not optional. When you test the basket in the store or at home, give it a gentle wobble. Put the intended tabletop on it before attaching anything. Walk around it. Pretend to reach for a cup. If it feels nervous, it probably is. A hidden plywood disk in the bottom can add helpful weight, and a removable top with underside blocks can feel surprisingly secure. This is the part of the project where patience saves you from future coffee-related disasters.
The third lesson is that finishing the tabletop makes the whole piece look more expensive. Raw wood can be pretty, but sanded and sealed wood looks intentional. Even a basic plywood round becomes more refined when the edge is smoothed, the surface is sealed, and the color connects with something else in the room. Matching the top to your curtain rod, floor tone, picture frames, or existing furniture helps the table feel like part of the design instead of a craft project that wandered in looking for snacks.
Another experience worth mentioning is how useful the storage version becomes. If you make the top removable, the basket quickly becomes the secret headquarters for living-room clutter. Blankets go inside. Remote controls disappear inside. Dog toys, gaming controllers, and extra pillow covers suddenly have a home. The room looks cleaner without feeling sterile. That is the charm of basket furniture: it hides real life while still looking relaxed and welcoming.
You may also discover that guests notice texture before they notice construction. People respond to woven materials because they add warmth. A simple basket coffee table can make a room feel softer, especially if your space has a lot of straight lines, hard flooring, metal legs, or plain upholstery. It gives the room a handmade note without requiring advanced woodworking skills.
The final lesson is that budget DIY works best when you do not rush the last ten percent. Let adhesive cure fully. Let stain dry. Add felt pads. Check for rough edges. Clean stray glue before it hardens into a shiny little regret. The project itself may be easy, but the finishing details are what make it web-publish-worthy, guest-approved, and daily-life-friendly.
Conclusion
Learning how to make a basket coffee table on a budget is a practical way to upgrade your living room without buying expensive new furniture. With a sturdy basket, a well-sized tabletop, a smooth finish, and a little attention to stability, you can create a stylish piece that adds storage, texture, and personality. Whether you choose a flip-and-top design, a removable lid for hidden storage, or a tray-top version that takes almost no tools, the result can look custom while staying friendly to your wallet.
The best DIY basket coffee table is not the fanciest one. It is the one that fits your sofa, works with your lifestyle, and makes your living room feel more pulled together. Measure first, choose materials wisely, seal the surface, and keep the styling simple. Your coffee table will look intentional, useful, and charmingly handmadein the good way, not the “hot glue at midnight” way.