There are two kinds of people in this world: people who buy bubble solution at the store, and people who realize they can make a whole backyard’s worth of bubbles with dish soap, water, and a tiny bit of kitchen wizardry. If you are in the second groupor you are about to join itwelcome. Your membership card is imaginary, slippery, and probably floating across the lawn.
Homemade bubbles are simple, affordable, and surprisingly scientific. A good DIY bubble solution recipe is not just “soap plus water and hope.” The best bubbles need the right ratio of water, soap, and a strengthening ingredient such as glycerin, corn syrup, or sugar. These ingredients help create a flexible soap film that stretches around air, floats beautifully, and does not pop the moment someone looks at it too enthusiastically.
In this guide, you will learn how to make homemade bubbles, why some recipes work better than others, how to create giant bubbles, how to fix weak bubble solution, and how to turn bubble-making into a fun backyard activity for kids and adults. Yes, adults too. Nobody is too grown-up to chase a bubble the size of a beach ball.
What Makes a Good Homemade Bubble Solution?
A soap bubble is basically a thin film of soapy water wrapped around air. Water alone has high surface tension, which means it prefers to pull itself together instead of stretching into a bubble. Dish soap changes that. It lowers the surface tension enough for the water to stretch into a film, while still holding together long enough to float.
But soap and water alone often make bubbles that pop quickly. That is where “bubble boosters” come in. Glycerin, corn syrup, and sugar help slow evaporation and strengthen the bubble film. In plain English: they help bubbles stay wet, stretchy, and dramatic for a few extra seconds. For a bubble, that is basically a long and meaningful life.
The Basic Ingredients
Most homemade bubble solution recipes use three main ingredients:
- Water: Distilled water works best because it has fewer minerals than tap water.
- Dish soap: A mild liquid dish soap creates the soapy film bubbles need.
- Glycerin, corn syrup, or sugar: These ingredients help bubbles last longer and grow bigger.
You can make bubbles without glycerin, but if you want stronger, longer-lasting bubbles, adding one strengthening ingredient is a smart move. Think of it as giving your bubbles a tiny superhero cape.
Classic Homemade Bubble Solution Recipe
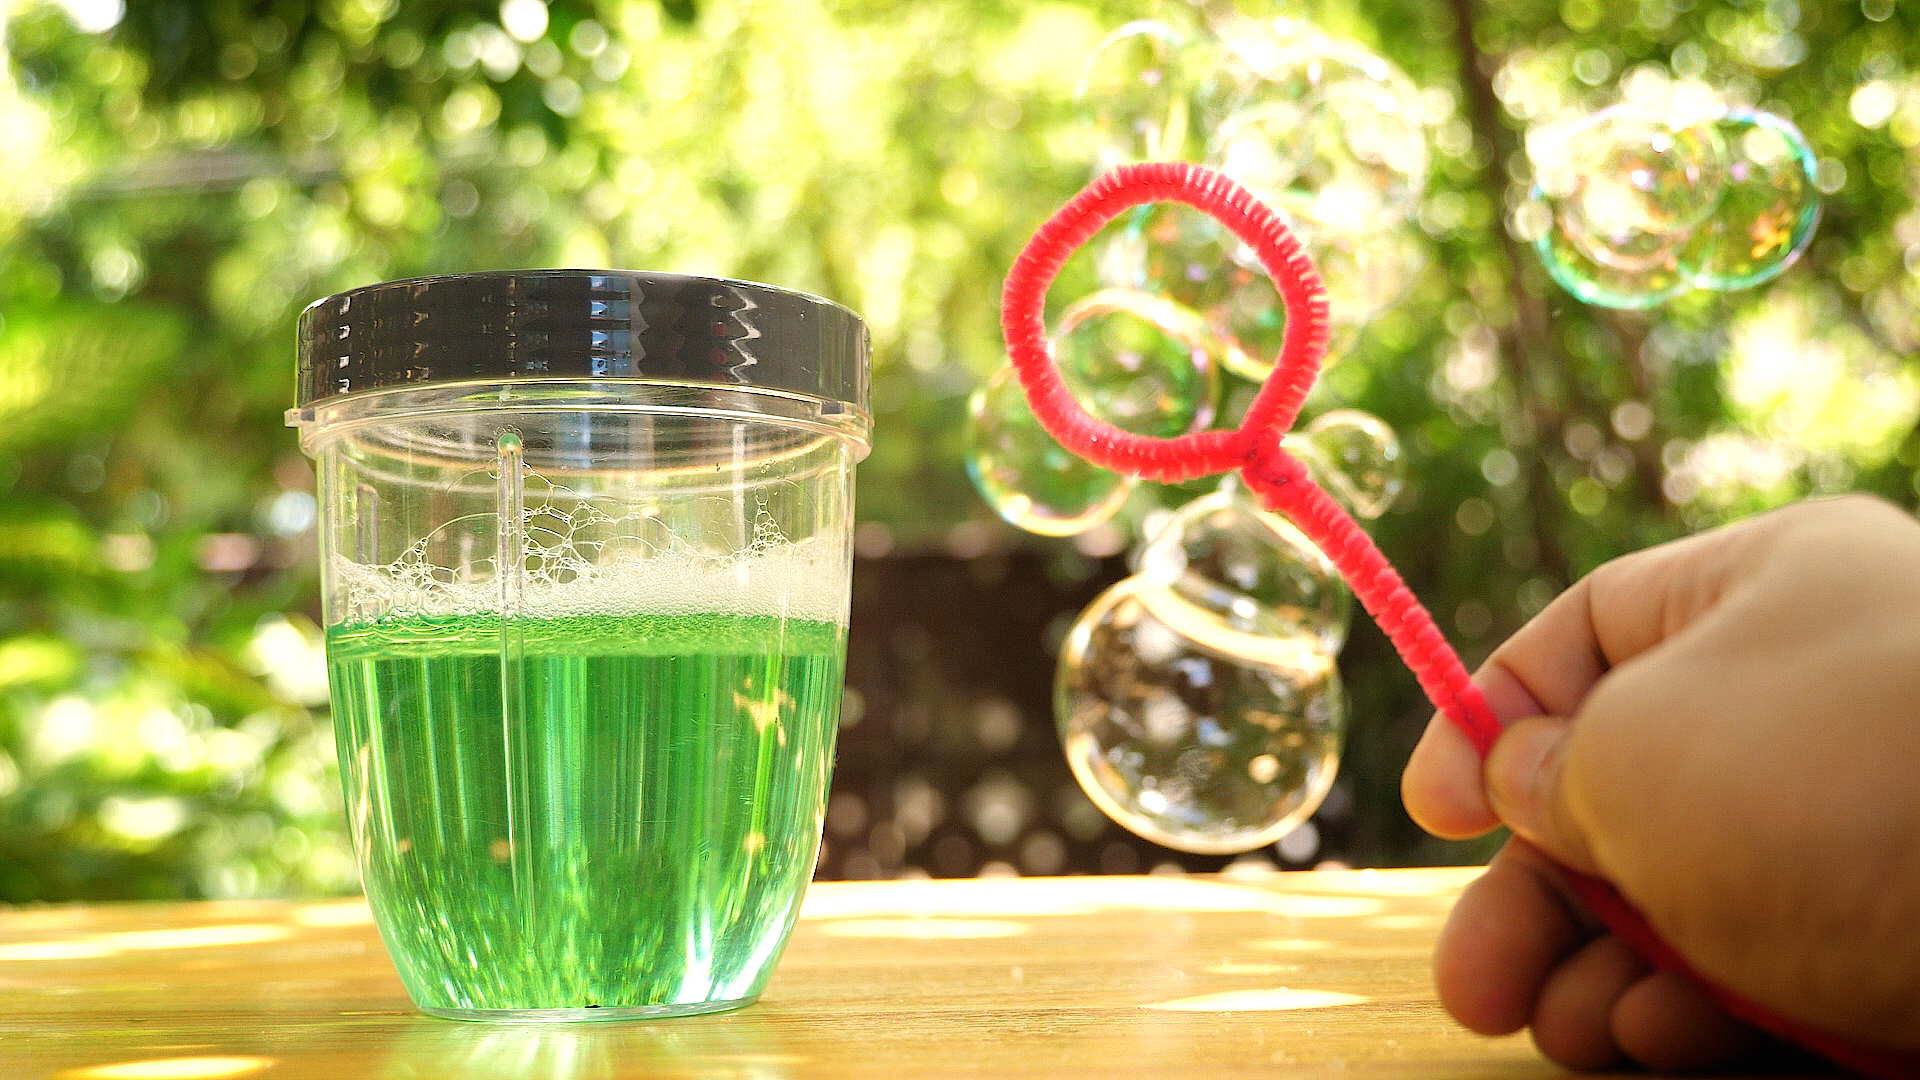
This is the easiest DIY bubble solution recipe for everyday bubble play. It works with regular bubble wands, straws, pipe cleaners, and small homemade bubble blowers.
Ingredients
- 6 cups water, preferably distilled
- 1 cup liquid dish soap
- 1 tablespoon glycerin or 1/4 cup light corn syrup
Instructions
- Pour the water into a clean bowl or container.
- Add the dish soap slowly. Do not dump it in like you are putting out a fire.
- Stir gently until combined. Try not to create foam.
- Add glycerin or corn syrup and stir again.
- Let the solution rest for at least one hour. Overnight is even better.
- Dip your wand, blow gently, and enjoy the floating magic.
The resting time matters. Freshly mixed bubble solution can work, but solution that sits for several hours often performs better because the ingredients have more time to blend evenly. Translation: patience makes better bubbles, which is deeply unfair but scientifically useful.
Two-Ingredient Bubble Solution Recipe
No glycerin? No corn syrup? No problem. You can still make homemade bubbles with only water and dish soap. The bubbles may not last as long, but they are still fun, especially for quick outdoor play.
Ingredients
- 6 cups water
- 1 cup liquid dish soap
Instructions
- Mix water and dish soap in a large container.
- Stir slowly to avoid foam.
- Let it rest for 30 to 60 minutes if possible.
- Use with small bubble wands or homemade pipe cleaner wands.
This simple bubble recipe is great when you need entertainment fast. It is also a good starting point for experiments. Make one batch with only soap and water, then make another batch with sugar or corn syrup. Compare which one creates bigger bubbles, longer-lasting bubbles, or the most impressive “wow, did you see that?” moment.
Homemade Bubble Solution Without Glycerin
Glycerin is excellent for bubbles, but it is not always sitting in the pantry next to the peanut butter. If you do not have glycerin, you can use corn syrup or sugar instead. These ingredients help slow down drying and make the bubble film stronger.
Corn Syrup Bubble Recipe
- 3 cups water
- 1 cup liquid dish soap
- 1/2 cup light corn syrup
Mix the water and dish soap first, then add the corn syrup. Stir slowly until combined. This recipe makes sturdy bubbles and works especially well for kids who like to wave bubble wands through the air instead of blowing carefully.
Sugar Bubble Recipe
- 4 cups warm water
- 1/2 cup liquid dish soap
- 1/4 cup granulated sugar
Dissolve the sugar in warm water first. Once the sugar disappears, add the dish soap and stir gently. Let the mixture cool before using. Sugar can make bubbles stronger, but too much can make the solution sticky, so do not turn the bowl into dessert soup.
Giant Bubble Solution Recipe
Small bubbles are charming. Giant bubbles are backyard celebrities. If you want huge, shimmering bubbles that drift across the yard like floating jellyfish, you need a stronger bubble solution and a larger wand.
Ingredients
- 6 cups distilled water
- 1/2 cup liquid dish soap
- 1 tablespoon glycerin
- 1/2 cup cornstarch
- 1 tablespoon baking powder
Instructions
- Pour the water into a bucket or wide container.
- Slowly stir in the cornstarch until mostly dissolved.
- Add the dish soap, glycerin, and baking powder.
- Stir gently. Foam is not your friend here.
- Let the solution rest for at least one hour, or overnight for best results.
- Before using, stir gently again because cornstarch may settle at the bottom.
For giant bubbles, use a wand made from two sticks and a loop of cotton string. Dip the string loop into the solution, lift it slowly, and walk backward or let the wind open the loop. If it works, you will feel like a wizard. If it fails, you will look like someone confidently holding wet string. Both are valid parts of the journey.
Best Dish Soap for Homemade Bubbles
The dish soap you choose can make a noticeable difference. A basic, concentrated liquid dish soap usually works well. Avoid creamy, lotion-heavy, antibacterial, or heavily scented soaps when possible because extra additives may interfere with bubble formation.
If your first batch does not work well, do not immediately blame yourself. Dish soaps vary by formula, and bubble recipes often need small adjustments. Try adding a little more soap, switching to distilled water, or letting the solution rest overnight.
Why Distilled Water Helps
Tap water can contain minerals that interfere with the soap film. This is especially true in areas with hard water. Distilled water has fewer minerals, so it often creates smoother, stronger bubbles. If you only have tap water, you can still make bubbles. The bubble police will not arrive. But if your bubbles are popping too fast, distilled water is one of the easiest upgrades.
How to Make Homemade Bubble Wands
You do not need fancy equipment to blow bubbles. Many household items can become bubble wands with a little imagination and a willingness to get slightly soapy.
Easy Bubble Wand Ideas
- Pipe cleaners: Twist into circles, hearts, stars, or random shapes that only modern art critics understand.
- Straws: Dip one end into the solution and blow gently through the other end.
- Cookie cutters: Dip and wave them through the air.
- Plastic berry baskets: Create clusters of tiny bubbles.
- String and sticks: Perfect for giant bubbles.
- Slotted spoons: Surprisingly good for lots of small bubbles.
A quick note: bubbles usually come out round no matter what shape your wand is. A heart-shaped wand may start with a heart-shaped film, but once the bubble floats free, surface tension pulls it into a sphere. Science loves efficiency almost as much as parents love activities that use things already in the kitchen drawer.
Tips for Bigger, Stronger Bubbles
If your homemade bubbles are not cooperating, do not surrender to the store-bought bottle yet. Try these simple fixes.
1. Stir Slowly
Foam in the bowl can weaken your bubble solution. Stir slowly and gently. You are making bubbles, not auditioning for a smoothie commercial.
2. Let the Solution Rest
Many bubble mixtures improve after sitting for several hours or overnight. Cover the container and let it rest before the big bubble session.
3. Use Clean Wands
Dirt, grease, and food residue can ruin bubbles. Wash wands before using them, especially if your bubble wand used to be a kitchen tool.
4. Choose the Right Weather
Bubbles love humid, calm weather. Dry air makes bubbles pop faster because the water in the bubble film evaporates quickly. Wind can help giant bubbles open, but strong wind turns bubble-making into a slapstick chase scene.
5. Do Not Overdo the Additives
More glycerin, corn syrup, or sugar does not always mean better bubbles. Too much can make the solution heavy and sticky. Start with the recipe, then adjust gradually.
Common Homemade Bubble Problems and Fixes
Problem: My Bubbles Pop Immediately
Try using distilled water, adding a small amount of glycerin or corn syrup, and letting the solution rest overnight. Also check the weather. Very hot, dry days are tough on bubbles.
Problem: I Only Get Tiny Bubbles
Your wand may be too small, or your solution may need more soap. Add a small splash of dish soap and test again. For giant bubbles, use a string wand rather than a small plastic wand.
Problem: The Solution Is Too Foamy
Foam usually happens from stirring too fast. Let the solution sit until the foam settles. Next time, stir like you are trying not to wake a sleeping cat.
Problem: The Solution Feels Sticky
You may have used too much corn syrup or sugar. Dilute the mixture with a little water and dish soap, then test again.
Fun Bubble Experiments for Kids
Homemade bubbles are not just fun; they are also an easy science activity. Kids can explore surface tension, evaporation, air pressure, shapes, color, and motion without needing a lab coat. Although a lab coat would make the whole thing more dramatic.
Bubble Recipe Test
Make three small batches: one with soap and water, one with glycerin, and one with corn syrup. Test each batch using the same wand. Count how long the bubbles last or measure how large they get before popping.
Bubble Shape Challenge
Create wands in different shapes using pipe cleaners. Try circles, squares, triangles, and hearts. Watch what happens when the bubbles float away. This is a simple way to show how bubbles naturally form spheres.
Bubble Colors Observation
Look closely at a bubble in sunlight. The swirling rainbow colors come from light reflecting off the thin soap film. As the film changes thickness, the colors shift and move. It is basically a tiny floating light show with no ticket fee.
Bubble Bounce Test
Put on a clean cotton glove and gently touch a bubble. Sometimes the bubble may bounce instead of popping because the glove absorbs less of the bubble film than bare skin. This experiment works best with stronger bubble solution.
Safety Tips for Homemade Bubbles
Homemade bubble solution is usually simple, but it is still made with soap and should be handled carefully. Keep bubble solution away from eyes, mouths, and pets. Do not drink it, even if a small child insists it looks like “bubble lemonade.” It does not. It really, really does not.
Use bubbles outdoors or on surfaces that can handle spills. Bubble solution can make floors slippery, so wipe up spills quickly. If children are playing, adult supervision is recommended, especially with large buckets of solution or homemade wands made from sticks and string.
How to Store Homemade Bubble Solution
Store leftover bubble solution in a clean, airtight container. A jar, bottle, or lidded plastic container works well. Label it clearly so nobody mistakes it for something edible. Before using it again, stir gently because some ingredients may settle.
Most homemade bubble solutions work best within a week or two. If it smells odd, changes texture, or looks questionable, pour it out and make a fresh batch. Bubble solution is cheap. Mystery liquid is not worth the emotional risk.
of Real-Life Bubble-Making Experience
The first time you make homemade bubbles, there is a good chance you will underestimate the activity. You may think, “This will entertain the kids for ten minutes.” Then suddenly an hour has passed, the lawn looks like a soap festival, and someone is yelling, “That one was shaped like a potato!” This is the beauty of DIY bubbles: they are simple enough for toddlers, interesting enough for older kids, and oddly relaxing for adults who have spent the week answering emails with phrases like “just circling back.”
One useful experience is that the first batch is rarely the best batch. Homemade bubble solution behaves differently depending on the soap brand, water type, weather, and wand. A recipe that creates amazing bubbles on a humid Saturday may struggle on a dry, windy afternoon. That does not mean the recipe failed. It means bubbles are tiny floating divas with environmental preferences.
For small kids, the best setup is a shallow tray rather than a tall cup. A tray makes it easier to dip wands, cookie cutters, or berry baskets without knocking everything over. It also reduces the “I lost my wand in the bucket” problem, which can quickly become a full rescue mission. For older kids, a few different wand shapes turn the activity into a science experiment. They can test which wand makes the most bubbles, which creates the biggest bubble, and whether square wands make square bubbles. Spoiler: they do not, but discovering that is half the fun.
Giant bubbles are the most memorable but also the most dramatic. The solution needs to be stronger, the wand needs to be bigger, and the person holding it needs to move slowly. Fast movements usually rip the bubble film. The best technique is to dip the string wand completely, lift it carefully, open the loop, and let the breeze do some of the work. When a giant bubble finally forms, everyone nearby reacts like someone just launched a spaceship from the driveway.
Another lesson: bubbles are better in the shade. Direct sun can dry them out quickly, especially in hot weather. Early morning, late afternoon, or a cloudy day often gives better results. Humid air is your friend. Wind is complicated. A gentle breeze can help giant bubbles float beautifully, but strong wind turns them into instant bubble confetti.
Cleanup is usually easy, but plan ahead. Keep towels nearby, remind kids not to run on slippery surfaces, and avoid bubble play near polished indoor floors. Outdoor grass, patios, and driveways are better choices. If bubble solution gets on clothing, rinse it soon, especially if the recipe contains corn syrup or sugar.
The best part of making homemade bubbles is that it encourages playful experimentation. Kids can measure ingredients, predict results, observe what happens, and adjust the recipe. Adults get the rare joy of doing something inexpensive, screen-free, and genuinely fun. And when one perfect bubble floats across the yard, catching sunlight in rainbow colors before popping silently, it feels like a tiny reminder that simple things can still be magical.
Conclusion
Learning how to make homemade bubbles is easy, affordable, and more interesting than it looks. With water, dish soap, and a strengthening ingredient like glycerin, corn syrup, or sugar, you can create DIY bubble solution recipes for small bubbles, strong bubbles, and giant backyard bubbles. The key is using the right ratio, stirring gently, letting the solution rest, and testing your mixture with different bubble wands.
Whether you are planning a summer activity, a birthday party, a preschool science lesson, or a “we need to get outside before everyone turns into couch furniture” afternoon, homemade bubbles are a reliable win. They are simple, silly, educational, and just messy enough to feel exciting.
Note: This article is written for web publishing and is based on practical bubble-making methods, common household recipes, and basic bubble science. Adult supervision is recommended when children use bubble solution, large containers, or homemade wands.