Your porch floor does not have to settle for being the practical cousin of the front door. It can be the charming overachiever of your curb appeal. A painted porch floor adds personality, disguises tired surfaces, and delivers a big visual upgrade without the drama of a full renovation. In plain English: it is one of the smartest ways to make your entry look expensive while spending a lot less than “rip it all out and start over” money.
The trick is not just choosing a pretty pattern. The real magic happens in the prep, the paint choice, and the patience you show between coats. Skip those, and your porch floor may peel faster than a sunburn in July. Do it right, though, and you can create anything from a classic checkerboard to a faux tile look, a painted runner, or a custom geometric design that makes guests pause and say, “Wait, you did that yourself?”
This guide walks you through exactly how to paint a design on your porch floor, from planning and prep to pattern layout, painting, drying, and long-term care. Whether your porch is wood or concrete, the steps below will help you get a finish that looks polished and holds up to real life, including muddy shoes, wet weather, and the occasional package delivery Olympic sprint.
Why a Painted Porch Floor Is Worth It
A porch floor makeover sits in that sweet spot between affordable and dramatic. You can change the mood of your entry in a weekend or two, and you do not need advanced artistic talent to pull it off. A stencil, some painter’s tape, and a good porch-and-patio paint can do a lot of heavy lifting.
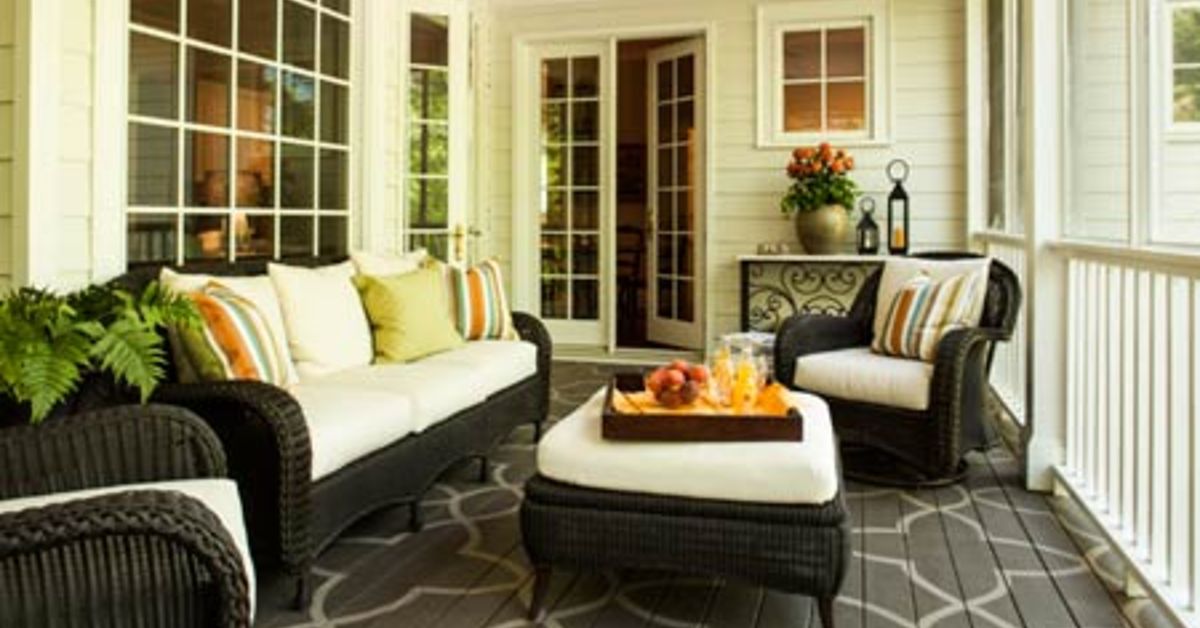
Painted porch floors are especially useful when the existing surface is structurally sound but visually underwhelming. Maybe your concrete slab is dull. Maybe your wood floorboards look weathered. Maybe everything is technically fine, but your porch has the energy of a waiting room. Pattern and color can solve that fast.
Popular design directions include:
- Checkerboard for timeless charm
- Faux rug borders for a layered designer look
- Stencil patterns that mimic cement tile
- Simple stripes for a coastal or cottage vibe
- Geometric shapes for a more modern porch
Before You Paint: Start With the Surface
Every great porch floor design starts with a less glamorous sentence: clean the floor. No one frames that advice on the wall, but it matters more than the pretty part.
For wood porch floors
Sweep thoroughly, scrub off dirt and grime, and let the surface dry completely. Remove flaking paint, sand rough areas, and patch minor imperfections. If the wood is weathered, sanding helps smooth raised grain and gives your new coating a better grip. Any glossy old finish should be dulled before you paint.
For concrete porch floors
Concrete must be clean, dry, and free of grease, dust, peeling coatings, or sealer residue. If bare concrete is exposed, it often needs etching or another approved prep method so the paint can bond properly. New concrete should be fully cured before coating. If moisture is trapped in the slab, the paint can fail, so a dry surface is not optional. It is the whole ballgame.
General prep rules
- Move furniture, mats, planters, and decor completely out of the way
- Do not paint right after rain or when more rain is expected soon
- Follow the paint label for temperature and humidity limits
- Prime if the product or surface condition calls for it
- Make sure repairs, fillers, and cleaned areas are fully dry before coating
Choose the Right Paint for a Porch Floor
This is not a job for leftover wall paint hiding in your garage like a bad decision from three apartments ago. Use a coating made specifically for porch, patio, deck, or floor surfaces. These products are designed for foot traffic, weather exposure, scuffs, and better adhesion on wood or concrete.
Look for paint labeled for exterior floor use and confirm that it works on your porch material. Some formulas are suitable for both wood and concrete, while others are surface-specific. If your porch gets slick when wet, consider an anti-slip or textured option, especially on steps or areas near water.
When choosing sheen, low-luster and satin finishes are common because they are durable and forgiving. High gloss can look striking, but it may show more surface imperfections and can become slippery depending on the product and the conditions.
How to Pick a Design That Actually Works on a Porch
Here is the best design advice no one tells you: your porch already has lines. Floorboards, steps, columns, railings, and the front door all create a visual structure. Your painted design should work with that structure, not pick a fight with it.
Good beginner-friendly designs
- Checkerboard: Easy to measure, classic, and charming
- Bordered “rug”: A painted rectangle with inner stripes or motifs
- Stencil tile effect: Great for concrete and small porches
- Wide stripes: Simple, bold, and easier to keep straight
Color pairings that tend to work well
- Soft gray and white for a crisp, fresh look
- Black and warm white for high contrast and drama
- Navy and pale gray for coastal style
- Sage and cream for farmhouse or cottage porches
- Terracotta and sand for a warmer, Mediterranean feel
Always test colors on sample boards or an inconspicuous area. Outdoor light is wildly honest. A color that feels sophisticated in the can may read as “surprise cartoon” at noon.
Tools and Materials You Will Need
- Porch and patio floor paint
- Primer, if needed
- Cleaner or degreaser suitable for your surface
- Paint roller and tray
- Angled brush for edges
- Painter’s tape
- Stencil, if using one
- Stencil brush, foam roller, or small dense roller
- Measuring tape
- Chalk line, pencil, or washable marker
- Drop cloths
- Sandpaper or sanding block
- Protective gear such as gloves and knee pads
Step-by-Step: How to Paint a Design on Your Porch Floor
Step 1: Clean and prep the floor
Thoroughly sweep, wash, scrape, sand, patch, and dry the surface. This part is not glamorous, but it determines whether your project lasts. Think of prep as the vegetables of painting: not the fun part, but absolutely necessary if you want to feel good later.
Step 2: Prime if needed
Use a bonding or surface-appropriate primer if the paint manufacturer recommends it, especially on bare concrete, repaired areas, weathered wood, or tricky previously painted surfaces. Let it dry fully before moving on.
Step 3: Paint the base coat
Apply your background color first. Use a brush to cut in around edges and a roller for the field. Thin, even coats are better than thick ones. Allow the first coat to dry, then add a second coat if needed for full coverage. Let the base cure enough before laying out your pattern, or you may pull it up with tape and say words the neighbors do not need to hear.
Step 4: Measure and mark the design
Use a tape measure and chalk line to mark your pattern. For checkerboards, map out equal squares. For a painted rug, outline the outer border first, then add inner bands. For stencils, find your starting point and test alignment so the design lands neatly along visible edges.
Dry-fit everything before opening the accent paint. A beautiful pattern can go weird fast if the spacing drifts. The goal is intentional symmetry, not “I guess the porch was leaning emotionally.”
Step 5: Tape or stencil carefully
If you are using tape for stripes, diamonds, or borders, press the tape edges down well. If you are using a stencil, secure it with painter’s tape or a light temporary adhesive approved for the task. Less paint on the stencil tool is better than too much. Overloading a roller or brush invites bleeding under the edges.
Step 6: Apply the pattern color
For taped designs, roll or brush lightly over the sections. For stencils, use a dabbing or light rolling motion instead of slathering on paint. Build color gradually. This helps keep lines sharper and reduces smudging.
Remove stencil sections or tape at the right moment according to your method. With tape, many DIYers get the cleanest lines by removing it before the paint fully hardens. With stencils, careful lifting while the paint is still workable often helps prevent tearing or sticking. Always follow your product instructions and test your technique first.
Step 7: Let it dry and recoat if needed
Most porch-floor coatings need time between coats and even more time before regular foot traffic. Weather matters. Humidity slows everything down. Cool temperatures also make drying take longer. Do not rush the cure just because the floor looks dry on top. “Looks dry” and “ready for muddy sneakers” are not the same relationship status.
Step 8: Inspect and touch up
Once the design is dry, step back and look for thin spots, fuzzy lines, or areas that need a small artist’s-brush correction. A tiny touch-up session is normal. Perfection is not required, but clean edges and consistent coverage go a long way.
Design Ideas That Look Great on Porch Floors
1. The painted rug
Perfect for small front porches, this design creates the look of a rug without trapping rainwater or dirt. Start with a large rectangle, then add a contrasting border and smaller corner motifs.
2. Checkerboard charm
This style works beautifully on farmhouse, cottage, and traditional homes. Black and white is the classic choice, but soft taupe and cream also look elegant and more forgiving outdoors.
3. Faux tile stencil
If you love the look of encaustic or cement tile but not the price tag, this is your move. It works especially well on concrete porches and can make a builder-basic slab look custom.
4. Simple stripes
Wide stripes are easier for beginners and visually lengthen a narrow porch. Choose subtle contrast for a refined effect or bolder contrast if you want the floor to be the star.
Common Mistakes to Avoid
- Painting a dirty or damp surface
- Using the wrong paint for foot traffic or exterior exposure
- Skipping sanding or etching where needed
- Starting a stencil pattern without checking edge alignment
- Applying too much paint over a stencil
- Walking on the floor too soon
- Ignoring weather during drying and curing
How to Make Your Painted Porch Floor Last Longer
Once the floor is finished, maintenance is refreshingly simple. Sweep grit regularly so it does not act like sandpaper underfoot. Wipe spills sooner rather than later. Use outdoor furniture pads when possible. Avoid dragging heavy planters across the design unless your goal is “distressed” in the worst possible way.
If the porch takes a beating from weather, expect touch-ups over time. High-traffic paths and exposed areas may show wear first. The good news is that painted porch floors are easier to refresh than many other surface upgrades. You are not married to the design forever. You are just in a very stylish long-term commitment.
What Painting a Porch Floor Actually Feels Like: Real-World Experience and Lessons Learned
If you talk to people who have painted a porch floor, you hear the same thing over and over: they wish they had done it sooner, and they wish they had respected prep more. The funny part is that almost nobody starts the project excited about cleaning, sanding, or waiting for the weather. Everyone starts excited about the pattern. Then the project teaches a very adult lesson, which is that the boring steps are secretly the glamorous ones in disguise.
One of the most common experiences is surprise at how much a painted floor changes the entire front entry. People expect the floor to look better, but they do not always expect the railings, furniture, planters, and even the front door color to suddenly make more sense. A porch floor design often acts like a visual anchor. Once it is in place, everything around it looks more intentional. That is why a simple checkerboard or painted runner can make a porch feel decorated, even if you changed nothing else.
Another real-world lesson is that scale matters more than people think. A pattern that looks cute on a phone screen can feel way too busy across a real porch. Many DIYers end up happiest when they go slightly larger and slightly simpler than they first imagined. Wider stripes, bigger checks, and cleaner stencil repeats usually read better from the sidewalk and the street. Tiny details may look artistic up close, but they can disappear or feel cluttered from a distance.
There is also the emotional roller coaster of tape removal. This deserves its own documentary. While the paint is wet or just beginning to set, you pull the tape and see those crisp lines appear, and for one shining moment you feel like a design genius. Then you notice one wobbly corner and remember you are, in fact, a human being with knees that hurt and a porch that was built sometime before laser levels ruled the earth. That is normal. Small imperfections rarely show once furniture and decor return.
Weather is another thing people remember vividly. The porch may feel dry enough to touch, but experienced DIYers learn that curing is a patience game. Rushing furniture back into place or letting traffic hit the floor too early is one of the fastest ways to ruin a good result. Most people who love their finished porch say the same thing: giving the paint extra time was worth it.
And finally, there is the pride factor. Painting a design on your porch floor is one of those projects that gets noticed. Guests ask about it. Delivery drivers notice it. Neighbors definitely notice it. It feels custom because it is custom. Even a beginner-level pattern carries a sense of effort and personality that store-bought decor cannot quite fake. So yes, the project takes planning. Yes, it asks for patience. But when you step outside with a coffee and see that painted floor making the whole porch feel more finished, more welcoming, and more like home, the effort makes perfect sense.
Conclusion
Learning how to paint a design on your porch floor is really a combination of practical prep and creative confidence. Clean the surface well, use the right porch-floor paint, map out a design that suits your space, and give each coat time to dry properly. That is the formula. The finished result can look classic, playful, polished, or bold, depending on your color palette and pattern choice.
If you want the best outcome, do not chase shortcuts. A porch floor is a hardworking surface, and the design needs a hardworking foundation. Take your time, trust the process, and remember that even a simple painted pattern can completely change how your home feels from the curb. Not bad for a project that starts with a broom and a dream.