Gel nail polish is the beauty equivalent of a loyal golden retriever: shiny, dependable, and surprisingly hard to make leave. It survives dishwashing, typing marathons, vacation sunscreen, and that one mysterious moment when your regular polish would have chipped before you even found your car keys. But when gel starts lifting, growing out, or catching in your hair like a tiny plastic hook, it is time for removal.
The good news? You can remove gel nail polish at home quickly and safely. The important part is doing it with patience, acetone, and a calm spiritnot with your teeth, a credit card, or the emotional confidence of someone who says, “I’ll just peel one corner.” That corner is where nail damage begins.
This guide explains how to take off gel nails at home without wrecking your natural nails, including the supplies you need, the fastest safe method, mistakes to avoid, and aftercare that helps your nails recover their dignity.
Why Gel Nail Polish Is So Hard to Remove
Regular nail polish dries when solvents evaporate. Gel polish, however, is cured under a UV or LED lamp, which creates a hardened, glossy coating that bonds more firmly to the nail. That is why gel manicures can last two to three weeks without chipping, but it is also why they do not wipe away with standard nail polish remover.
To remove gel nail polish at home, you need to break the shiny topcoat, soften the gel with acetone, and gently lift away the loosened polish. The keyword here is “gently.” If the gel does not slide off easily, it is not ready. Forcing it off can remove layers of your natural nail plate, leaving nails thin, rough, bendy, or sore.
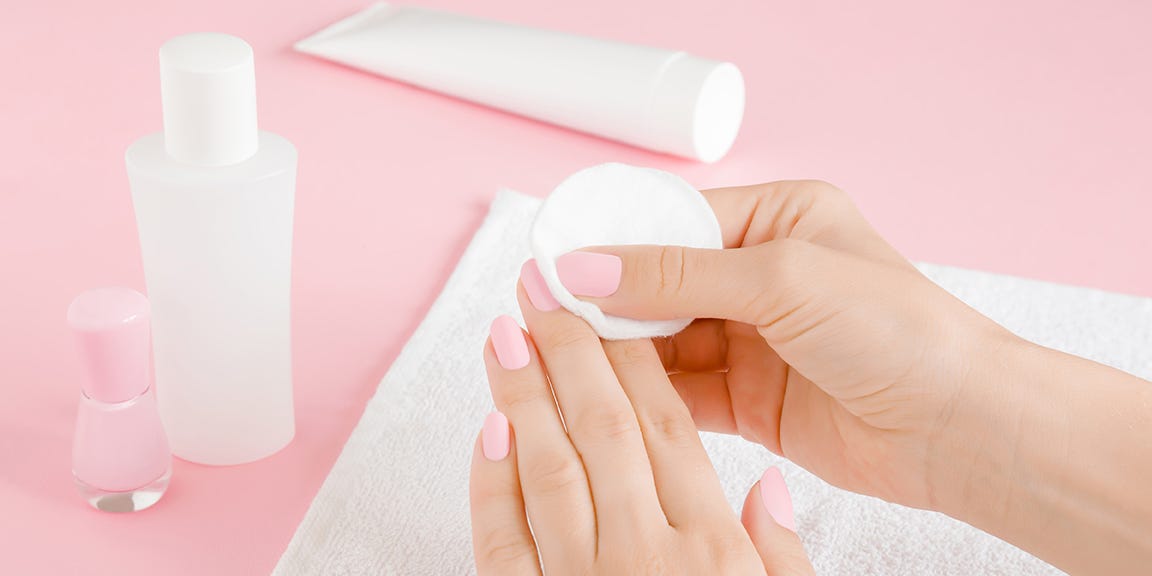
What You Need to Remove Gel Nails at Home
Before you begin, gather everything. Gel removal is not the time to wander around the house with foil fingers, looking like a low-budget robot searching for cotton balls.
Supplies Checklist
- 100% acetone
- Cotton balls or cotton pads
- Aluminum foil, nail clips, or plastic wrap
- Medium-grit nail file
- Buffer block
- Cuticle oil
- Petroleum jelly or thick balm
- Orange wood stick or gentle cuticle pusher
- Hand cream
- A towel or protected work surface
- A timer
Use pure acetone if possible. Non-acetone remover is usually too weak for gel polish and may turn a 20-minute task into a tiny personal tragedy. Acetone can be drying, so you will protect the surrounding skin first and moisturize afterward.
Fastest Safe Method: The Acetone Wrap Technique
The acetone wrap method is the most reliable way to take off gel nails quickly at home. It concentrates acetone on the nail plate while limiting unnecessary contact with the surrounding skin.
Step 1: Protect Your Workspace
Acetone can damage wood finishes, painted surfaces, plastics, and some fabrics. Lay down an old towel or paper towels before you open the bottle. Work in a well-ventilated area, because acetone has a strong smell and evaporates quickly.
Step 2: File the Shiny Topcoat
Use a medium-grit nail file to gently buff the glossy surface of each gel nail until it looks dull and matte. You are not trying to file off the entire manicure. You are only breaking the seal so acetone can penetrate the gel layers.
Think of the topcoat as a raincoat. Acetone cannot do much while the raincoat is still zipped up. Once you rough up the surface, the remover can get to work.
Step 3: Protect Cuticles and Skin
Apply a thin layer of petroleum jelly or thick balm around each nail, focusing on the cuticles and sidewalls. Try not to smear it directly onto the nail surface, because it can block the acetone from reaching the gel polish.
This step matters because acetone is effective, but it is also drying. Your skin deserves a tiny protective moat.
Step 4: Soak Cotton in Acetone
Tear cotton balls or pads into pieces just large enough to cover each nail. Saturate each piece with acetone. The cotton should be wet, not politely damp. If there is not enough acetone, the gel will soften unevenly and removal will take longer.
Step 5: Wrap Each Nail
Place the acetone-soaked cotton directly on the nail and secure it with aluminum foil, nail clips, or plastic wrap. Foil is classic, nail clips are reusable, and plastic wrap can create a snug seal. Whatever you choose, the goal is the same: keep the acetone-soaked cotton pressed firmly against the gel.
If you are working alone, do one hand at a time. Wrapping your second hand after your first hand has been transformed into five shiny burritos is possible, but not elegant.
Step 6: Wait 10 to 15 Minutes
Set a timer for 10 to 15 minutes. Thicker gel, glitter gel, multiple coats, builder gel, or older manicures may need longer. Avoid peeking every two minutes. Every time you unwrap the nail, you release acetone vapor and slow the process.
For faster removal, some people warm the acetone indirectly by placing a small acetone-safe bowl inside a larger bowl of warm water. Never microwave acetone, never heat it directly, and keep it away from flames. Acetone is flammable, and your manicure is not worth a kitchen incident.
Step 7: Check One Nail First
After the timer goes off, unwrap one nail. The gel should look lifted, cracked, bubbled, or curled at the edges. Use a gentle orange wood stick or cuticle pusher to nudge the softened polish off the nail.
If it slides away easily, continue with the rest. If it clings like it pays rent, rewrap the nail with fresh acetone and wait another five minutes.
Step 8: Remove Leftover Gel Gently
Once most of the gel has lifted, gently wipe the nail with acetone on cotton to remove residue. Use a buffer only lightly to smooth the surface. Do not aggressively file the natural nail. A little texture is better than over-buffing your nails into paper-thin sadness.
Step 9: Wash and Rehydrate
After all gel polish is removed, wash your hands with mild soap and water. Apply cuticle oil, then follow with hand cream. If your nails feel dry, keep applying cuticle oil daily for the next week.
How to Remove Gel Nail Polish Without Foil
No foil? No panic. You still have options.
Use Nail Clips
Nail clips are reusable plastic clips that hold acetone-soaked cotton in place. They are less crinkly than foil and easier to use if you remove gel polish regularly at home.
Use Plastic Wrap
Small pieces of plastic wrap can create a snug seal around each fingertip. This method helps hold acetone close to the nail and may feel less bulky than foil.
Use the Soak Bowl Method Carefully
You can soak nails in a small bowl of acetone, but this exposes more skin to acetone and can be more drying. If you use this method, protect your cuticles first, keep the soak brief, and moisturize well afterward. For most people, wraps are gentler and less messy.
Can You Remove Gel Polish Without Acetone?
Technically, sometimes. Practically, not very well.
Acetone is the most effective remover for soak-off gel polish. Non-acetone removers are usually designed for regular polish and may not break down gel efficiently. Some gel remover products claim to lift gel quickly, but they can contain strong solvents and may irritate skin if used incorrectly. Always follow the product directions and avoid contact with broken or sensitive skin.
If you are allergic to acetone, have irritated skin, or are dealing with a painful nail condition, it is better to visit a professional nail technician or dermatologist instead of experimenting at home.
What Not to Do When Taking Off Gel Nails
Removing gel nails quickly is great. Removing them recklessly is how nails end up looking like they survived a tiny lawn mower.
Do Not Peel Gel Polish Off
Peeling gel polish may feel satisfying for three seconds, but it can pull away layers of the natural nail. This can lead to thinning, peeling, splitting, white spots, and sensitivity.
Do Not Force Scrape
If the gel is not loose, scraping harder is not the answer. More soaking is the answer. Your nail plate is not a countertop.
Do Not Over-File the Natural Nail
Filing the topcoat is helpful. Filing deeply into your natural nail is damaging. Once the shine is gone, stop.
Do Not Use Metal Tools Aggressively
Metal pushers can be useful in professional hands, but at home they can easily gouge the nail. If you use one, use the lightest pressure possible. An orange wood stick is safer for beginners.
Do Not Rush Thick Enhancements
Standard soak-off gel polish is different from hard gel, builder gel, dip powder, or acrylic. Hard gel usually cannot be soaked off with acetone and often needs professional filing. If your nails are thick, sculpted, or extended, get help from a salon rather than guessing.
How Long Does Gel Nail Removal Take?
For regular gel polish, plan on 20 to 30 minutes from start to finish. The actual acetone soak usually takes 10 to 15 minutes, but filing, wrapping, checking, rewrapping, and aftercare add time.
If your gel manicure has glitter, nail art, chrome powder, several layers, or builder gel underneath, removal may take longer. Glitter is gorgeous, but it has the exit strategy of a houseguest who “just needs one more coffee.”
How to Make Gel Polish Come Off Faster
Speed should never come from peeling or scraping. Instead, make the proper method work more efficiently.
- File the topcoat until every nail is fully matte.
- Use 100% acetone, not regular polish remover.
- Cut cotton to fit the nail so acetone touches the gel, not half your finger.
- Wrap tightly enough to keep cotton in place.
- Keep hands warm, but never directly heat acetone.
- Wait the full soaking time before checking.
- Rewrap stubborn nails instead of forcing them.
Aftercare: What to Do After Removing Gel Nails
Gel removal can leave nails dry, even when done correctly. A little aftercare helps your nails bounce back faster.
Apply Cuticle Oil Daily
Cuticle oil helps condition the skin around the nail and reduces dryness. Apply it once or twice daily, especially before bed.
Use Hand Cream
Follow cuticle oil with a rich hand cream. The cream helps seal in moisture and keeps the skin around your nails comfortable.
Keep Nails Short for a Few Days
Freshly removed gel nails may feel softer or more flexible. Keeping them short reduces snagging and splitting while they recover.
Take a Break Before the Next Gel Manicure
If your nails are peeling, thin, or sensitive, give them time before your next gel manicure. Regular breaks can help prevent ongoing weakness and brittleness.
Use a Gentle Nail Strengthener
A strengthening treatment can help if your nails feel bendy, but avoid harsh formulas if your nails are irritated. Look for products designed to support flexibility and hydration, not just hardness.
When to See a Professional
At-home gel nail removal is convenient, but it is not always the best choice. See a professional if your gel will not soften, your nails hurt, you have nail extensions, or you suspect hard gel was used. You should also get help if you notice redness, swelling, pus, green discoloration, severe lifting, bleeding, or pain around the nail.
A salon professional can remove stubborn products more safely, and a dermatologist can evaluate nail changes that may be caused by infection, allergy, trauma, or another condition.
Common Questions About Removing Gel Nail Polish at Home
Can I just file gel polish off?
You can file the top layer to break the seal, but filing off the entire gel manicure is risky unless you know exactly what you are doing. It is easy to over-file and thin the natural nail. Soaking with acetone is safer for standard soak-off gel polish.
Why are my nails white after removing gel polish?
White patches can happen when the nail surface becomes dehydrated or damaged, especially after picking, peeling, or forceful scraping. Keep nails moisturized and avoid more gel until the surface improves.
Is acetone bad for nails?
Acetone is drying, but it is effective. Used properly and briefly, it is usually less damaging than peeling or scraping gel polish off. Protect your skin before soaking and moisturize afterward.
Can I remove gel polish from toenails the same way?
Yes, the same method works for gel pedicures. Toenails may take a little longer because the polish can be thicker. Protect surrounding skin and avoid forcing the gel off.
What if the gel still will not come off?
Rewrap the nail with fresh acetone and wait another five to ten minutes. If it still does not soften, the product may not be soak-off gel. In that case, visit a nail professional.
Personal Experience: What Removing Gel Nails at Home Really Feels Like
The first time many people remove gel nail polish at home, they dramatically underestimate the process. It looks simple online: file, soak, slide, done. In real life, you may start with confidence, wrap your fingertips in foil, and then realize you cannot unlock your phone, open a snack, or scratch your nose. Gel removal teaches humility.
One of the biggest lessons is that preparation makes everything smoother. When all supplies are ready before the acetone comes out, the process feels almost professional. When supplies are scattered, it feels like a beauty-themed escape room. Cotton is in the bathroom, foil is in the kitchen, the nail file has entered witness protection, and one hand is already slippery with cuticle oil. The simple act of setting everything on a towel first saves time, stress, and several muttered words not suitable for a spa brochure.
The second lesson is that filing the topcoat properly matters more than people think. If the gel surface is still shiny, acetone struggles to break through. A fully matte surface is the difference between polish that lifts in soft flakes and polish that sits there smugly after 15 minutes. The trick is to file patiently but lightly. You want to remove gloss, not excavate your natural nail like an archaeological site.
The third lesson is patience. There is a moment during removal when one tiny edge lifts and your brain whispers, “Pull it.” Do not listen. That voice is chaos wearing lip gloss. The safe move is to rewrap the nail and wait. Usually, another five minutes turns stubborn gel into soft pieces that glide away with almost no pressure. The nail underneath looks smoother, feels stronger, and does not punish you for your impatience later.
Aftercare also makes a noticeable difference. Nails can feel dry immediately after acetone, almost like they have had a long conversation with a desert. Cuticle oil helps quickly, especially when used more than once. A good hand cream on top makes the whole process feel less harsh. By the next day, nails usually look calmer and healthier if they were not peeled or scraped.
The best at-home gel removal experience is not the fastest possible one; it is the fastest safe one. Once you know the rhythmfile, protect, soak, wait, nudge, rehydrateit becomes much easier. You also become less tempted to pick at lifting gel during meetings, movies, or traffic lights. That alone is personal growth.
Most importantly, removing gel nail polish at home gives you control. You can change colors when you want, save a salon trip, and rescue grown-out nails before they snag on everything you own. But the real win is learning that nail care rewards gentleness. Treat your nails like delicate accessories attached to living tissue, not like stubborn price stickers on a jar. They will look better, feel better, and be ready for your next manicure adventurewhether that means a fresh gel set or a week of naked nails living their minimalist truth.
Conclusion
Removing gel nail polish at home can be quick, safe, and surprisingly satisfying when you use the right method. The key is to file only the shiny topcoat, soak with pure acetone, wait long enough for the gel to soften, and gently remove only what lifts easily. Peeling, biting, and aggressive scraping may feel faster in the moment, but they can leave your nails weak, thin, and damaged.
For the best results, protect your skin with petroleum jelly, work one hand at a time, use enough acetone, and rehydrate your nails afterward with cuticle oil and hand cream. If your manicure includes hard gel, builder gel, acrylic, extensions, pain, or unusual nail changes, skip the DIY experiment and see a professional. Your nails are small, but they are not disposable.
Note: This article is for general nail-care education. If you have nail pain, swelling, infection signs, allergic reactions, or persistent nail damage, consult a licensed nail professional or dermatologist.