

A string trimmer without string is essentially a loud walking stick. Fortunately, learning how to replace the lan untangling a garden hoseprovided you use the correct line, follow the winding arrow, and resist the urge to cram the spool like an overpacked suitcase.
BLACK+DECKER produces several trimmer designs, including Automatic Feed Spool (AFS), EASYFEED, bump-feed, single-line, and dual-line models. Although the basic replacement process is similar, spool dimensions and line diameters vary. Many popular models use 0.065-inch line and an AF-100 replacement spool, while models such as the GH3000 use 0.080-inch line and an SF-080 spool. Always confirm the model number before buying replacement parts. e>
Note: This guide covers the most common BLACK+DECKER removable-spool trimmers. Your model’s manual and the markings molded into its spool take priority whenever its instructions differ from the general steps below.
What You Will Need
- The correct replacement trimmer line or compatible prewound spool
- Clean work gloves
- Safety glasses
- Scissors or line cutters
- A dry brush, rag, or old toothbrush
- Your trimmer’s model number or owner’s manual
You normally do not need screwdrivers or other hand tools to change a standard BLACK+DECKER spool. Most covers are held by two release tabs. If the cover refuses to move, do not attack it with a pry bar. Recheck the tabs and consult the manual before turning a five-minute maintenance job into an online search for a replacement housing.
Before You Begin: Prewound Spool or Bulk Line?
Using a prewound replacement spool
A factory-wound spool is the quickest and most reliable choice. Remove the empty spool, insert the compatible replacement, thread the line through the eyelet, and reinstall the cover. Factory winding also reduces the risk of tangles, uneven layers, and overfilling.
The tradeoff is cost. A prewound spool is more expensive per foot of line than a package of bulk trimmer string. It is ideal for homeowners who value speed or only replace line occasionally.
Rewinding an existing spool
Bulk line costs less and produces less plastic waste because you reuse the original spool. However, the line must be the correct diameter and wound neatly in the direction shown by the arrow. Loose loops, crossed layers, and an overstuffed spool can interfere with automatic feeding.
BLACK+DECKER’s official guidance recommends using only the size and type listed for the specific trimmer. The company also instructs users to wind the line snugly and evenly without filling beyond the spool’s notches. ow to Replace the Line on a Black and Decker Trimmer in 12 Steps
Step 1: Identify the trimmer model
Find the model number on the rating label, which is commonly located near the motor housing, battery port, handle, or shaft. Write down the complete number rather than relying on the trimmer’s voltage or cutting width.
This matters because two BLACK+DECKER trimmers that look like distant cousins may use completely different spools. For example, the widely used AF-100 spool contains 30 feet of 0.065-inch line and fits numerous models, including the GH900, LST300, LST400, and LST136. The GH3000 instead uses the 0.080-inch SF-080 line system. tep 2: Disconnect every source of power
Turn off the trimmer and wait for the head to stop completely. Remove the battery from a cordless model. Unplug a corded model from the outlet and disconnect any extension cord.
Do not depend only on the trigger lock. Your hands will be close to the cutting head, and accidental startup is not the kind of surprise that improves a Saturday afternoon. BLACK+DECKER specifically instructs users to unplug the tool or remove its battery before opening the spool housing. tep 3: Turn the trimmer over safely
Place the trimmer on a bench, driveway, or other stable surface with the cutting head facing upward. Support the shaft so the tool cannot roll. Wear gloves if the guard, line-cutting blade, or spool housing is dirty or has sharp edges.
Keep fingers away from the small metal blade attached to the guard. That blade trims excess line during operation and may remain surprisingly sharp even when it is coated with dried grass.
Step 4: Remove the spool cap
Locate the two release tabs on opposite sides of the spool cap. Press both tabs inward while pulling the cap straight away from the housing. Avoid twisting unless the markings or manual specifically tell you to rotate it.
If the cap is stuck, brush away packed grass and press the tabs again. Do not force a screwdriver between the cap and housing because the plastic retaining clips can crack.
Step 5: Lift out the old spool
Remove the spool slowly and observe its orientation. The side marked with an arrow or spool label usually faces outward when installed. Taking a quick photo before removing the last pieces of line can make reassembly easier, especially on an unfamiliar model.
Check for a spring, lever, or other feed component beneath the spool. Not every model uses the same arrangement, so leave those pieces in position unless the manual directs otherwise.
Step 6: Clean and inspect the housing
Use a dry brush or rag to remove grass, dust, and pieces of broken line from the spool cavity, eyelet, cap, and surrounding vents. Rotate or move accessible components gently to confirm that they are not jammed.
Inspect the spool for cracks, warped edges, worn retaining slots, or damaged center holes. Examine the cap tabs and eyelet as well. A cracked spool should be replaced rather than rewound because it may wobble, jam, or release line unpredictably.
Step 7: Remove the remaining old line
Pull all leftover string from the spool. Remove short fragments from the anchor hole and grooves. Do not tie new line to the old line or wind fresh string over a tangled layer. Starting with a bare spool produces smoother, more consistent feeding.
If you are installing a factory-wound spool, skip ahead to Step 10 after verifying that the replacement matches your model.
Step 8: Cut and anchor the new trimmer line
Cut an appropriate length of the specified round nylon trimmer line. The required amount varies by spool, so use the capacity stated in the manual rather than guessing. Excess line does not create a “high-capacity” spool; it creates a small plastic bird’s nest.
Insert approximately 1/2 inch of line into the anchor hole in the spool, or secure it using the molded starting point shown for your model. BLACK+DECKER’s instructions for common auto-feed spools specify inserting about 1/2 inch, or 12 millimeters, into the spool hole. tep 9: Wind the line in the arrow’s direction
Locate the winding arrow molded or printed on the spool. Wind the line in that direction, keeping each wrap snug and arranged in even layers. Do not allow the line to cross itself repeatedly, bunch at one side, or become so tight that it digs into lower layers.
Stop when the wound line reaches the spool’s recessed fill area or rim notches. Do not fill beyond those indicators. Official BLACK+DECKER guidance warns against overfilling and instructs users to wind neatly rather than crisscrossing the line. r a dual-line spool, wind the upper and lower chambers separately. Temporarily secure each line in its corresponding parking slot while winding the other chamber. Both sections must contain the correct line, and the two strands should not cross between chambers.
Step 10: Secure the line and thread the eyelet
Leave a short working tail and place it in the retaining notch on the spool rim. This prevents the line from unwinding while you reinstall the spool.
Guide the tail through the eyelet in the spool housing. If your model has two lines, pass each tail through its matching eyelet. Keep gentle tension on the line so it does not slip underneath the spool or spring loose from its neatly wound layers.
Step 11: Seat the spool and reinstall the cap
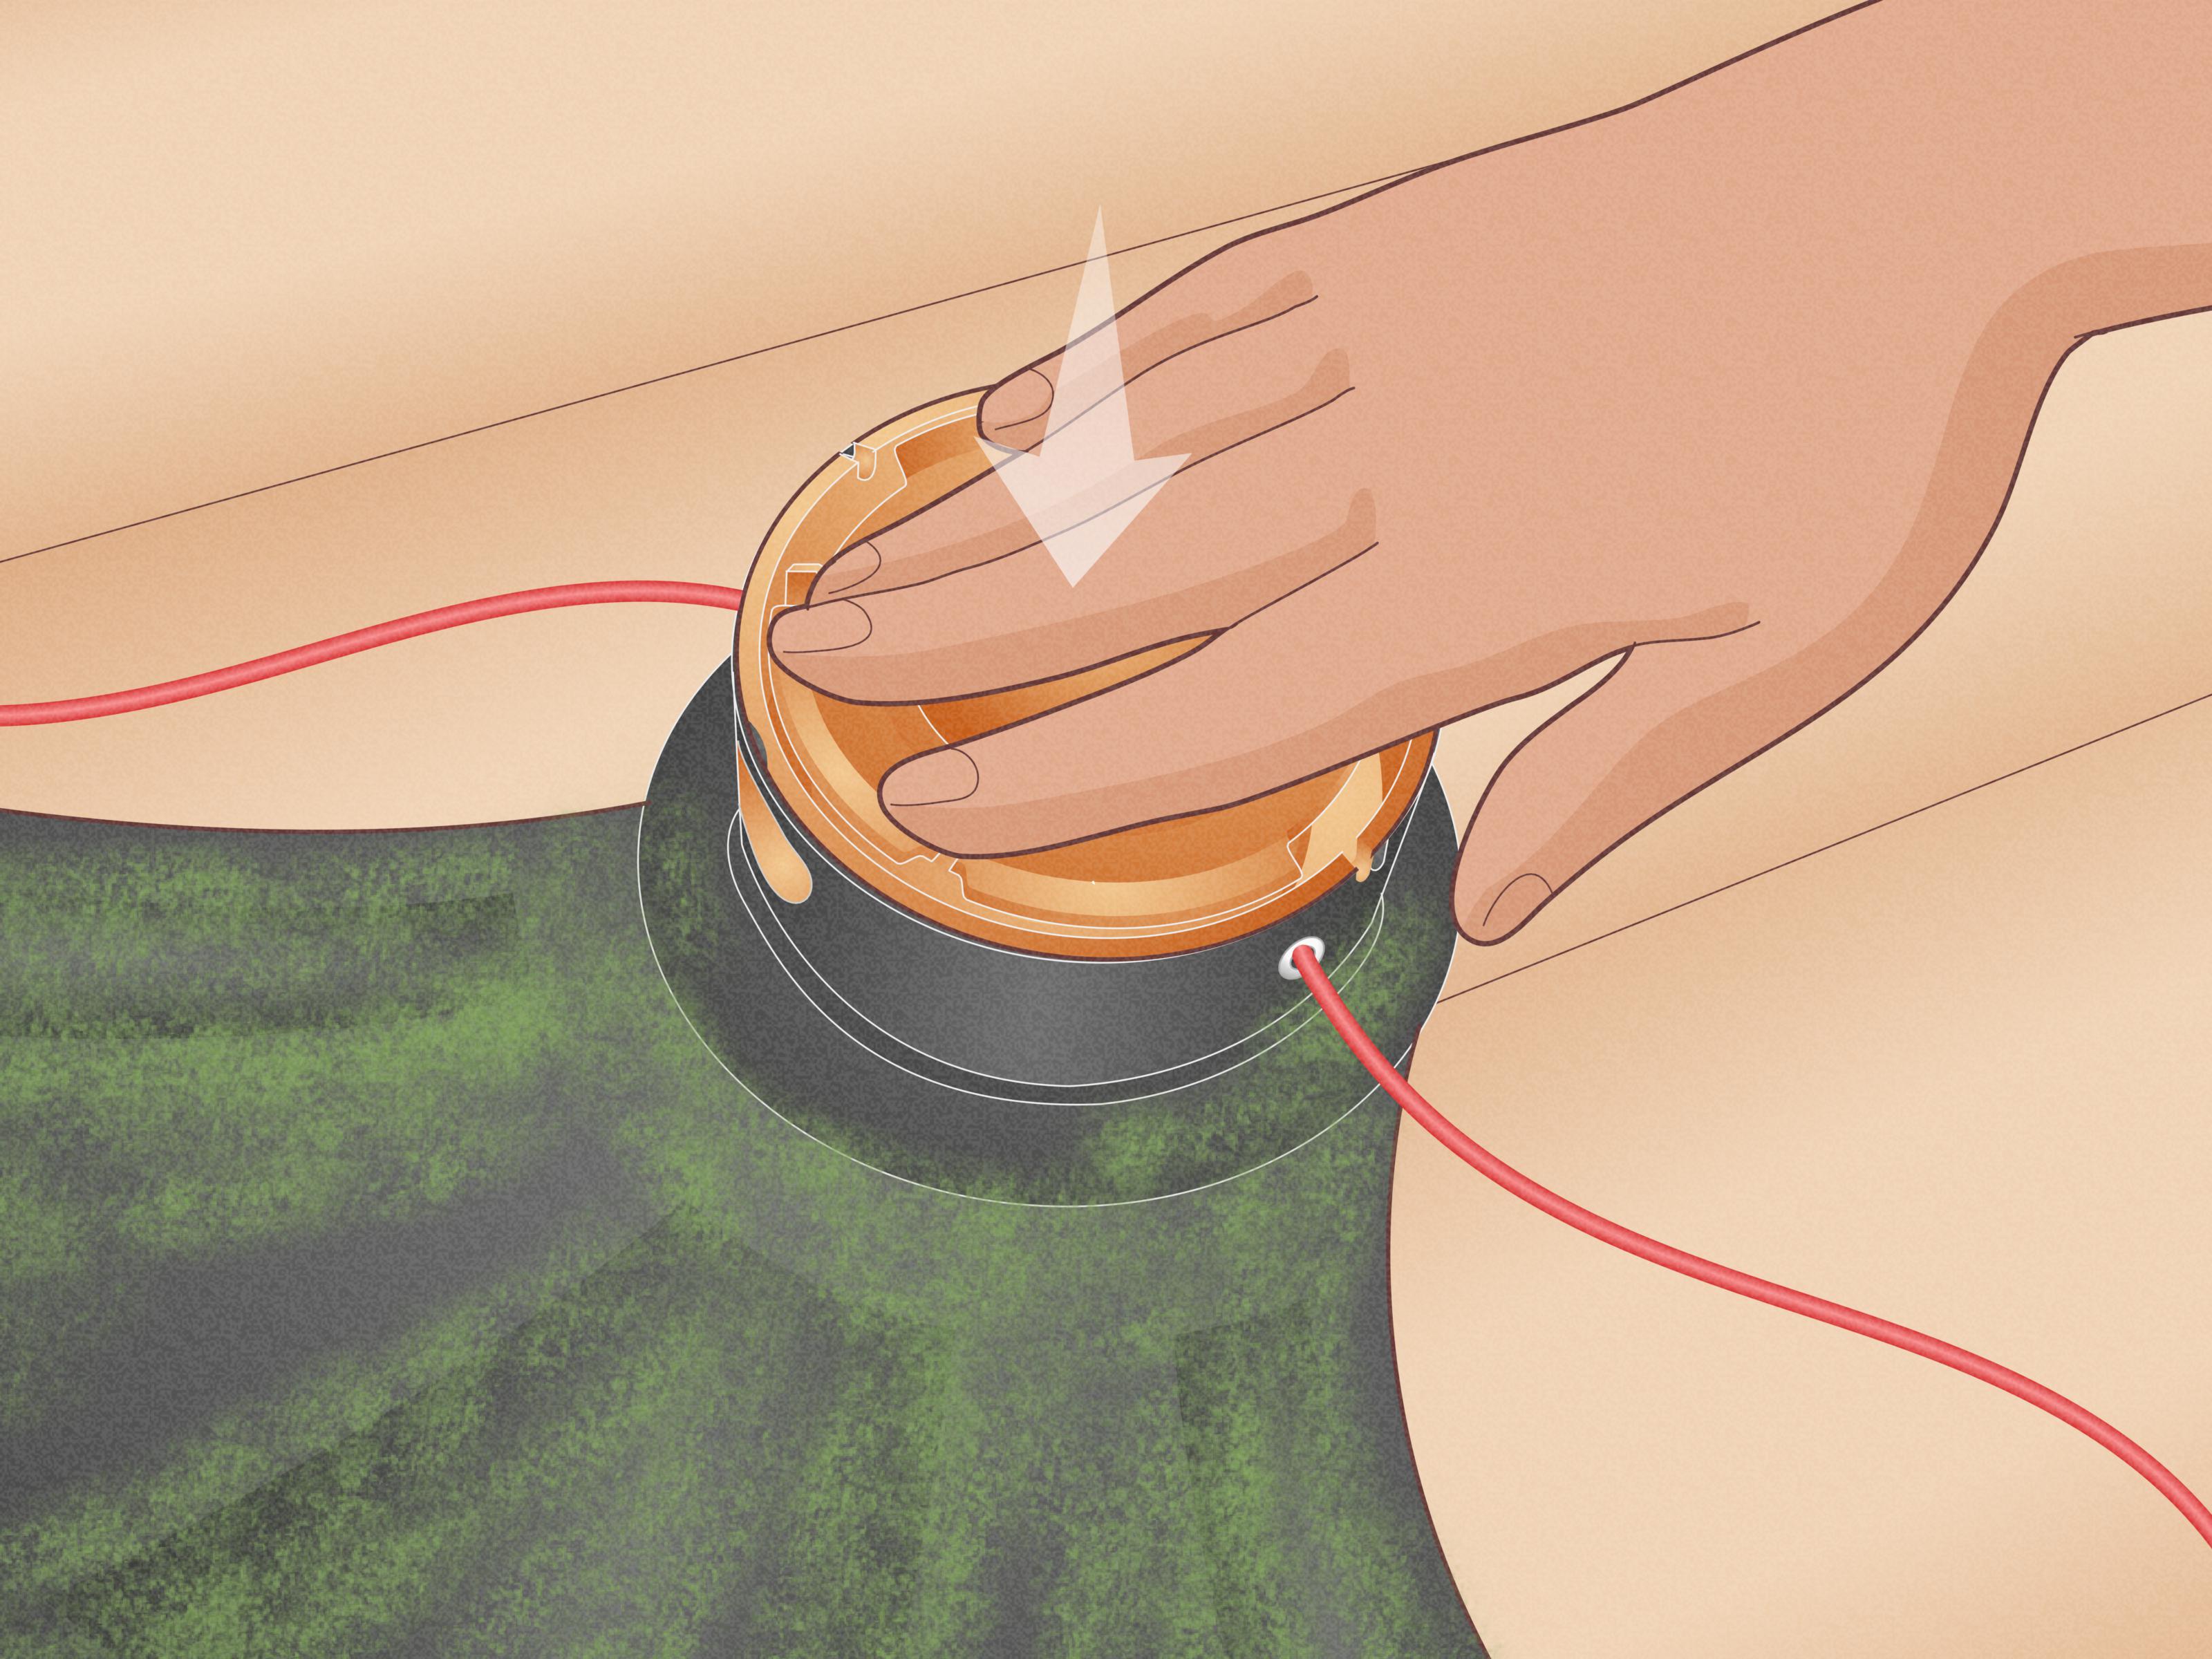
Place the spool into the housing with the correct side facing outward. Press it down gently and rotate it slightly until it drops into its seated position. On common BLACK+DECKER auto-feed heads, a properly seated spool can move a few degrees from side to side without lifting out.
Make sure the line is not trapped beneath the spool. Pull the line free from its parking notch, then snap the cap into place. Tug the cap lightly to confirm that both tabs are locked. The cap should sit evenly without a visible gap on one side. tep 12: Restore power and test the feed
Move the trimmer to an open outdoor area. Reinstall the battery or reconnect the power cord. Put on eye protection, hold the tool in its normal operating position, and start it briefly.
The line may strike the cutter on the guard as it is trimmed to the correct operating length. That quick snapping sound is normal. BLACK+DECKER’s AFS system is designed to monitor line use and advance additional line as the cutting strand shortens, eliminating the need to bump the head on compatible models. op immediately if the head vibrates heavily, the cap comes loose, or a large amount of line pours from the housing. Disconnect the power and inspect the installation again.
Common Problems After Replacing Trimmer Line
The line will not feed
The most common causes are incorrect winding direction, crossed layers, an overfilled spool, line trapped beneath the spool, or a cap that is not fully seated. The line may also be too thick for the eyelet or feed mechanism.
Disconnect the power, reopen the housing, and confirm that the arrow was followed. Remove enough line to leave clearance beneath the spool rim, rewind loose areas, and verify that the tail passes freely through the eyelet.
The trimmer releases too much line
First, make sure the spool is seated correctly and the cap is locked. If installation is correct but line continues to feed uncontrollably, the feed lever or its retaining pins may be damaged. BLACK+DECKER notes that a damaged actuating lever beneath an automatic-feed spool can allow line to advance freely and may require professional repair. he line keeps breaking
Frequent breakage can result from striking concrete, chain-link fencing, rocks, thick stems, or other hard debris. Clear sticks and stones before trimming, and avoid holding the cutting line directly against walls or curbs. BLACK+DECKER identifies stones, large twigs, and heavy vegetation as common causes of rapid line wear. d nylon can also become brittle after long exposure to heat and sunlight. Store bulk line in a closed container away from direct sun. Most importantly, do not compensate by installing a larger diameter unless your manual permits it. Heavier line creates more drag and can affect feeding and motor performance. Smaller 0.065-inch line is commonly paired with lighter battery-powered trimmers because it demands less power. he spool cap will not close
Remove the spool and check for excess line, debris under the spool, a displaced spring, or a mismatched replacement part. Compare the new spool with the old one. Even a small difference in hub height or rim shape may prevent the cap from locking.
Practical Experience: Lessons That Make the Job Easier
Real-world trimmer maintenance teaches one lesson quickly: most spool problems begin before the spool is installed. Buying line based only on appearance is a classic mistake. A package labeled “universal” may contain excellent nylon, but that does not mean every diameter, shape, or spool fits every BLACK+DECKER head. Checking the model number takes a minute and can prevent an extra trip to the hardware store with a dusty plastic spool in your pocket.
Another useful habit is to photograph the spool before removing it. The picture records which side faces outward, where the line enters the anchor hole, how it passes through the eyelet, and whether a spring is visible underneath. This tiny step becomes especially valuable when the spool suddenly pops free and the remaining line uncoils across the garage like it has been waiting all week for freedom.
Neat winding matters more than winding speed. A hurried spool often looks acceptable from above while hiding crossed loops below the surface. Those loops tighten against one another during operation, causing the feed system to behave as though the spool is empty. Slowing down and guiding each layer with a thumb generally saves more time than reopening the head later.
Moderate tension is the goal. Line wound too loosely can expand and tangle inside the cap. Line wound extremely tightly may pinch lower layers or retain the curved shape of the spool. Keeping the wraps snug, parallel, and below the fill marks gives the automatic-feed mechanism room to do its job.
Cleaning the housing during every line change also pays off. Damp grass dries into a surprisingly stubborn paste around the spool and eyelet. That buildup can limit spool movement, hold the cap slightly out of position, or make the line drag as it exits. A dry toothbrush is often more effective than poking at the mechanism with a screwdriver, and it is far less likely to damage plastic parts.
Prewound spools are worth considering when reliability is more important than the lowest operating cost. They are convenient before a large yard cleanup, when several people share the tool, or when careful winding is difficult because of limited hand strength. Keeping one compatible prewound spool in the garage also provides a useful diagnostic tool. If the factory spool feeds properly but a hand-wound spool does not, the winding method is probably the issue rather than the trimmer.
Trimming technique has an enormous effect on line consumption. The tip of the line performs the cutting. Pressing the entire line against a fence does not cut twice as fast; it merely shortens the line twice as enthusiastically. Approach concrete edges gradually, keep the head moving, and remove stones or branches from the work area before starting.
Finally, replace damaged components rather than repeatedly forcing them to work. A cracked cap, distorted spool, worn eyelet, or broken feed lever will not improve through optimism. When a correctly installed compatible spool still dumps line, jams repeatedly, or vibrates strongly, inspect the head carefully and arrange service if the internal mechanism is damaged.
How Often Should Trimmer Line Be Replaced?
There is no universal schedule. Replacement frequency depends on yard size, vegetation, trimming technique, line diameter, and the number of hard surfaces around the lawn. Soft grass may use very little line, while edging along brick, concrete, stone, or wire fencing can consume it rapidly.
Inspect the spool whenever the cutting width becomes noticeably smaller, the feed stops working, or only a few wraps remain. Replace the complete spool when it is cracked, warped, or too worn to hold line securely.
Final Thoughts
Replacing Black and Decker trimmer line is a straightforward job once you know the correct spool, line diameter, and winding direction. Disconnect the power, clean the head, wind in tidy layers, avoid overfilling, route the tail through the eyelet, and make sure the spool and cap are fully seated.
The model number remains the most important detail. A perfectly wound 0.080-inch line is still the wrong solution for a trimmer designed around 0.065-inch line. Match the parts first, take your time during winding, and your trimmer should return to cutting grass instead of testing your vocabulary.