There are two kinds of people in this world: people who casually walk past a plain dollar store pot and people who stare at it and think, “You, my friend, are one fake rust finish away from becoming expensive-looking porch decor.” This guide is for the second group. Or the first group that wants to cross over to the fun side.
A faux rust finish is one of the easiest ways to make a cheap planter look older, moodier, and far more charming than its humble price tag suggests. The best part is that you do not need an art degree, a welding certificate, or an abandoned barn in the backyard. You just need a basic pot, a few paint supplies, and the confidence to dab brown paint like you mean it.
This DIY works especially well on lightweight plastic or resin pots from dollar stores, discount chains, and craft shops. Instead of fighting the fact that the pot looks brand-new, you lean into a weathered, rusty, timeworn look that feels warm, earthy, and slightly European-flea-market-meets-garden-shed. In other words, fancy on a budget. The dream.
Why a Faux Rust Finish Works So Well
Real rust happens on metal, not plastic, but the look of rust is really a combination of color, depth, texture, and imperfection. That is good news for DIYers because paint can mimic all four. A believable rusted finish usually layers a dark base with rusty browns, reddish orange, muted terracotta, and a little dusty black or charcoal to keep it from looking too cheerful. Real rust is not pumpkin spice in a flowerpot. It is varied, slightly grimy, and a little dramatic.
What makes this project so satisfying is the contrast. A glossy, cheap-looking pot suddenly gains character. It looks less “picked up while buying paper towels” and more “found at a charming antique market where everything costs more than it should.” That is the kind of transformation we support.
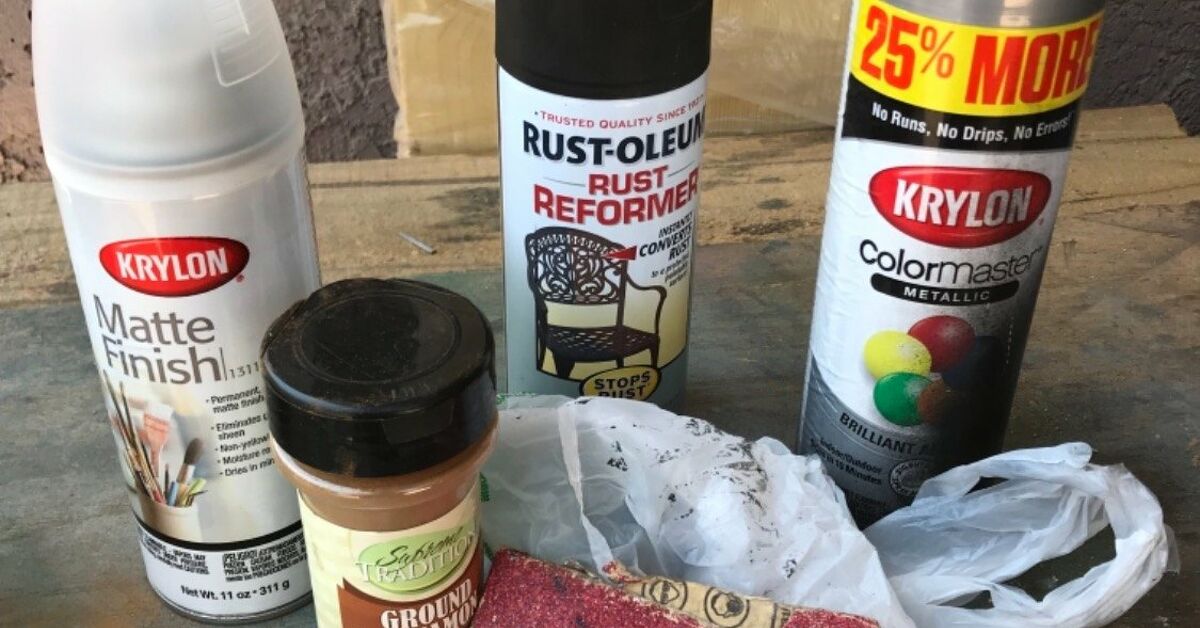
Supplies You Will Need
Keep your materials simple. The point of this DIY is to make the pot look expensive, not to spend enough money that you could have bought an expensive one in the first place.
Basic materials
- One dollar store pot, plastic planter, or lightweight resin pot
- Dish soap and water
- A clean rag or paper towels
- Fine-grit sandpaper or a sanding sponge
- Spray primer or paint made for plastic, or a multi-surface craft base coat
- Acrylic craft paint in black, dark brown, red-brown, terracotta, burnt orange, and a little tan or bronze
- Cheap chip brushes, an old paintbrush, or makeup sponges
- Optional texture medium, crackle medium, or baking soda mixed into paint for grit
- Optional antiquing glaze or matte sealer
- Drop cloth, cardboard, or kraft paper to protect your work area
If you are styling the pot indoors or using it as a decorative cover pot, you can focus entirely on looks. If it will live outside, hold a real plant, and face sun and rain, choose products labeled for exterior use and keep the drainage hole open. Pretty is great, but pretty with drainage is smarter.
Step 1: Pick the Right Pot
Not every cheap pot deserves the rust treatment. Some shapes sell the illusion better than others. The best candidates are simple round planters, squat urn-style pots, slightly tapered pots, and anything with a lip or ridge around the top. Those details give you natural places to build darker shadow and rusty buildup.
A very shiny plastic pot can still work, but it needs a little more prep. A pot with embossed details, fluting, or raised bands is even better because rust looks more believable when it settles into creases and edges. If the pot has drainage, great. If not, and you plan to plant directly into it, add holes before painting.
Step 2: Clean the Pot Like You Actually Care
This is the least glamorous step and one of the most important. Dust, mold-release residue, and mystery shelf grime can mess with paint adhesion. Wash the pot with dish soap and warm water, rinse well, and let it dry completely. Not “mostly dry.” Not “dry enough emotionally.” Completely dry.
Once dry, scuff the surface lightly with fine-grit sandpaper, especially if the pot is glossy or ultra-smooth. You are not trying to reshape it. You are just giving the primer or base coat something to grip. Wipe away sanding dust with a clean cloth.
Step 3: Lay Down a Believable Base Color
The secret to a good faux rust finish is that rust is rarely the first color the eye sees. Underneath it, there is usually a darker, more grounded base. Start with a matte or satin dark brown, charcoal, black-brown, or deep bronze. Spray paint works beautifully here, especially on plastic pots, because it gives even coverage without brush marks.
Apply thin coats instead of one thick coat. That is the golden rule of spray painting and one worth obeying unless you enjoy drips. Let the base dry fully before moving on. If you are using brush-on craft paint instead, do two thin coats and let them dry in between.
A good base color does two jobs. First, it kills the obvious “cheap plastic” vibe. Second, it gives all the later rust tones something shadowy to sit on. Without that darker underlayer, the finish can start looking like orange craft paint had an argument with your planter and lost.
Step 4: Add Texture for a More Convincing Rust Look
This step is optional, but it is the difference between “cute DIY pot” and “wait, is that metal?” Real rust has texture. A completely smooth finish can still look good, but a little grit makes it more realistic.
You have a few easy ways to do this. You can dab on a texture medium tinted with brown paint. You can use a crackle medium in spots for an aged finish. You can also make a scrappy DIY texture by mixing a small amount of baking soda into dark brown acrylic paint, then pouncing it onto the surface with a stiff brush or sponge. Keep it uneven. Concentrate the texture around the rim, lower third, drainage area, and any raised details where moisture would naturally collect.
Do not coat the whole pot in chunky texture unless you want it to look like it survived a volcanic event. A little restraint goes a long way.
Step 5: Build the Rust Colors in Layers
This is where the magic happens. Faux rust looks best when the colors overlap rather than sit in neat little zones. Use a torn sponge, makeup sponge, or chip brush and start dabbing on rust tones in layers.
Layer one: dark rust
Use deep brown or espresso first. Tap it over parts of the pot, especially around textured areas, the rim, and lower edges. This creates depth and marks out the places where the heaviest “rust” will sit.
Layer two: red-brown
Now add a warmer reddish brown. Overlap some of the dark areas but leave bits of the base visible. This middle tone is what makes the finish feel aged instead of flat.
Layer three: orange and terracotta
Use burnt orange or terracotta sparingly and mostly as highlights. Tap it on top of the brown areas, not all over the pot. This brighter color mimics the fresher, more visible parts of rust. Too much orange and your planter starts giving Halloween pumpkin. Too little and the rust effect disappears. Aim for “weathered iron gate,” not “seasonal latte.”
Layer four: dust and age
If the finish looks too bright, dry-brush a bit of black, charcoal, or muted brown over portions of the surface. You can also soften everything with a very light wash of watered-down brown paint. This tones down the colors and makes them feel more naturally aged.
Stand back every few minutes while working. Up close, everything looks chaotic. From three feet away, you can tell whether the finish looks realistic or whether it needs a little more depth in one section.
Step 6: Make It Look Naturally Worn, Not Artificially Painted
The easiest mistake in this project is making the rust pattern too even. Real weathering is messy. Some sides are more exposed. Water runs downward. Edges catch wear. Bottom rims get grime. So break up any spots that look too balanced.
Try darkening one side more than the other. Add subtle vertical streaks under the rim. Let some base coat peek through. Brush a faint dusty tan over parts of the pot if you want a drier, aged look instead of a freshly rusted one. You can also highlight the rim or raised details with a touch of metallic bronze underneath the rust tones for the feeling of old metal showing through.
Think in terms of storytelling. Where would water sit? Where would hands grab the pot? Where would sun fade the finish? Even a fake rust effect looks better when it behaves like a real material.
Step 7: Seal It Only If the Project Needs It
Sealing depends on how and where you will use the pot. For indoor decor, a clear matte topcoat can help protect the finish from scuffs. For outdoor use, a UV-resistant clear coat can help the color last longer. A matte or satin finish usually looks more convincing than gloss, because rust is many things, but glossy is not one of them.
That said, do not rush into sealing. Let the paint dry thoroughly first. If you are happy with a more chalky, dusty, antique look and the pot is mostly decorative, you may even skip the sealer. Some faux finishes look better when they stay a little soft and imperfect.
One smart trick is to use the rusted pot as a cachepot, meaning a decorative outer pot that holds a plain nursery pot inside. That protects your finish from constant moisture, fertilizer spills, and repeated scrubbing. It also keeps you from repainting your masterpiece every season.
Best Styling Ideas for a Faux Rust Dollar Store Pot
Once your pot is done, it deserves better than being shoved in a corner next to a lonely garden hose. A faux rust finish pairs beautifully with trailing ivy, olive branches, eucalyptus, faux stems, dried florals, and herbs. It also works with farmhouse, cottage, French country, vintage, moody autumn, and Mediterranean-inspired decor.
For a charming entryway, group three pots in different sizes and keep the finish slightly varied so the set looks collected over time. For indoor decor, tuck one on a bookshelf with faux greenery. For fall, pair it with brass candlesticks, wood beads, and old books. For spring, let the weathered finish contrast with fresh green herbs. Rust has range.
Common Mistakes to Avoid
Using too much bright orange
A little goes far. Orange is the accent, not the whole performance.
Skipping prep on glossy plastic
Paint needs something to stick to. Clean and scuff first unless you are using a product specifically made to grip plastic without much prep.
Applying heavy spray coats
This is how drips are born. Thin, even coats are calmer and prettier.
Making the pattern too symmetrical
Nature does not weather things with a ruler.
Blocking the drainage hole
A beautiful planter that drowns roots is not the victory it thinks it is.
Does This DIY Actually Last?
Yes, with realistic expectations. A faux rust finish on a dollar store pot is decor, not industrial restoration. Indoors, it can last a long time with minimal wear. Outdoors, longevity depends on sun exposure, rain, the type of paint you use, and whether the pot holds a nursery liner or gets planted directly. The finish may soften or fade over time, but honestly, that can make it look even better. Some DIYs age badly. This one can age into its role.
If the pot starts looking tired after a season or two, refresh it with a little dry-brushed brown, terracotta, or orange. Since the whole point is imperfection, touch-ups are easy. No one expects antique charm to look factory-fresh.
Experience Notes: What I Learned From Rusting Cheap Pots the Fun Way
The first time I tried to rust a dollar store pot, I was wildly overconfident. I had the pot, the paint, the sponge, and the kind of energy that usually ends with someone saying, “Well, that looked easier online.” I assumed I could skip the prep because the pot looked clean enough. Reader, it was not clean enough. The first coat clung in some places, slid in others, and generally behaved like it had better things to do. That was my first lesson: budget pot or not, prep is not optional if you want the finish to last.
The second lesson came from color. I started with too much orange because I thought, “Rust is orange, right?” Technically yes, but not in the way a traffic cone is orange. My poor pot looked less like aged metal and more like it had been dipped in buffalo wing sauce. Once I calmed down and brought in darker brown, red-brown, and muted black, everything clicked. The finish suddenly looked layered and believable instead of loud.
I also learned that the best tool is often the ugliest one. Fancy brushes are nice, but an old chip brush with half its bristles going rogue makes excellent texture. A torn sponge works even better because it refuses to create neat patterns. That randomness is exactly what makes the pot look naturally weathered. I spent more time trying to make my first pot perfect than I did making later pots imperfect on purpose, and the imperfect ones looked better every single time.
One of my favorite experiments was doing a trio of pots with slightly different rust personalities. One was darker and moodier, one leaned terracotta and sunbaked, and one had a dusty antique finish with just a hint of bronze underneath. Grouped together, they looked like they had been collected over years from flea markets and garden sales. Separately, they were cute. Together, they looked styled.
The biggest surprise was how versatile the finish became. I originally thought faux rust would only work in fall, maybe next to pumpkins and lanterns while pretending I live in a magazine spread. But once I put a rusty pot beside fresh green herbs in spring, it looked even better. The contrast between old-looking texture and bright new leaves was gorgeous. It felt classic instead of seasonal.
There were a few flops, of course. One sealer turned the finish slightly shinier than I wanted, which reminded me that matte is usually the safe choice. Another pot got too much texture and started looking like it had a skin condition. Happily, faux rust is forgiving. More dark paint, a little dry brushing, and the disaster calmed down.
What I love most about this DIY is that it makes decorating feel playful. You start with something cheap and ordinary, and by the end it has charm, depth, and a weirdly convincing sense of history. It is proof that style is not always about buying better things. Sometimes it is about seeing potential in the most basic object on the shelf and giving it a wonderfully rusty glow-up.
Final Thoughts
If you have ever looked at a dollar store pot and wished it had more character, this is your sign to grab the paint and go for it. A faux rust finish is affordable, forgiving, and weirdly addictive once you see how dramatic the before-and-after can be. It gives cheap planters warmth, texture, and that collected-over-time look that expensive decor stores love to charge for.
So yes, rust the pot. Make it moody. Make it charming. Make it look like it has seen things. Then set it on your porch, shelf, or patio and accept compliments with the quiet confidence of someone who spent very little money and still won the decor game.