Some projects are simple tune-ups. Others are full-blown mechanical redemption arcs. A knitting machine rebuild belongs in the second category. It starts with a machine that coughs, skips, jams, and behaves like it has unresolved feelings about yarn. Then, piece by piece, it becomes something better than “working again.” It becomes smoother, smarter, more reliable, and in some cases dramatically more capable than it was before.
That is exactly why the idea behind Knitting Machine Rebuild Takes It To The Next Level is so compelling. A rebuild is not just about making an old machine less annoying. It is about turning a fussy vintage tool into a serious creative system. When makers rebuild a knitting machine, they are restoring motion, correcting wear, replacing weak parts, and sometimes adding brand-new electronics or digital controls. That is where repair stops being maintenance and starts becoming transformation.
For hobbyists, textile artists, engineers, and curious tinkerers, a knitting machine rebuild sits at the sweet spot between craft and invention. It is practical enough to solve real problems, but exciting enough to feel like a mini engineering adventure. And let’s be honest: there is something deeply satisfying about taking a machine that once sounded like a shopping cart with a grudge and turning it into a smooth, dependable knitting partner.
Why This Rebuild Story Matters
The phrase “takes it to the next level” is not marketing fluff here. It describes a real shift in what a machine can do after a rebuild. A basic cleaning might help a carriage slide better. Replacing a few needles might stop dropped stitches. But a true rebuild changes the machine’s future. It restores consistency, expands pattern possibilities, and often makes the machine easier to troubleshoot later.
That is especially true with older domestic and semi-professional knitting machines. Many of them were built with impressive precision, but time has not been kind. Foam compresses. Grease hardens. Dust sneaks into every possible corner. Rails dry out. Plastic parts age. Electronics become unpredictable. A machine can look fine on the table and still perform like it spent the last decade in a haunted attic.
Rebuilding solves those deeper issues. It addresses the hidden causes of poor performance instead of just treating the symptoms. When done well, it can also modernize a machine’s workflow. A rebuild may add better motor control, more stable sensing, improved pattern handling, or even a new interface that makes the machine feel less like a relic and more like a specialized digital fabrication tool.
What A Knitting Machine Rebuild Really Includes
Mechanical restoration
This is the unglamorous but essential part. It usually involves cleaning the needle bed, inspecting the carriage, replacing worn or bent needles, checking springs, refreshing or replacing the sponge bar, and making sure the rails and moving surfaces are properly serviced. It is the knitting equivalent of stretching before a marathon: not flashy, absolutely necessary.
Parts replacement
Many rebuilds uncover parts that are technically still present but no longer doing their job. A flattened sponge bar, for example, can throw off needle positioning and create all sorts of mysterious problems. Bent needles can snag yarn and produce uneven fabric. A worn carriage component can make the machine feel stiff, noisy, or unreliable. Replacing those parts often creates the biggest improvement for the least drama.
Electrical and control upgrades
This is where things get spicy. Some rebuilders go far beyond routine repair and redesign how the machine is controlled. Older computerized knitting machines may benefit from replacement control boards, modern microcontrollers, new motor control systems, or improved sensor handling. Suddenly, the machine is not just rescued. It is upgraded.
Workflow improvement
A rebuild also changes how the machine fits into the maker’s process. Better labeling, documented part placement, organized maintenance habits, and test swatches all make the machine easier to use long term. In other words, the rebuild is not just happening to the machine. It is happening to the way the owner works with it.
The Parts That Usually Need Attention First
If a knitting machine were a rock band, the needle bed would be the stage, the carriage would be the lead singer, and the sponge bar would be the underrated bassist quietly preventing total collapse. Ignore any one of them and the whole performance gets weird.
Needle bed
The needle bed is where lint, old oil, dust, and yarn fuzz gather like they were invited. A dirty bed affects movement, needle selection, and stitch consistency. Cleaning it thoroughly is one of the fastest ways to reveal how healthy the machine really is.
Carriage
The carriage does the hard work, and it shows. If it feels sticky, noisy, or resistant, that is often a sign of dirt buildup, dried lubrication, wear, or misalignment. Rebuilders usually clean the underside carefully and inspect every contact point. This is not the place for guesswork or “good enough.”
Sponge bar
Ask enough machine knitters what they check first when a machine starts misbehaving and eventually the answer becomes a chorus: the sponge bar. It keeps needles positioned correctly. When it compresses or deteriorates, the machine can mis-pattern, skip stitches, or feel generally cursed. Replacing it is often one of the most important steps in a rebuild.
Needles and needle butts
A single bent needle can create a surprisingly large mess. Multiply that by several worn needles and you have a machine that looks clean but knits like it is improvising jazz when you asked for sheet music. Replacing damaged needles restores predictability.
Motor and electronics
On advanced machines, old electronics may be the weak link. A rebuild can include a new controller, better speed regulation, cleaner sensor input, and more dependable operation. That is often what truly pushes the machine “to the next level.”
From Dusty Relic To Dependable Tool: A Smarter Rebuild Process
1. Document everything before taking it apart
Photos matter. Notes matter. Labels matter. A rebuild tends to inspire confidence right up until the moment you are staring at four similar-looking parts and asking the room, “Which one of you is the villain?” Good documentation saves hours of frustration later.
2. Start with cleaning, not heroics
Many rebuilds fail because people jump straight to modifications before doing basic service. Clean out lint. Wipe down accessible surfaces. Remove sticky residue. Brush the bed. Check the carriage underside. Use light oil where appropriate, and use it sparingly. This is not a salad. More oil is not more flavor.
3. Replace the obvious wear items
If the sponge bar is flat, change it. If needles are bent, replace them. If rails are dry, service them. This stage often solves the majority of functional problems before any advanced troubleshooting begins.
4. Test boring things on purpose
After rebuilding, resist the urge to jump straight into your dream jacquard sweater for your emotionally unavailable cat. Knit swatches first. Plain knitting reveals tension issues, selection problems, and carriage drag. Boring tests are honest tests.
5. Upgrade only after stability is proven
Digital controls, sensors, custom interfaces, and motor conversions are exciting, but they work best when the core mechanics are already sound. A machine with unresolved mechanical issues does not become advanced when you add electronics. It becomes a more expensive mystery.
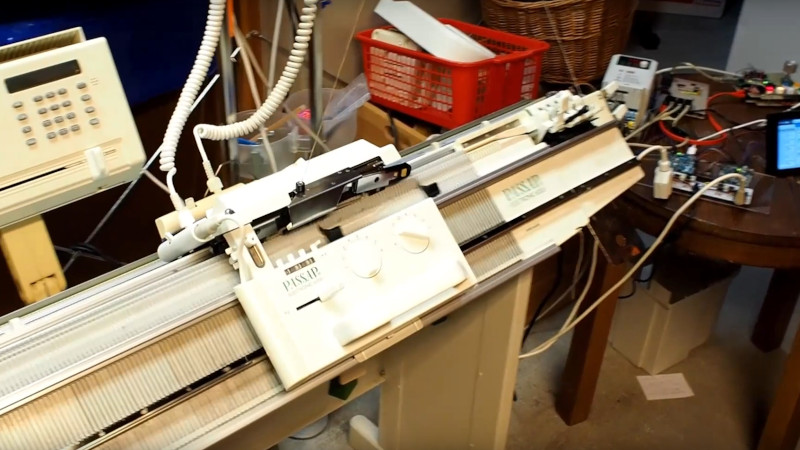
How The Passap E6000 Rebuild Changed The Conversation
One reason this topic resonates so strongly is that a rebuilt knitting machine can become something far more capable than a restored antique. A well-known Passap E6000 rebuild showed exactly that by replacing core control components, improving the motor setup, and extending control over functions that originally felt limited. The machine was not merely repaired to factory expectations. It was reimagined for better control and broader creative use.
That matters because it reframes what a knitting machine can be. Instead of treating older machines as fragile collectibles, rebuild-minded makers treat them as modular systems. Mechanical structure, sensing, motion, selection, and interface can all be improved. Suddenly, the machine is not just a craft appliance. It is a programmable textile platform with real upgrade potential.
This is the same broader idea seen in modern machine knitting research and digital fabrication work. The field is moving toward more intuitive control, better guidance, and more accessible design workflows. Rebuilding older machines fits naturally into that trend. It keeps existing hardware useful while opening the door to smarter software and more ambitious textile design.
Why A Rebuild Is Bigger Than A Repair
A simple repair says, “Make this stop failing.” A rebuild says, “Make this worth using again.” That difference changes everything.
When a rebuilt knitting machine runs smoothly, the user gains more than convenience. They gain confidence. They trust the carriage. They trust the stitch formation. They trust that when something goes wrong, it is a manageable issue instead of mechanical chaos. That confidence encourages experimentation, which is where the best machine knitting usually begins.
A rebuild also supports sustainability in a very practical way. Vintage and older knitting machines often have excellent bones. Throwing them aside because a sponge bar flattened or a controller aged out is wasteful. Rebuilding extends their working life and keeps specialized equipment in circulation. In a world full of disposable gadgets, that is refreshingly sensible.
Common Mistakes That Can Ruin A Rebuild
Over-oiling the machine
Light oil is helpful. Drowning the machine is not. Too much oil attracts grime, spreads where it should not, and can create new problems instead of solving old ones.
Ignoring the sponge bar
This is the classic trap. Everything looks fine, the machine has been stored carefully, and surely the old sponge is still okay. Then the carriage behaves badly, stitches go rogue, and the culprit is the same flattened foam everyone warned about. Respect the humble sponge bar.
Skipping test knitting
A machine can feel smooth by hand and still fail under yarn tension. Swatching is not optional after a rebuild. It is the proof that the machine is ready for real work.
Taking poor notes during disassembly
Memory is overrated during mechanical projects. Photos and labels are not. Rebuilders who document carefully usually finish faster and with fewer dramatic monologues.
Upgrading too soon
Fancy modifications are wonderful once the machine is already stable. Before that, they are just glitter on confusion.
What “Next Level” Actually Looks Like In Practice
So what changes after a successful rebuild? Usually, a lot.
The carriage glides instead of grinds. Needle selection becomes more reliable. Tension behaves more predictably. Fabric comes off the machine looking cleaner and more even. Troubleshooting becomes easier because the obvious wear items have already been dealt with. And if digital upgrades were added, pattern handling and machine control can become dramatically more flexible.
That is the real magic of a knitting machine rebuild. It does not just make the machine functional. It improves the entire relationship between the maker and the machine. Frustration goes down. Possibility goes up. The machine stops feeling like an old problem and starts feeling like a capable collaborator.
Who Should Consider Rebuilding A Knitting Machine?
A rebuild makes sense for several kinds of people:
- Machine knitting beginners who inherited or purchased an older machine and want dependable performance.
- Experienced knitters who are tired of recurring issues and want a fresh mechanical baseline.
- Makers and hackers interested in blending traditional textile equipment with modern electronics.
- Educators and studio owners who need machines that work reliably in repeated-use environments.
- Collectors with practical instincts who believe old machines should do more than sit politely on a shelf.
Not every machine needs a radical conversion. Sometimes “next level” simply means deep cleaning, careful servicing, and a few smart part replacements. But even that can be transformative.
Real-World Rebuild Experiences And Lessons Learned
People who rebuild knitting machines often describe the same emotional journey, even when the machines are different. At first there is optimism. The machine comes out of storage looking sturdy, maybe even charming, with that wonderful promise vintage tools always seem to make: “I was built better back then.” Then the carriage snags halfway across the bed, the needles sit too high, the patterning misbehaves, and the rebuild officially begins.
One of the most common experiences is discovering that the machine was not broken in one dramatic way. It was tired in ten tiny ways. The sponge bar had flattened. A few needles were slightly bent. Dust had settled into the bed. Old lubricant had turned sticky. Nothing looked catastrophic, but together those issues made the machine act unreliable. This is why many rebuilders say the project taught them patience before anything else. The machine was not asking for one heroic fix. It was asking for a series of small, careful decisions.
Another recurring lesson is that cleaning reveals truth. Before cleaning, owners often suspect major mechanical failure. After cleaning, the machine suddenly tells a more accurate story. The carriage slides better. The rails make sense. The rough spots become easier to identify. A rebuild can feel mysterious at the start, but once lint and grime are removed, the machine becomes much easier to understand. In that way, rebuilding is as much about visibility as repair.
Many knitters also talk about the confidence boost that comes after replacing their first sponge bar or needle. Before doing it, the task feels risky. After doing it once, it becomes part of normal machine care. That shift matters. A rebuilt machine is not only more dependable; it also makes its owner more capable. They stop treating the machine like a fragile antique and start treating it like a system they can maintain.
For makers who go further and add upgraded controls or digital features, the experience becomes even more rewarding. Suddenly, the machine is no longer limited by aging electronics or awkward workflows. It becomes possible to think bigger: more complex structures, better repeatability, more refined pattern development, and more freedom to experiment. That is often when rebuilders say the machine starts to feel “alive” again. Not in a haunted-house way, thankfully. More in a “this tool finally matches my ideas” way.
And perhaps the biggest lesson of all is this: successful rebuilds usually come from respect. Respect for the machine’s original engineering. Respect for careful documentation. Respect for maintenance. Respect for testing. The rebuilders who rush often end up doing the work twice. The rebuilders who slow down tend to end up with machines that knit beautifully and stay useful for years.
Conclusion
Knitting Machine Rebuild Takes It To The Next Level is more than a catchy title. It captures a real truth about machine knitting today. Rebuilding an older knitting machine is no longer just a preservation project. It is a practical way to improve performance, expand creative options, and bridge the gap between traditional textile craft and modern maker culture.
Whether the rebuild is a straightforward maintenance overhaul or a bold upgrade with new electronics and smarter control, the result is the same: a machine that earns its place in a serious workspace. It knits better. It behaves better. It invites better ideas. And for anyone who loves tools with history, potential, and just a little mechanical attitude, that is a very good level to reach.