

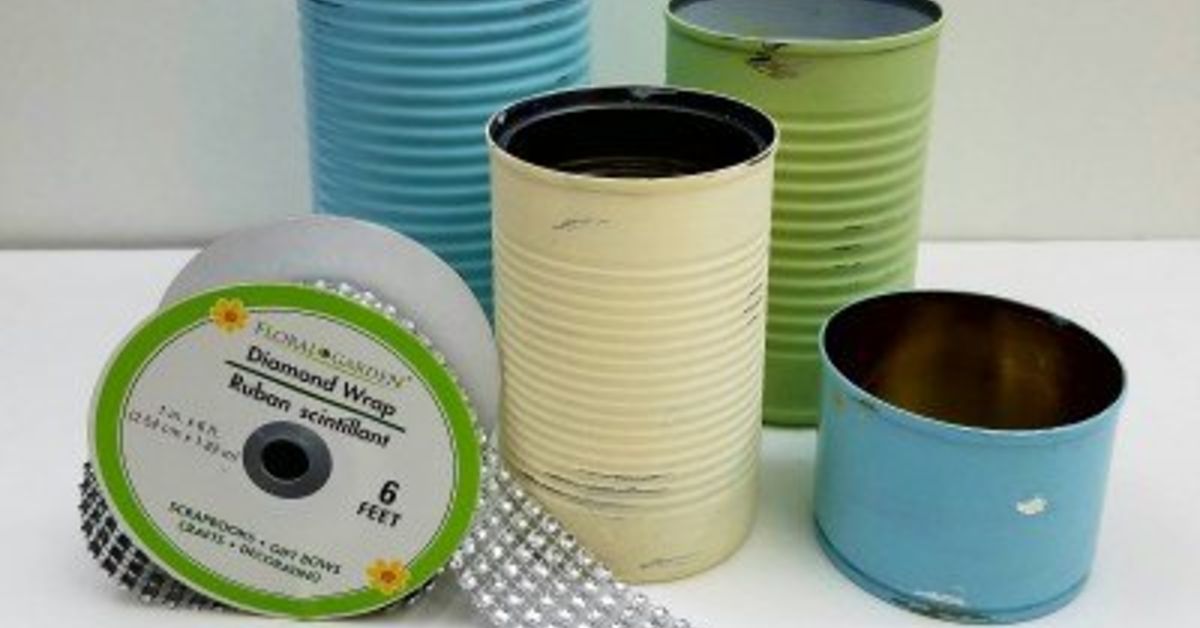
Most empty food cans follow a predictable career path: pantry shelf, dinner table, recycling bin. It is respectable, but rather brief. With a little cleaning, a few basic tools, and some imagination, those ordinary containers can begin surprisingly useful second careers as planters, organizers, lanterns, vases, gift boxes, and even backyard games.
Repurposed tin cans are especially appealing because they are inexpensive, sturdy, widely available, and easy to customize. You do not need a workshop full of power tools or a degree in industrial design. In many cases, the project requires little more than paint, paper, glue, and the ability to avoid gluing your sleeve to the table.
Although people commonly call them “tin cans,” most modern food cans are primarily steel with a thin protective coating. Steel and aluminum food containers are also widely recyclable, so cans that are unsuitable for crafting can still enter an established recycling stream. Local acceptance rules vary, making it wise to check the requirements of the recycling program in your community.
Why Repurposing Tin Cans Is Worth the Effort
Upcycling does not replace recycling, but it can delay disposal while reducing the need to buy new household containers. A can that becomes a pencil holder, for example, replaces a product that might otherwise be manufactured, packaged, transported, purchased, and eventually discarded.
The environmental benefit is only part of the attraction. Tin can crafts can also solve small organizational problems for almost no money. A matching set can organize office supplies, cooking utensils, makeup brushes, hardware, craft materials, or gardening tools. Decorated cans can become seasonal centerpieces, party favors, or handmade gifts that look far more expensive than the original container of diced tomatoes.
Another advantage is flexibility. Tin cans can fit rustic farmhouse decor, colorful children’s rooms, modern black-and-white interiors, industrial workshops, or cheerful gardens. Their shape is simple enough to disappear beneath fabric and rope, yet attractive enough to display with nothing more than a clean metallic finish.
How to Prepare Tin Cans Safely
The success of a repurposed tin can project often depends less on artistic talent than on preparation. Paint cannot hide tomato sauce residue forever, and decorative ribbon is not a recognized treatment for a razor-sharp rim.
Choose the Right Cans
Select cans that are structurally sound and free from severe rust, deep dents, bulging sides, or damaged seams. A slightly dented can may be acceptable for a rustic organizer, but a heavily corroded container should be recycled rather than invited to live permanently on a bathroom counter.
Different sizes serve different purposes. Small cans work well for paper clips, cotton swabs, seedlings, or party favors. Standard food cans are ideal for pens and paintbrushes. Large coffee cans can hold kitchen utensils, small tools, yarn, or children’s craft supplies.
Wash and Dry Thoroughly
Remove all food residue with warm water and dish soap. Rinse the can well and allow it to dry completely, including the bottom seam. Rinsing also matters when a can is headed for recycling because it reduces odors and contamination from leftover food.
Paper labels usually peel away after a short soak in warm water. Sticky adhesive can often be loosened with cooking oil, rubbing alcohol, or a commercial adhesive remover. Wash the surface again afterward so paint and glue can bond properly.
Deal With Sharp Edges
Inspect the upper rim carefully. A smooth-edge can opener can reduce sharp edges, but every can should still be checked by an adult. Wear work gloves while handling rough metal. Flatten small projections with pliers, then smooth the rim with a metal file or fine-grit sandpaper.
For desk organizers, children’s craft containers, or anything handled frequently, cover the rim with folded fabric, strong decorative tape, rubber edging, rope, or a carefully applied bead of durable adhesive. Good Housekeeping similarly recommends ensuring that reused cans have no sharp edges before turning them into household decor.
Prepare the Surface for Paint
Paint adheres best to a clean, dry, lightly scuffed surface. Remove loose rust, grease, dust, and remaining adhesive. Lightly sanding a glossy can gives primer and paint more texture to grip. Metal-coating manufacturers also emphasize removing contamination and loose rust before painting and allowing cleaned surfaces to dry completely.
Use a primer formulated for metal when you want a durable, even finish. Apply several light coats of paint rather than one thick, dripping coat. Follow all product directions, work in a ventilated area, and allow the finish to cure before decorating or handling the can extensively.
Useful Materials for Tin Can Crafts
You probably already own many of the supplies needed for repurposed tin cans. Common options include acrylic paint, metal spray paint, primer, brushes, decorative paper, wallpaper scraps, fabric, felt, burlap, ribbon, rope, twine, beads, wooden craft sticks, permanent markers, stencils, decoupage adhesive, and strong craft glue.
Projects involving holes may require a hammer and nail, awl, or drill. Fill the can with water and freeze it before punching decorative holes; the ice helps the container resist crushing. Always secure the can, wear eye protection, and keep hands away from the area being drilled or hammered.
12 Creative Ways to Repurpose Tin Cans
1. Make a Desk Organizer
A pencil holder is the classic tin can project because it is simple, useful, and nearly impossible to overcomplicatealthough craft enthusiasts will certainly try.
Paint the can in a solid color for a clean look, or wrap it in wallpaper, maps, book pages, fabric, or decorative paper. Add a felt circle underneath to prevent scratches. Several cans of different heights can be attached to a painted wooden base to create compartments for pens, scissors, rulers, markers, and charging cables.
2. Build a Portable Utensil Caddy
Attach three or more cans to a small wooden board or place them inside a handled basket. Label each container for forks, spoons, knives, and napkins. The result is a convenient utensil station for cookouts, buffets, picnics, and casual family dinners.
For a farmhouse appearance, use cream paint, jute handles, and simple black labels. For parties, match the cans to the event colors. Use them only for clean, dry utensils, and avoid allowing sharp metal to remain exposed.
3. Grow Herbs and Small Plants
Tin cans can become compact planters for basil, parsley, chives, mint, succulents, or flower seedlings. Punch several drainage holes in the bottom, add potting mix, and place the can on a saucer to protect the surface below.
Drainage is essential because waterlogged soil restricts oxygen around plant roots. University extension guidance confirms that metal containers can be used for plants, but containers need drainage holes to release excess water.
Remember that small metal containers dry quickly in hot weather and can also become warm in direct sun. Check soil moisture frequently and move heat-sensitive plants away from surfaces that become excessively hot.
4. Create a Vertical Can Garden
For a balcony, fence, or sunny wall, mount painted cans on a sturdy board or secure them to an appropriate outdoor support. Arrange them in straight rows for a modern design or stagger them for a more relaxed look.
Choose lightweight herbs, compact flowers, or trailing plants. Make certain every can drains freely and that the mounting hardware can support wet soil, which is much heavier than dry potting mix. A vertical garden is charming; an unexpected soil avalanche is less so.
5. Design Rustic Flower Vases
Wrap cans in burlap, lace, rope, sheet music, or floral fabric to create inexpensive centerpieces. They work especially well for weddings, showers, holiday tables, and casual garden parties.
To reduce rust and leaks, place a small glass or watertight jar inside the can rather than pouring water directly into it. This approach is also recommended in published tin-can flower arrangement ideas.
6. Make Decorative Lanterns
Draw a pattern on paper, tape it around the can, and punch holes along the design. Stars, leaves, initials, geometric patterns, and simple holiday shapes all work well. Paint the exterior, add a wire handle if desired, and place a battery-operated LED light inside.
Flameless lights are the safest choice, especially around children, pets, fabric, dry plants, or crowded outdoor tables. If a real candle is used, place the lantern on a stable, nonflammable surface and never leave it unattended. The U.S. Consumer Product Safety Commission specifically recommends flameless alternatives and warns against leaving burning candles unattended.
7. Organize a Children’s Craft Station
Decorated cans can separate crayons, colored pencils, brushes, glue sticks, pom-poms, and craft sticks. Let children help choose colors or add foam shapes, stickers, and washable paint after an adult has prepared and covered every metal edge.
Place the finished cans in a shallow tray so the collection can move from a shelf to the table. Professional organizing ideas featured by The Spruce also suggest using decorated cans to divide children’s art materials while turning the decorating process into an activity of its own.
8. Sort Garage Hardware
Tin cans are excellent for nails, screws, bolts, washers, zip ties, paintbrushes, and small hand tools. Label each can clearly and arrange them on a shelf, in a divided bin, or on a wall-mounted board.
For removable storage, attach strong magnets to the cans and place them on a suitable metal panel. Test the weight before trusting the setup with heavy hardware. A magnetic can full of washers is convenient; a magnetic can suddenly dropping washers across the garage is an unscheduled scavenger hunt.
9. Make a Responsible Bird Feeder
A large can can be mounted horizontally and fitted with a small perch, or hung securely with weather-resistant wire. Smooth every edge, create drainage holes, and position the feeder where birds have a clear view of approaching predators.
Feeders must be cleaned regularly. Audubon notes that inviting birds into a yard carries a responsibility to maintain feeders and take precautions against disease, predators, and window collisions. Avoid mounting a homemade feeder where spilled seed will create persistent messes or attract unwanted rodents.
10. Create a Carnival-Style Game
Paint six to ten cans in bright colors, add numbers or funny faces, and stack them in a pyramid. Players toss beanbags or soft balls to knock them down. This works for birthday parties, school fairs, family reunions, or backyard afternoons when everyone has temporarily forgotten how entertaining gravity can be.
Use lightweight, smooth-edged cans and supervise young children. Good Housekeeping includes a similar stacked-can activity among practical ways to reuse empty food containers.
11. Turn Cans Into Gift Containers
Clean cans with removable lids can become containers for wrapped candy, seed packets, tea bags, craft supplies, or small self-care gifts. Cover the exterior with decorative paper and add a fabric circle, cardstock lid, or reusable cloth wrap on top.
A tiny succulent planted in a decorated can also makes an affordable party favor. Add a care tag and place the plant inside a removable nursery pot so drainage remains manageable.
12. Build Wall-Mounted Storage
Secure several cans to a painted plank for a compact entryway, studio, bathroom, or workshop organizer. Use them for mail, sunglasses, brushes, cords, gardening gloves, or lightweight tools.
Mount the board into studs or use hardware appropriate for the wall and expected load. The concept reflects a broader range of tin-can organizing ideas published by HGTV, Better Homes & Gardens, The Spruce, and home-improvement retailers.
Decorating Styles That Work Well
Modern and Minimal
Use matte black, white, gray, or muted earth tones. Keep embellishments limited and arrange identical cans in straight lines. Simple vinyl labels or small wooden tags create a polished look without turning the project into a glitter emergency.
Rustic Farmhouse
Combine cream or sage paint with burlap, jute, lace, distressed lettering, and natural wood. Leave a small amount of metal visible for contrast, but seal exposed surfaces when the cans will be used outdoors.
Colorful and Playful
Try stripes, polka dots, rainbows, animal faces, or bold geometric shapes. This style is ideal for children’s rooms, classroom storage, and party decorations. Use age-appropriate, properly cured materials and make certain all rims remain fully covered.
Industrial
Keep the cans metallic and add black labels, numbers, leather tabs, or dark wooden bases. Matching cans can create attractive workshop or kitchen storage without hiding their original character.
Common Tin Can Upcycling Mistakes
Skipping drainage: Plants may survive many decorating decisions, but standing water is rarely one of them. Add several holes and use a saucer.
Painting a dirty surface: Oil, adhesive, and moisture can cause paint to peel. Wash, dry, sand, and prime before applying the final color.
Ignoring the rim: A project is not finished until every sharp area has been removed or securely covered.
Using the wrong adhesive: Paper glue may not hold rope, wood, or heavy embellishments on metal. Select an adhesive designed for the materials involved.
Using open flames casually: Decorative perforations do not make a homemade lantern fireproof. Battery-operated lights offer the glow without most of the risk.
Expecting outdoor projects to remain perfect: Moisture, sunlight, and temperature changes eventually affect paint and metal. Use suitable outdoor coatings, provide drainage, and accept that a little weathering may become part of the design.
When a Tin Can Should Be Recycled Instead
Not every can deserves an artistic comeback. Recycle containers with severe rust, unstable seams, large jagged openings, chemical residue, or damage that makes safe handling difficult. Do not cut, drill, or repurpose aerosol cans, pressurized containers, or cans that held hazardous products unless you are following specific disposal guidance from the manufacturer and local authorities.
When recycling ordinary food cans, remove the contents and rinse away significant residue. Local programs may differ on labels, lids, crushing, and sorting, so follow the instructions provided by your recycling service. Steel and aluminum remain valuable recyclable materials even when a can is not suitable for reuse.
Experience Notes: What Repurposing Tin Cans Teaches You
The first lesson from working with repurposed tin cans is that the simplest projects are often the most successful. It is tempting to begin with a complicated hanging garden featuring twelve cans, three paint colors, hand-lettered labels, and a watering system that appears to require assistance from NASA. In practice, a single well-finished pencil cup or herb planter is a better introduction.
Preparation usually takes longer than decoration. Removing a stubborn label, cleaning adhesive, drying the seams, smoothing the rim, and applying primer may feel unexciting, but these steps determine whether the finished project looks polished or resembles a recycling bin wearing a ribbon. When beginners rush directly into painting, the most common results are peeling finishes, visible glue, and fingerprints preserved for future archaeologists.
Another useful discovery is that cans rarely match as perfectly as expected. Two containers that appear identical on a pantry shelf may have slightly different heights, ridges, rims, or base shapes. This matters when attaching several cans to one board. Arranging everything before drilling or gluing prevents crooked rows and uneven spacing. A cardboard template can make repeated placement much easier.
Planting projects reveal their own lessons. Small cans look adorable, but they contain little soil and can dry out quickly. Herbs growing in them may require more frequent watering than plants in larger pots. Dark-painted metal also warms rapidly in direct sunlight. Positioning the cans where they receive morning light and some afternoon protection can be kinder to roots in hot climates.
Drainage holes need to be large enough to work but not so large that soil constantly escapes. A small piece of mesh, coffee filter, or landscape fabric over the holes can keep potting mix inside while still allowing water to leave. The container should then sit on a saucer or a surface that tolerates moisture and occasional rust marks.
Painted projects teach patience. A coat may feel dry to the touch while remaining soft underneath. Handling it too early can leave dents, smudges, and mysterious fabric patterns. Thin coats and adequate curing time generally create a stronger finish than attempting to cover the entire can with one heroic blast of paint.
Decorative wrapping presents a different challenge. Fabric, paper, and rope must be measured around the widest portion of the can, including raised ridges. Patterns should be aligned before adhesive is applied. Starting at the back creates a cleaner front view, while a narrow overlap hides uneven edges. Felt pads on the bottom are a small addition that dramatically improves the final result by protecting furniture and making the can feel more finished.
Projects for children require adults to complete all cutting, drilling, sanding, and rim preparation. Once the can is safe, children can paint, add stickers, attach foam pieces, or create funny faces. The best children’s projects are useful afterward; a decorated container that holds their own crayons gives the activity a purpose beyond producing another object for the household’s crowded craft shelf.
It also becomes clear that repurposing works best when the new purpose matches the container’s limitations. Tin cans are strong but not indestructible. They may rust, conduct heat, and become sharp when damaged. They are excellent for dry storage, short-term planters, decorative displays, and lightweight organizers. They are not automatically suitable for cooking, long-term wet storage, or any use requiring a certified food-safe surface.
Finally, saving every can is not necessary. Upcycling should solve problems rather than create a metal mountain in the garage. Collect only the sizes needed for planned projects, clean them promptly, and recycle the rest. The most satisfying experience comes from turning a specific discarded object into something genuinely usefulnot from becoming the neighborhood’s unofficial curator of empty bean cans.
Conclusion
Repurposed tin cans prove that practical home projects do not need expensive materials. With thoughtful cleaning, careful edge preparation, suitable paint, and a clear purpose, an ordinary food container can become attractive storage, garden decor, a handmade gift, or a useful household tool.
The best approach is to begin small. Transform one can into an organizer or planter, learn how the metal responds to sanding and paint, and then build a coordinated set. When a container is too damaged or unsuitable for crafting, place it in the proper recycling stream rather than forcing it into a project.
Tin can upcycling is affordable, flexible, and forgiving. Even an imperfect result can hold paintbrushes. That is more than can be said for many ambitious weekend projects.
Note: Adults should perform all cutting, drilling, filing, and rim preparation. Follow paint and adhesive labels, use eye and hand protection when working with metal, and choose flameless LED lights instead of open flames whenever possible.