

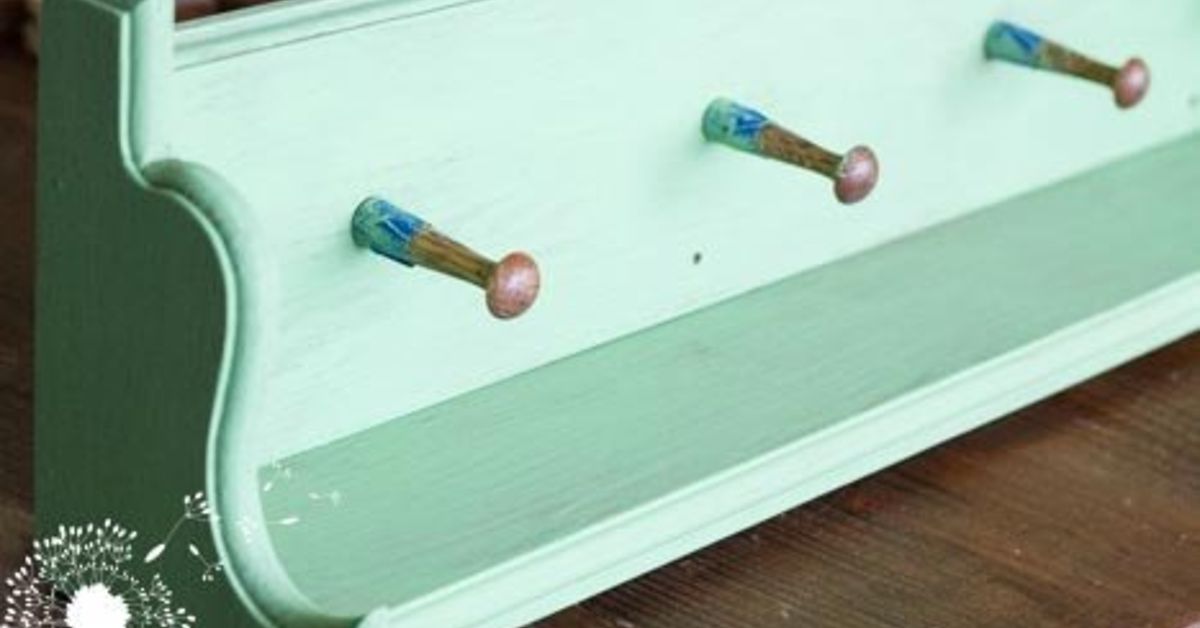
Some furniture arrives with a story. Other pieces arrive in a flat-packed box, accompa instruction sheet. A rustic charm aged finish helps close that gap. It gives wood, cabinets, picture frames, tables, and décor the relaxed character of something that has survived family dinners, rainy boots, busy holidays, and at least one overly enthusiastic dog.
The appeal is not about making a piece look neglected. It is about creating depth, warmth, and a believable sense of history. A well-executed aged finish lets natural grain, layered paint, softened edges, and gentle variation do the talking. The result can feel farmhouse-friendly, cabin-cozy, cottage-inspired, or surprisingly modern when paired with clean lines and simple décor.
Best of all, rustic finishes are not reserved for antique-store treasures. With thoughtful prep, the right materials, and a little restraint, a plain thrifted dresser or inexpensive pine bench can gain the personality of a cherished heirloom. The secret is making it look naturally worn, not like it lost a wrestling match with a belt sander.
What Makes a Rustic Aged Finish Look Authentic?
A rustic aged finish is built on variation. Real furniture does not wear evenly from corner to corner, and neither should a faux-aged piece. The most convincing finishes show subtle changes in color, texture, sheen, and edge wear. They suggest years of use without trying too hard to announce, “Hello, I was distressed on Saturday afternoon.”
Think about where a piece would naturally age. Drawer pulls, chair arms, table edges, cabinet corners, and raised carvings receive the most contact. Those areas may reveal a lighter layer of paint, a darker glaze, or exposed wood. Flat center panels, by contrast, usually remain more intact. When distressing follows the logic of actual use, the result feels believable.
Color matters just as much as texture. Warm whites, soft cream, mushroom gray, faded sage, weathered blue, clay red, charcoal, and deep brown often work beautifully in rustic interiors. Aged finishes usually look richer when they include at least two tones: a base color and a second layer, glaze, wash, or wax that settles into details and creates dimension.
Rustic Does Not Mean Rough Around Every Edge
There is a fine line between charmingly timeworn and accidentally abandoned at the curb. The goal is controlled imperfection. You want enough wear to create visual interest, but not so much that guests worry the furniture might crumble when someone sets down a coffee mug.
Aged finishes work best when the materials still feel intentional. Smooth drawers should slide. Tabletops should remain usable. Chairs should be sturdy. The finish can tell a story, but the structure should not be part of a suspense novel.
Choosing the Right Piece for an Aged Finish
Almost any solid, stable piece can become a rustic focal point, but some projects are easier than others. Side tables, benches, wooden stools, picture frames, old dressers, shelving units, and unfinished pine furniture are excellent starting points. They have manageable surfaces and enough corners, edges, and details to make distressing look natural.
Wood with visible grain is especially rewarding. Oak, pine, maple, and reclaimed boards can take stain, wash, glaze, or paint in different ways, producing a finish with movement and personality. Wood veneers can also be painted, but they should be handled gently. Sanding too aggressively may cut through the thin veneer layer and create a surprise nobody ordered.
Before starting, inspect the piece for loose joints, damaged hardware, grease, wax buildup, peeling finish, or water damage. Repair structural issues first. Tighten screws, glue loose sections, fill obvious holes when needed, and clean the surface thoroughly. A beautiful aged finish cannot compensate for a drawer that opens only after a dramatic shoulder tackle.
Five Ways to Create Rustic Charm With an Aged Finish
1. Layered Paint and Gentle Distressing
Layered paint is one of the classic ways to create a rustic aged finish. Start with a darker or warmer base color, then apply a lighter top coat. Once the paint dries, lightly sand selected edges and raised details to reveal glimpses of the layer beneath.
For example, a dark brown or charcoal base under warm ivory paint can create a traditional farmhouse look. A muted blue base beneath creamy white feels coastal and relaxed. Sage green over warm gray gives furniture a garden-inspired cottage vibe.
Use fine-grit sandpaper and work slowly. Focus on areas that would realistically receive wear: corners, drawer edges, knobs, armrests, feet, and raised carvings. Sanding random giant patches in the middle of a cabinet door rarely looks natural unless the cabinet has spent several years being chased by raccoons.
2. Chalk-Style Paint for a Soft, Matte Look
Chalk-style paint is popular for rustic furniture because its matte appearance already has a softened, low-sheen quality. Brushstrokes can become part of the design rather than something to hide. This makes it especially friendly for beginners who want character without the pressure of producing a factory-smooth finish.
Apply thin, even coats and let each layer dry fully. Once the piece is painted, lightly sand small areas to reveal wood or a contrasting paint color. For more depth, add a clear or dark furniture wax. Clear wax protects the finish while maintaining the original color. Dark wax can settle into corners and details, adding an antique-style shadow effect.
Use dark wax sparingly. It is easier to add more than to remove too much. A little can create depth; a heavy-handed application can make a bright white cabinet look as though it spent the weekend inside a chimney.
3. Glaze for Depth and Antique Character
A glaze is one of the best tools for making a newly painted piece look layered and mature. Because glaze is translucent, it can settle into grooves, molding, brush texture, and recessed details while allowing the paint beneath to remain visible.
To use it, paint the piece first and allow the base coat to cure according to the product instructions. Brush or wipe glaze over a manageable section, then remove some of it with a clean cloth. Leave more glaze in crevices and around decorative details. The goal is subtle shadow, not a dramatic mud mask.
Brown, gray, black, and warm umber glazes are especially useful for rustic furniture. A cool gray glaze can create a weathered coastal effect, while brown or umber gives cream and white furniture a warmer, old-world finish.
4. Dry Brushing for Highlighted Texture
Dry brushing is a simple technique that adds visual texture without covering the entire surface. Dip only the tips of a stiff brush into paint, then remove most of the paint on a paper towel or rag. Lightly drag the brush over edges, grain, carvings, and raised areas.
This technique works well when you want a layered finish but do not want to sand. A pale dry brush over dark brown wood can create a driftwood effect. A warm white dry brush over black or dark green paint can soften a heavy piece and make carved details more visible.
The key word is “dry.” When too much paint is left on the brush, dry brushing turns into regular painting with an identity crisis. Keep the paint light, build slowly, and step back often to check the balance.
5. Weathered Wood Stain and Natural Grain
Sometimes the most rustic option is to skip paint entirely and highlight the wood itself. A weathered stain, gray wash, or aged wood treatment can make new lumber look more relaxed and timeworn while allowing the grain to remain visible.
For a softer look, apply a diluted paint wash or whitewash, then wipe off the excess. This creates a pale, sun-faded appearance that works beautifully on pine, oak, shelves, tables, and decorative beams. For a darker look, use a brown, walnut, or weathered oak stain and layer a lighter dry-brushed color over it after the stain has dried.
A vinegar-and-steel-wool solution is another commonly used technique for aging bare wood. It can darken and weather the surface, but results vary by wood species because different woods contain different amounts of tannin. Always test the treatment on an offcut or hidden area first. A test board may not be glamorous, but neither is explaining why your “weathered oak” project turned vaguely purple.
A Simple Step-by-Step Process for an Aged Furniture Finish
- Clean the surface: Remove dust, grease, wax, and residue with an appropriate cleaner. Let the piece dry completely.
- Repair what needs attention: Tighten joints, replace broken hardware, and fill unwanted dents or holes if they do not suit the look.
- Scuff sand when necessary: Light sanding helps paint adhere to glossy finishes. Use a gentle touch, especially on veneer.
- Apply the base layer: Choose a darker paint, stain, or natural wood tone that will peek through later.
- Add the top color: Apply one or two thin coats of your main paint color. Allow each coat to dry thoroughly.
- Create selective wear: Sand or dry brush corners, edges, knobs, and raised details. Keep the pattern logical and restrained.
- Add glaze or wax: Use a translucent glaze or furniture wax to deepen details and soften the contrast between layers.
- Seal for real life: Finish with a suitable wax, water-based topcoat, or durable protective sealer, particularly on tabletops, kitchen furniture, and heavily used surfaces.
For tabletops and dining furniture, durability deserves special attention. A rustic finish should survive actual meals, not merely look photogenic beside a bowl of decorative lemons. Choose a protective finish appropriate for the product and surface, and allow the recommended curing time before daily use.
How to Style Rustic Aged Furniture in Any Room
An aged finish does not require an entire house filled with wagon wheels and mason jars. In fact, rustic charm usually looks stronger when it appears in measured doses. Use one or two aged pieces as anchors, then combine them with simpler materials and cleaner shapes.
In a living room, a weathered coffee table can pair beautifully with a tailored sofa, linen pillows, woven baskets, and a ceramic lamp. In a kitchen, a painted hutch with soft edge distressing can warm up modern cabinets. In a bedroom, an aged wood bench at the foot of the bed adds texture without overwhelming the room.
For a modern rustic look, mix aged wood with matte black hardware, simple lighting, neutral walls, and natural fabrics. For a cottage look, use softer whites, faded blues, florals, and vintage brass accents. For a farmhouse style, combine warm woods, black metal, creamy paint, and practical storage pieces that look ready for both breadboards and board games.
Maintaining an Aged Finish Without Erasing Its Character
Rustic furniture needs gentle care, not babying. Dust regularly with a soft cloth, wipe spills promptly, and use coasters, placemats, and trivets on tables. Avoid abrasive cleaners and harsh ammonia-based products, which can dull or damage the protective layer.
If wax was used, refresh it occasionally based on wear. If a painted edge becomes too worn over time, touch it up lightly rather than repainting the entire piece. The beauty of an aged finish is that small marks and changes can blend into the story instead of becoming a decorating emergency.
Safety Notes Before Distressing Older Furniture
Be cautious when sanding, scraping, or stripping older painted furniture, especially pieces that may have been painted decades ago. Homes built before 1978 may contain lead-based paint, and disturbing old paint can create hazardous dust. Test older painted surfaces when appropriate, keep children and pregnant people away from the work area, contain dust, and use lead-safe practices.
Wear appropriate eye protection, gloves, and a properly fitted mask for sanding and refinishing tasks. Work in a well-ventilated area, follow product labels closely, and avoid rushing the drying and curing stages. A rustic finish is supposed to add charm to your home, not turn your garage into a chemical experiment with a soundtrack.
Conclusion: Let the Finish Tell a Believable Story
Rustic charm aged finishes work because they bring warmth and individuality into a space. They celebrate grain, texture, softened paint, imperfect edges, and the quiet beauty of furniture that looks lived with rather than freshly shrink-wrapped.
Whether you choose chalk-style paint, layered colors, weathered stain, glaze, dry brushing, or a combination of techniques, the best results come from observation and restraint. Make wear appear where life would leave it. Let some wood show through. Build color gradually. Protect the final finish. Most importantly, give the piece enough personality to feel collected over time, not attacked all at once.
Experiences With Rustic Charm Aged Finish: Lessons From Real DIY Projects
The first time I tried a rustic aged finish, I made every beginner mistake available, plus a few that may deserve their own category. I started with an inexpensive pine side table that looked perfectly innocent. It had smooth surfaces, plain legs, and the emotional presence of an office waiting room. My plan was simple: paint it white, sand it a little, add some dark wax, and admire my new “vintage” furniture.
Instead, I applied too much paint, sanded too much in the wrong places, and used dark wax as if I were frosting a cake for someone who had personally offended me. The table came out looking less like a hundred-year-old farmhouse find and more like it had been rescued from the bottom of a very dusty pirate ship.
But the project taught me the most important lesson about rustic finishes: subtlety is not boring. Subtlety is what makes the finish believable. On my next attempt, I used a softer gray base, a warm cream top coat, and fine sandpaper. I focused only on the drawer edges, corners, and around the original wood knob. That second table looked calmer, more natural, and much more expensive than it actually was. It also taught me that nobody needs to know how many times a piece was repainted before it became “intentional.”
Another memorable project involved an old dresser found at a neighborhood sale. It had good bones, solid drawers, and a finish that could best be described as “sad orange varnish.” Beneath that color, though, was beautiful wood. I cleaned it, lightly sanded it, painted it a faded green, and used a brown glaze in the recessed drawer panels.
The glaze changed everything. At first, the dresser looked simply painted. Once the glaze was wiped into the details, it gained depth. The recessed areas looked older, the drawer fronts looked more dimensional, and the simple wood trim suddenly seemed deliberate. The result was not an exact antique reproduction, but it had enough visual history to feel special. It became the kind of piece people touch when they walk past it, which is either a compliment or a sign that guests need more hobbies.
I have also learned that aged wood finishes can be wonderfully unpredictable. A weathered stain may look perfect on oak and completely different on pine. A gray wash can feel elegant on one board and slightly lavender on another. A vinegar-and-steel-wool treatment can bring out dramatic variation in reclaimed lumber, but it can also surprise you if the wood has knots, uneven grain, or a different natural tannin level.
That unpredictability is not always a problem. It can become part of the charm when you stop expecting every board to behave like a digital image. The best rustic projects often have slight differences between planks, brushstrokes, corners, and layers. Those little variations keep the finish from looking machine-made.
One of my favorite transformations was a plain wooden bench used near an entryway. It was functional but forgettable, the furniture equivalent of plain toast. I applied a medium brown stain, let it dry, then dry-brushed a soft off-white paint across the grain. After sealing it, the bench looked weathered without being overly pale or shabby. With a woven basket below it and a simple linen cushion on top, it became one of the most useful pieces in the room.
The experience reminded me that rustic design does not need to be dramatic. A small bench, old frame, cabinet door, tray, or wall shelf can bring enough warmth to change a room. You do not need to transform every surface into reclaimed barn wood. Sometimes one aged accent piece is more effective than a full-scale decorating stampede.
Over time, I have come to appreciate the forgiving nature of aged finishes. On a glossy modern surface, a tiny scratch can feel tragic. On a well-finished rustic piece, a small new mark often blends in. It becomes another chapter in the furniture’s story. That does not mean you should invite chaos with a set of keys and a toddler armed with markers, but it does mean the piece can live a little.
That may be the real beauty of rustic charm aged finishes: they make a home feel less precious and more personal. They welcome imperfect moments, practical use, and objects that gain character over time. Aged furniture does not demand perfection. It quietly suggests that a few signs of life are not flaws at all.
Note: Always test paint, stain, glaze, wax, and distressing techniques on a hidden area or sample board before applying them to the full piece.