

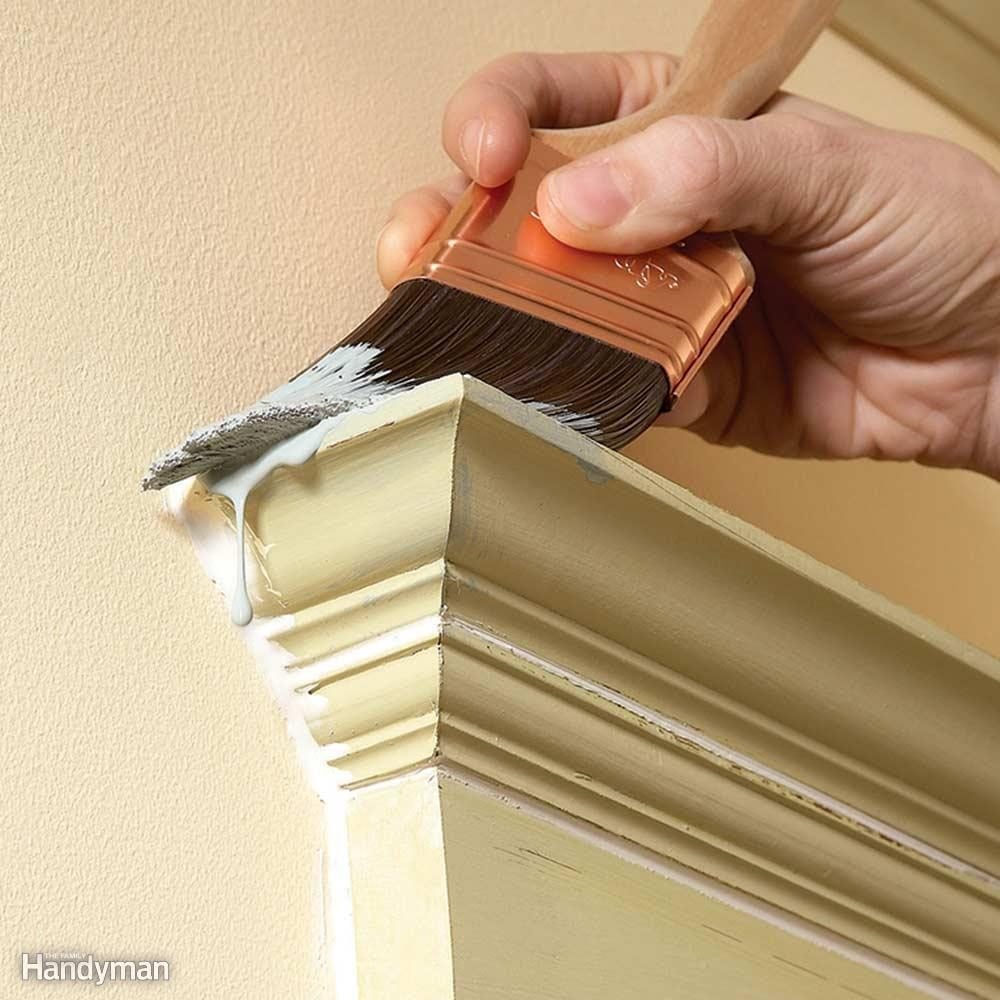
Painting trim sounds simple until you are crouched beside a baseboard at 9:47 p.m., holding a tiny brush, whispering motivational speeches to a bead of paint that absolutely refuses to behave. Walls are forgiving. Ceilings are distant. Trim, however, is the diva of interior painting. It catches light, collects dust, frames every doorway, and tells visitors whether you prepped like a pro or painted like a raccoon with a weekend deadline.
The good news? Smooth, flawless trim paint is completely achievable for DIYers. You do not need a contractor’s van, a secret handshake, or 27 years of apprenticeship. You need the right prep, the right paint, the right brush, and enough patience to let coats dry before touching them. This guide breaks down the best trim paint tips for baseboards, door casing, window trim, crown molding, and interior doors so your finish looks crisp, durable, and professionally done.
Why Trim Paint Is Different From Wall Paint
Trim gets more abuse than most surfaces in your home. Baseboards meet shoes, vacuum cleaners, pet fur, mop water, and the mysterious black scuffs that appear even when no one admits to making them. Door casing is grabbed, bumped, brushed, and occasionally attacked by furniture during “quick” room rearrangements. Because trim is high-contact, trim paint should be harder, smoother, and easier to clean than standard wall paint.
That is why satin, semi-gloss, and gloss finishes are popular choices for trim. A higher sheen reflects more light, which gives trim a crisp architectural edge. It also improves wipeability. The trade-off is that shiny paint reveals flaws more easily. Every bump, brush mark, dust nib, and old drip gets a tiny spotlight. In other words, glossy trim paint is honest. Sometimes brutally honest.
Choose the Right Trim Paint Before You Open the Can
Interior trim paint should level well
For smooth and flawless results, look for paint labeled for trim, doors, cabinets, or enamel finishes. These paints are usually designed to level better than basic wall paint. “Leveling” means the wet paint relaxes after brushing so brush marks soften as it dries. A good trim enamel can make your brushwork look much better than it deserves, which is exactly the kind of teamwork we appreciate.
Water-based enamel is DIY-friendly
Modern water-based acrylic or urethane-modified enamel is a strong choice for most DIY trim projects. It dries faster than traditional oil-based paint, cleans up with soap and water, and resists yellowing better over time. Oil-based paint can still deliver a beautiful hard finish, but it has stronger odor, longer dry times, and more complicated cleanup. For most homeowners painting interior trim, a premium water-based trim enamel is the practical sweet spot.
Use the right sheen for the room
Satin works well when you want a softer, more modern look. Semi-gloss is the classic choice for baseboards, doors, and window trim because it balances durability with shine. High gloss can look stunning on perfectly prepared trim, but it is not forgiving. If your molding has dents, old paint ridges, or the emotional history of three previous owners, semi-gloss may be the wiser and kinder choice.
Gather the Best Tools for Painting Trim
Great trim painting starts before the paint touches the wood. Cheap tools can leave bristles, streaks, lint, and regret. You do not need the most expensive products in the aisle, but you should avoid bargain-bin brushes that look like they were assembled during a windstorm.
Recommended tools and supplies
- 2-inch or 2.5-inch angled sash brush
- Fine-grit sanding sponge, usually 180 to 220 grit
- Medium-grit sanding sponge for rough trim, around 120 to 150 grit
- Vacuum with brush attachment
- Tack cloth or slightly damp microfiber cloth
- Painter’s tape
- Drop cloths or rosin paper
- Wood filler or spackling compound
- Paintable acrylic latex caulk
- Quality primer
- Trim enamel paint
- Small paint pail instead of painting directly from the can
A soft or medium-stiff synthetic brush is often best for water-based trim paint. Softer bristles help reduce brush marks on smooth surfaces, while an angled sash brush gives control along edges and profiles. For flat doors or wide baseboards, a small high-density foam roller or smooth woven mini roller can speed up coverage, but back-brushing may still be needed on detailed profiles.
Start With a Clean Surface
Paint does not like dirt, grease, wax, dust, or mystery residue. Trim can look clean from standing height, but once you kneel down, you may find dust packed along the top edge of baseboards like a tiny gray mountain range. Before sanding or painting, wash the trim with a mild cleaner or degreasing solution, especially in kitchens, bathrooms, and high-traffic areas.
Use a damp cloth and avoid soaking the wood. If the trim is greasy, a gentle degreaser can help. Rinse with a clean damp cloth afterward so cleaner residue does not interfere with adhesion. Let the surface dry completely. Painting damp trim is like putting a tuxedo on someone who just stepped out of a swimming pool: technically possible, but not a good plan.
Repair Dents, Nail Holes, and Gaps
One of the biggest secrets to professional-looking trim paint is that the painting part is not the whole job. Repairs matter. Fill nail holes, dents, gouges, and open seams before you prime. Use wood filler for deeper imperfections in wood trim and lightweight spackle for small nail holes or shallow dings. Slightly overfill the hole because filler often shrinks as it dries.
After the filler dries, sand it flush with the surrounding surface. Run your fingers over the repair. Your hand will catch flaws your eyes miss. If you can feel a ridge, the paint will probably show it. Smooth now, brag later.
Caulk the gaps, not the details
Use paintable caulk where trim meets the wall, around door casing gaps, and along crown molding seams. Cut the caulk tube tip small. A giant bead of caulk may feel efficient, but it creates a lumpy edge that looks like the trim is wearing frosting. Apply a thin bead, smooth it with a damp finger or caulk tool, and wipe away excess. Let the caulk dry according to the label before painting.
Do not caulk joints that are meant to move freely, and do not use silicone caulk unless the label clearly says it is paintable. Standard silicone rejects paint like a cat rejects obedience.
Sand for a Smooth Trim Finish
Sanding is where DIY trim painting becomes serious. Even if your trim looks smooth, lightly sanding helps dull glossy old paint and gives the new coat better grip. For trim in decent shape, use a 180- or 220-grit sanding sponge. For rough, chipped, or heavily layered trim, start with a coarser grit such as 120 or 150, then finish with 220.
Sanding sponges are excellent for trim because they flex into curves, grooves, and molded profiles. Sand with the direction of the trim when possible. You are not trying to remove every bit of old paint; you are trying to smooth rough areas, knock down ridges, and create a surface that primer and paint can hold onto.
Important safety note for older homes
If your home was built before 1978, assume old paint may contain lead unless testing proves otherwise. Do not aggressively sand, scrape, or disturb old paint without lead-safe precautions. Use an EPA-recognized test kit, consult local guidance, or hire a certified professional when needed. Lead dust is not a DIY badge of honor; it is a serious health hazard, especially for children and pregnant people.
Remove Every Speck of Dust
Dust is the tiny villain of flawless trim painting. It hides in corners, waits for your wet paint, then pops up as gritty bumps. After sanding, vacuum the trim, floor edge, and surrounding wall. Then wipe the trim with a tack cloth or a lightly damp microfiber cloth. Do not skip this. A clean surface can be the difference between “smooth enamel finish” and “textured oatmeal surprise.”
Also clean the room. If you sand and immediately start painting while dust is still floating in the air, some of it will land in the finish. Give the dust a little time to settle, vacuum, then paint.
Prime Like You Mean It
Primer is not always glamorous, but it is often the difference between trim paint that lasts and trim paint that peels when someone looks at it with attitude. Use primer on bare wood, patched areas, stained trim, glossy old paint, knots, water stains, or when changing from a dark color to a light one.
For previously painted trim in good condition, you may not need a full primer coat if the new trim paint is compatible and the surface has been cleaned and scuff-sanded. However, spot-prime bare areas and repairs. If you are painting stained or varnished wood, use a bonding primer or stain-blocking primer. Otherwise, tannins and knots may bleed through your crisp white finish like tiny brown ghosts.
Master the Brush Technique
The best brush technique for painting trim is simple: load the brush properly, apply the paint evenly, and finish with long, light strokes. Dip only about one-third of the bristles into the paint. Tap the brush against the side of the pail instead of scraping it hard. Scraping removes too much paint and leaves you with a dry brush that drags across the trim.
Work in small sections
Paint a few feet of trim at a time. First, apply paint with short strokes to cover the surface. Then, without reloading the brush, make one long, smooth finishing stroke in the direction of the trim. This helps blend the short marks into a clean, continuous finish. On baseboards, move along the length of the board. On door casing, follow the vertical or horizontal direction of each piece.
Use light pressure
Pressing too hard spreads the bristles and leaves grooves. Let the brush glide. Think “polishing a fancy car,” not “scrubbing a casserole dish.” Light pressure allows the paint to release evenly and level as it dries.
Keep a wet edge
Do not brush back into paint that has already started to set. Water-based enamel can begin drying quickly, especially in warm or dry rooms. If you overwork half-dry paint, you will create drag marks and rough texture. Move steadily, maintain a wet edge, and resist the urge to “fix” every tiny line. Many brush marks settle down as the paint levels.
Apply Thin Coats, Not Hero Coats
Thick paint coats are tempting because they look like progress. Unfortunately, they also create drips, sags, slow drying, soft finishes, and visible brush ridges. Smooth trim paint comes from multiple thin coats, not one heroic blob coat. Two thin coats usually look better and last longer than one heavy coat.
Watch corners, grooves, and lower edges where paint collects. If you see a drip forming, brush it out immediately while the paint is wet. Check back after a few minutes because sneaky drips sometimes appear after you move on. Trim paint has a sense of humor, and not always a kind one.
Sand Between Coats for a Flawless Finish
For the smoothest trim paint results, lightly sand between coats after the paint has dried fully. Use a fine sanding sponge, usually 220 grit or finer. The goal is not to remove the new paint. You are simply knocking down dust nibs, raised grain, and tiny imperfections. After sanding, vacuum and wipe the surface again before applying the next coat.
This one step makes a noticeable difference. If you have ever wondered why professional trim feels silky while rushed DIY trim feels slightly bumpy, sanding between coats is often the answer. It is not exciting, but neither is flossing, and dentists seem pretty confident about that one too.
Painter’s Tape: Helpful Tool or False Security?
Painter’s tape can help protect walls and floors, but it is not magic. Paint can bleed under poorly applied tape, especially on textured walls or dusty surfaces. Press tape down firmly with a putty knife or painter’s tool. For extra-crisp lines, some DIYers seal the tape edge with a thin swipe of the wall color or clear paintable caulk before applying trim paint.
Remove tape at the right time. If you pull too early, wet paint may smear. If you wait too long, cured paint may tear. Many painters remove tape while the final coat is still slightly soft, pulling slowly at a 45-degree angle. Always follow the paint and tape manufacturer’s recommendations.
Painting Baseboards Without Making a Mess
Baseboards are the most common trim painting project and also the most likely to involve awkward body positions. Start by protecting the floor with rosin paper, drop cloths, or painter’s tape. Vacuum along the baseboard edge before painting because floor dust loves wet enamel.
If you are painting baseboards after the walls, use painter’s tape along the wall edge or cut in carefully with an angled brush. Paint the top edge first, then the face, then the lower edge. Keep checking for paint buildup along the bottom lip. A small artist brush can help with tight corners, but do not use one for the whole job unless you want to finish sometime next fiscal year.
Painting Door and Window Trim
Door and window trim has more corners, profiles, and shadow lines than baseboards, so work methodically. Start with inside edges and detailed grooves, then paint wider flat areas. Brush with the grain or length of each trim piece. On window trim, avoid painting the sash shut. Let paint dry thoroughly before closing windows or doors, especially in humid conditions.
For doors, remove hardware when possible. If you cannot remove it, tape carefully around hinges and knobs. Paint recessed panels first, then rails and stiles, working from top to bottom. A mini roller can help on flat door slabs, followed by a light brush pass if you want a more traditional brushed finish.
Control Temperature, Humidity, and Airflow
Paint behaves differently depending on the room conditions. If the air is too hot or dry, paint may set before it levels, leaving brush marks. If the room is too humid or cold, paint may dry slowly and stay tacky. Most interior paints perform best in moderate temperatures with decent ventilation. Check the label for the recommended range.
Ventilation is important, but do not aim a fan directly at wet trim. Strong airflow can dry the surface too quickly and blow dust into the finish. Instead, create gentle air movement in the room. Open a window when weather allows, run a fan nearby but not directly on the trim, and give the paint time to cure before heavy cleaning or abuse.
Common Trim Painting Mistakes to Avoid
Skipping prep
This is the classic DIY shortcut that becomes visible forever. Paint magnifies rough filler, dust, grease, and old drips. Prep is not the warm-up act; it is half the show.
Using the wrong brush
A low-quality brush can leave bristles and heavy streaks. Use a good angled sash brush designed for the type of paint you are applying.
Overloading the brush
Too much paint causes drips and ridges. Dip one-third of the bristles, tap off excess, and apply thin coats.
Reworking drying paint
Once paint starts to tack up, leave it alone. Fix imperfections after it dries by sanding lightly and recoating.
Ignoring cure time
Dry paint is not the same as cured paint. Trim may feel dry within hours but can take days or weeks to reach full hardness. Be gentle with cleaning, furniture, and door closing during that period.
Example DIY Workflow for Smooth Trim Paint
Here is a practical step-by-step schedule for painting interior baseboards in a bedroom:
- Move furniture away from the walls and protect the floor.
- Clean baseboards with a mild cleaner and let them dry.
- Fill nail holes and dents with wood filler or spackle.
- Caulk gaps between the wall and trim with paintable caulk.
- Sand the trim with a fine sanding sponge.
- Vacuum and wipe away all dust.
- Spot-prime repairs and bare wood, or prime all trim if needed.
- Apply the first thin coat of trim enamel.
- Let it dry fully according to the label.
- Sand lightly, clean dust, and apply the second coat.
- Remove tape carefully and let the trim cure before heavy use.
This process takes longer than simply slapping paint on the baseboards, but the difference is obvious. The trim looks cleaner, feels smoother, and holds up better to daily life.
Advanced Tips for a Professional-Looking Finish
Strain old paint before using it
If your paint has been sitting for a while, strain it through a paint filter before brushing it onto trim. Dried bits from the can rim can ruin an otherwise smooth coat.
Use a paint pail
Pour a small amount of paint into a handheld pail. It is easier to control, keeps the main can cleaner, and reduces the chance of dropping a full gallon on your floor. Your floor appreciates this.
Paint trim before walls when renovating
If you are repainting an entire room, many pros paint trim first, then walls. Once the trim cures, they tape it off and paint the walls. This can make cutting cleaner because trim is usually harder and smoother than wall paint.
Feather touch-ups
Touch-ups can flash if the sheen or texture differs from the surrounding paint. For best results, lightly sand the damaged area, clean it, and feather the new paint beyond the repair rather than dabbing one thick spot.
DIY Experience Notes: What Actually Makes Trim Look Smooth
After painting enough trim, you start to learn that the prettiest finish usually comes from the least dramatic habits. The first lesson is that rushing almost always shows. I once painted a hallway baseboard after convincing myself that “good enough sanding” was a real category. It was not. The next morning, sunlight hit the trim and revealed every old paint ridge like a tiny topographical map. The fix took longer than doing it right the first time: sand, wipe, prime, repaint, and quietly apologize to the hallway.
The second lesson is that brush control matters more than muscle. Beginners often press harder when they want more coverage, but trim paint responds better to a loaded brush and light pressure. A brush should glide, not plow. When the brush starts to chatter or skip, it usually needs more paint, not more force. If the paint feels sticky as you brush, stop working that section. Let it dry, sand it smooth, and apply another thin coat. Wet paint can be adjusted; tacky paint should be left alone like a sleeping dog with trust issues.
The third lesson is that dust removal is not optional. Trim sits near floors, windows, and doorways, which means it collects the finest dust in the room. If you sand and only wipe the front face of the baseboard, dust hiding on the top edge can slide into your brush on the next pass. Vacuuming first, then wiping with a microfiber cloth, gives you a cleaner result. It feels fussy until you see how much smoother the finish looks.
Another experience-based tip: do not paint trim when the household is in full motion. Pets, kids, laundry baskets, and wet semi-gloss are not a peaceful combination. If possible, paint one area at a time and create a clear “no-touch zone.” Doors are especially tricky because people forget they are wet approximately seven seconds after being told. A small note on painter’s tape can save your finish and your patience.
Finally, respect cure time. Trim paint may be dry to the touch today, but it may not be ready for scrubbing, slamming doors, or pushing furniture back against it. Give freshly painted baseboards and door trim a gentler first week. The finish will harden, clean better, and last longer. Smooth trim is not created by one perfect brushstroke; it is built through clean prep, thin coats, light sanding, and patience. Yes, patience is annoying. But so are brush marks, and patience is easier to paint over.
Conclusion
Smooth and flawless trim paint is not about luck. It is about preparation, product choice, and technique. Clean the trim thoroughly, repair flaws, sand until the surface feels smooth, remove every trace of dust, prime where needed, and apply thin coats with a quality brush. Let each coat dry fully, sand lightly between coats, and avoid overworking paint once it starts to set.
The reward is huge. Freshly painted trim makes a room look sharper, brighter, and more finished. It frames your walls, doors, windows, and floors like a clean picture frame. And unlike some DIY projects that require power tools, permits, and emotional support snacks, trim painting is approachable for careful beginners. Take your time, trust the process, and your baseboards will stop looking tired and start looking like they have their life together.
Note: This article is written as original, publish-ready content and is based on widely accepted DIY painting practices, current paint manufacturer guidance, tool recommendations, and lead-safe renovation principles for older homes.