

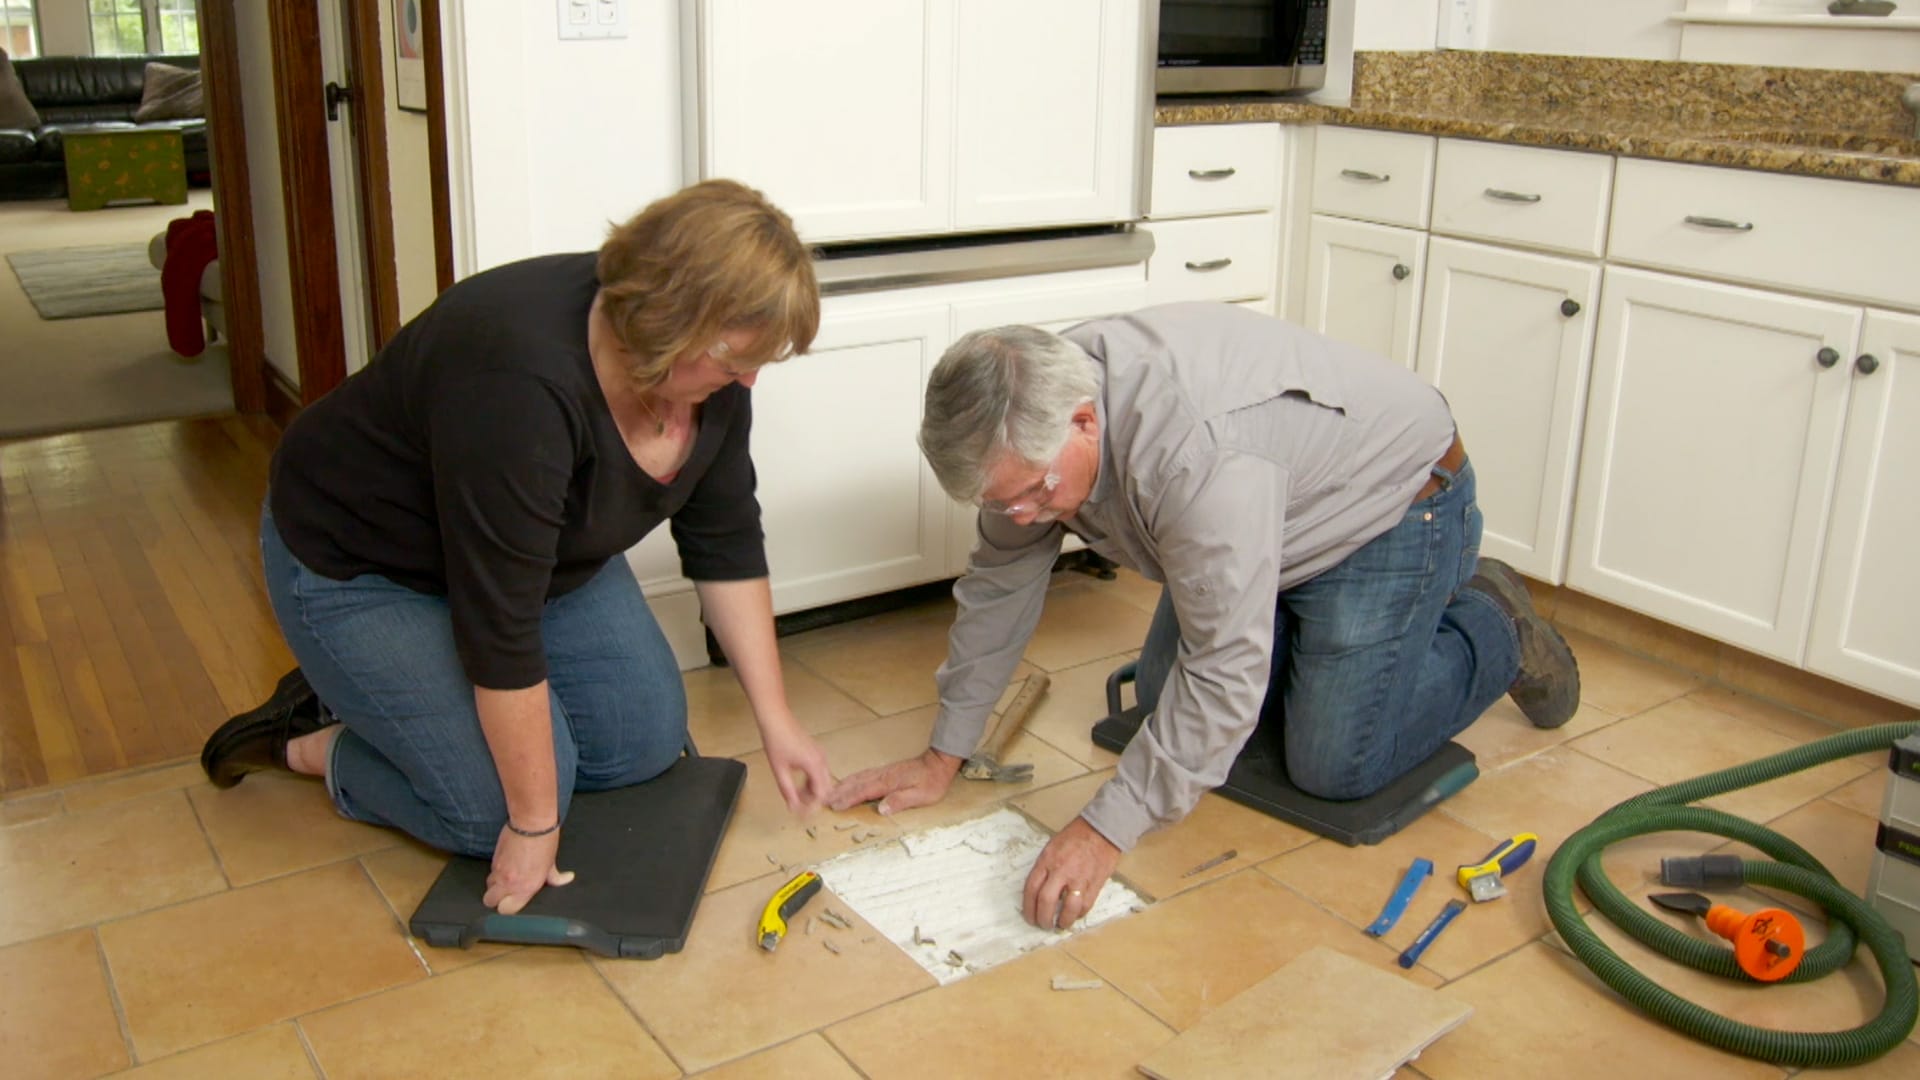
A cracked floor tile has a special talent for attracting your eye every time you enter over it, and walk around it like it is protected by an invisible fencebut the crack will still be there, quietly judging your home-maintenance priorities.
The good news is that replacing one damaged ceramic, porcelain, or natural-stone tile is usually a manageable DIY project. You do not need to demolish the entire floor, rent a jackhammer, or begin referring to your kitchen as “the construction zone.” With the right replacement tile, careful removal, compatible setting mortar, and a little patience, you can make the repair blend into the surrounding floor.
The most important part of the job is understanding that the visible crack may only be the symptom. Impact damage is straightforward, but repeated cracks can point to floor movement, poor mortar coverage, moisture damage, or a cracked substrate. Before installing the replacement, take a moment to investigate what caused the original tile to fail. uld You Repair the Crack or Replace the Tile?
Not every small flaw requires complete tile replacement. A narrow hairline crack or tiny chip in a low-visibility area may be filled with a color-matched tile repair compound or two-part epoxy. This is primarily a cosmetic repair, however. The line may remain visible, and the epoxy will not correct movement beneath the tile.
Replacement is generally the better choice when:
- The crack extends across most or all of the tile.
- The tile has loose, sharp, or missing pieces.
- The tile moves or sounds loose when stepped on.
- The damage is in a wet area where water could reach the substrate.
- The tile creates a trip hazard.
- You already have an exact replacement tile available.
If several tiles are cracked in a straight line, replacing one tile may not solve the real problem. A line of damage can follow a crack or joint in the concrete below. Likewise, widespread cracked grout, bouncing floors, or recurring loose tiles may indicate excessive movement. In those situations, a qualified tile contractor or structural professional should evaluate the floor before you continue.
Find a Matching Replacement Tile
The easiest replacement comes from leftover tile stored after the original installation. Check the garage, attic, basement, utility closet, or that mysterious stack of boxes nobody has opened since moving day.
If you do not have a spare, look for the manufacturer, collection name, color, finish, size, and production information on old receipts or unopened cartons. Measure the tile precisely. A tile advertised as 12 inches square may have a smaller actual dimension, and even a slight difference can make the grout joints look uneven.
Bring a loose fragment to a flooring retailer when shopping for a match. Compare more than the base color. Pay attention to:
- Surface texture and sheen
- Edge shape
- Pattern direction
- Thickness
- Color variation
- Actual length and width
If an exact match is unavailable, consider borrowing an original tile from a hidden area, such as beneath an appliance or inside a closet, and placing the closest substitute in that less noticeable location.
Tools and Materials You Will Need
Safety and Protection
- Safety glasses or sealed goggles
- Work gloves
- Long sleeves and sturdy shoes
- A suitable dust mask or respirator
- Knee pads
- Drop cloths or cardboard
- Painter’s tape
Removal Tools
- Grout saw, carbide grout-removal tool, or oscillating tool with a grout blade
- Hammer
- Cold chisel or narrow masonry chisel
- Center punch or nail set
- Drill with a masonry bit, if needed
- Stiff putty knife or floor scraper
- Shop vacuum, preferably with HEPA filtration
Installation Materials
- Matching replacement tile
- Tile-setting mortar approved for the tile and substrate
- Margin trowel or appropriately sized notched trowel
- Tile spacers
- Small level or straightedge
- Matching grout
- Grout float
- Clean buckets and sponges
- Grout sealer, when recommended for the selected grout
For most floor-tile repairs, a polymer-modified thin-set mortar compatible with the tile and substrate is a reliable choice. Do not automatically use a premixed wall adhesive just because it comes in a convenient tub. Product limitations vary, especially with porcelain, natural stone, large tiles, wet areas, and nonporous substrates. Follow the mortar manufacturer’s instructions rather than relying on the ancient DIY principle of “this bucket was already open.” To Replace a Cracked Floor Tile Step by Step
1. Protect the Work Area
Remove furniture and movable objects from the immediate area. Cover nearby floors, cabinets, and fixtures with cardboard or a drop cloth. Tile fragments can be surprisingly energetic when struck, so keep children and pets away from the room.
Put on safety glasses, gloves, long sleeves, and appropriate respiratory protection before breaking or scraping tile. Open windows when practical and control dust with a vacuum. Avoid unnecessary dry grinding or cutting.
If you are working in an older building and encounter unidentified resilient flooring, black adhesive, or other material that could contain asbestos, stop before sanding, drilling, or scraping it. Appearance alone cannot confirm asbestos; the EPA recommends professional sampling when suspect material will be disturbed during renovation. Remove the Grout Around the Damaged Tile
Use a grout saw, carbide tool, or oscillating grout blade to remove the grout on all four sides of the cracked tile. Work slowly and keep the tool centered in the joint.
This step isolates the damaged tile from its neighbors. If you leave the grout connected, force from the hammer and chisel can transfer into surrounding tiles and chip their edges. Remove the grout down to the setting material wherever possible, then vacuum the joints thoroughly.
Protect adjacent tile edges with several layers of painter’s tape. The tape will not stop a determined chisel, but it can reduce light scratches and remind you where the danger zone begins.
3. Break the Tile From the Center
Do not begin by prying against an outside edge. That places pressure directly against the neighboring tilethe one tile you absolutely do not want to replace next.
Instead, place a center punch or nail set near the middle of the damaged tile and tap it with a hammer. If the surface is very hard, drill one or more shallow holes through the center using a masonry bit. Keep the drill perpendicular and avoid penetrating deeply into the underlayment.
Once you create a small opening, place the cold chisel inside it and tap gently. Break the tile into smaller pieces, working from the center toward the perimeter. Use controlled strikes rather than trying to recreate a dramatic home-renovation television montage.
Lift out each fragment with the chisel or putty knife. Sharp glazed edges can cut through skin easily, so handle the debris with gloves and place it directly into a sturdy container.
4. Remove the Remaining Tile Edges
After the center is cleared, angle the chisel inward and carefully remove the remaining material along the perimeter. Never rest the chisel against the face or edge of an adjacent tile.
Take extra care near corners because they are easy to chip. If one perimeter piece refuses to move, break it into smaller sections rather than applying more leverage. Patience costs less than a second replacement tile.
5. Scrape Away the Old Mortar
Use a stiff scraper, masonry chisel, or oscillating tool with a suitable scraping attachment to remove the old setting mortar. The goal is a clean, sound, reasonably flat surface that leaves enough depth for new mortar and the replacement tile.
Hold tools at a low angle so they shave away mortar instead of digging into the substrate. Be especially careful over cement backer board, uncoupling membrane, radiant-heating components, or waterproofing. Damaging these layers can turn a small tile replacement into a much larger repair.
Vacuum the cavity and wipe away remaining dust as directed by the mortar manufacturer. Thin-set does not bond well to loose powder, grease, weak material, or wishful thinking. Proper substrate preparation is one of the most important parts of a durable tile installation. Inspect the Substrate
Before reaching for the new tile, inspect what you uncovered. Look for:
- A crack in the concrete or underlayment
- Soft, swollen, or water-damaged material
- A loose backer board
- An empty cavity or poor mortar coverage
- Movement when weight is applied nearby
- Damaged waterproofing or uncoupling membrane
A single tile broken by a dropped cast-iron pan probably has an obvious cause. A tile sitting above a continuing concrete crack requires more investigation. Crack-isolation or uncoupling products may help with appropriate nonstructural movement, but they must be chosen and installed as a complete system. They are not magical stickers that make structural problems disappear.
7. Dry-Fit the Replacement
Place the new tile in the opening without mortar. Confirm that the grout joints are even and that the tile can sit flush with the surrounding floor.
Lay a straightedge across the replacement and adjacent tiles. If the new tile is too high before mortar is added, more old material must be removed. If it sits too low, verify that you purchased the correct thickness. Do not build up an excessively deep layer with ordinary thin-set unless the product specifically permits it; use an appropriate patching or leveling material when substrate correction is necessary.
Mark the orientation of patterned or veined tile with painter’s tape so you do not rotate it while installing it. Nothing says “almost perfect” like one marble vein pointing confidently in the opposite direction.
8. Apply the Setting Mortar
Mix only a small amount of mortar according to the package directions. Measure the water rather than guessing. Allow the mortar to slake and remix it when instructed, and never add extra water after it begins to stiffen unless the manufacturer expressly allows it.
Use the flat side of the trowel to key a thin coat of mortar into the prepared substrate. Apply additional mortar and comb it in one direction with the notched side. For a small repair where the trowel cannot fit comfortably, apply mortar to the back of the tile while also burning a thin coat onto the substrate.
Aim for strong, continuous support beneath the tile, including its edges and corners. Random blobs of mortar can leave unsupported voids that make the tile vulnerable to another impact. Manufacturer instructions for repair mortars commonly emphasize full coverage and firm placement rather than spot bonding. Set and Align the New Tile
Lower the tile into the opening without sliding its edges against neighboring tiles. Press firmly while moving it slightly across the mortar ridges to collapse them. Install spacers around the perimeter if needed.
Check the grout-joint width and compare the tile height with the surrounding floor. Adjust it while the mortar is fresh. If the tile is too high, lift it, remove a little mortar, recomb, and reset it. Do not hammer directly on the tile. A rubber grout float or padded beating block can help apply even pressure.
Remove any mortar that squeezes into the grout joints. Clear the joints to sufficient depth for the new grout, and wipe mortar from the tile surface before it hardens.
10. Let the Mortar Cure
Leave the tile undisturbed for the period listed by the mortar manufacturer. Standard products may require roughly a day before grouting, while rapid-setting repair mortars can be ready sooner. Temperature, humidity, tile size, tile porosity, substrate, and product formulation all affect curing.
Block the area so nobody walks across the repair. This is particularly important in a busy hallway, where family members suddenly develop an intense need to stand on the exact square you just repaired.
11. Grout the Joints
Select a grout that matches both the color and type of the existing material. Grout can lighten as it cures, and an older floor may have darkened from age and cleaning products. Test the color in an inconspicuous location when an exact match matters.
Mix the grout according to its instructions. Use a rubber float to force grout fully into the joints, moving diagonally across them. Scrape away excess grout with the float held nearly upright.
When the grout begins to firm, wipe the surface diagonally with a dampnot drippingsponge. Rinse the sponge frequently and avoid repeatedly washing the joints. Too much water can weaken cementitious grout, alter its color, or pull material from the seams.
After a dry haze forms, polish the tile with a clean cloth. Grout manufacturers specify different waiting periods for cleaning, sealing, and foot traffic, so their package directions should control the schedule. Seal and Return the Floor to Service
Some cement-based grouts benefit from a penetrating sealer after they have cured. Many high-performance, epoxy, and presealed grouts do not require the same treatment. Check the label before applying anything.
Keep heavy furniture, rolling loads, standing water, and aggressive cleaning products away from the repair until the mortar and grout have reached the required cure. A tile that feels firm after a few hours may not yet be ready for normal service.
Common Mistakes to Avoid
Skipping Grout Removal
Grout connects the damaged tile to the surrounding field. Removing it first reduces the chance of transferring impact into adjacent tiles.
Prying From the Outside Edge
Always create an opening near the center and work outward. Prying against the perimeter can chip a neighboring tile or loosen it from the floor.
Leaving Old Mortar Too High
If the substrate is not cleaned adequately, the replacement may sit above the surrounding tiles. This uneven edge, called lippage, is visible and may become a trip point.
Using the Wrong Adhesive
Tile type, size, substrate, moisture exposure, and service conditions all influence mortar selection. A product intended for a dry backsplash may not be suitable for a porcelain bathroom floor.
Applying Mortar in Five Convenient Blobs
Spot bonding creates unsupported spaces beneath the tile. A chair leg, dropped object, or concentrated load can break the tile over one of those voids.
Walking on the Repair Too Soon
Early traffic can shift the tile, disturb the bond, and produce uneven grout joints. Let the materials cure for the full time stated on their labels.
Ignoring the Cause of Repeated Cracks
If the replacement cracks again, the problem is probably below the tile. Investigate substrate movement, inadequate support, moisture, expansion-joint issues, and structural cracking before installing a third sacrificial volunteer.
When to Call a Professional
A one-tile replacement is a reasonable DIY project when the substrate is solid, the damage is isolated, and a matching tile is available. Professional help is advisable when:
- Several tiles are cracked, hollow, or loose.
- The floor flexes or moves underfoot.
- A concrete crack continues through multiple tiles.
- The substrate is rotten, swollen, or badly deteriorated.
- Waterproofing or radiant-heating components are damaged.
- The tile is expensive, rare, extremely large, or difficult to match.
- Suspected asbestos-containing material may be disturbed.
- The repair is part of a shower pan or another critical waterproof assembly.
Practical Experience: Lessons That Make Tile Replacement Easier
Real-world tile repairs rarely behave as neatly as instruction diagrams. The official illustration shows one polite tile lifting cleanly from a perfectly flat bed of mortar. An actual floor may present a tile that has bonded with the determination of a barnacle, grout that has become harder than the chisel, and a curious dog inspecting the work from six inches away.
Experience 1: Slow Removal Is Usually Faster
One of the most common beginner mistakes is trying to finish the demolition with a few heroic hammer blows. Large impacts create large fragments, and those fragments press against the edges of neighboring tiles. Gentle taps produce smaller pieces that are easier to control.
A useful rhythm is to create a center opening, remove several small fragments, vacuum the cavity, and repeat. Clearing debris as you work gives the chisel somewhere to move and lets you see the substrate. It feels slower for the first five minutes but can save hours of repairing collateral damage.
Experience 2: Grout Matching Can Be Harder Than Tile Setting
A newly installed tile can match perfectly while the fresh grout looks dramatically wrong. Existing grout may have changed color because of age, sunlight, cleaners, cooking residue, or ordinary foot traffic. Wet grout also looks darker than cured grout.
Keep leftover grout from the repair and allow a sample to cure before judging the color. If the new joint remains noticeably brighter, cleaning the surrounding grout may reduce the contrast. Another option is a compatible grout colorant applied uniformly to a larger section. Trying to darken one fresh joint with dirt is not a recommended finishing technique, although the floor will eventually attempt it on its own.
Experience 3: Tile Height Should Be Checked More Than Once
A replacement can appear level during the dry fit and still rise after mortar is added. Check the tile immediately after setting it, then check again several minutes later. Thick mortar can hold the tile high, while excessive pressure can push it too low.
Run a straightedge across the repair in both directions. Also slide your fingertips over the edges. Your hand can often detect a height difference that is difficult to see. Correcting the level while the mortar is fresh is easy; discovering it the next morning is considerably less charming.
Experience 4: Clean the Joints Before the Mortar Hardens
Mortar squeezed into the grout lines is simple to remove while fresh and unpleasant to remove after curing. Keep a narrow tool, damp sponge, and small brush nearby while setting the tile. Clear the perimeter without disturbing the tile’s position.
Do not leave cleanup for “later” unless later means within the next few minutes. Hardened mortar may require scraping close to the new tile’s edges, creating a fresh opportunity to chip the repair you just completed.
Experience 5: A Returning Crack Is Valuable Information
When a replacement tile cracks in the same location, the failure is telling you that the original problem was not the tile. It may be following substrate movement, a joint in the concrete, inadequate floor stiffness, or poor support beneath the installation.
At that point, repeating the same repair with stronger adhesive is unlikely to provide a lasting result. Document the crack pattern, check neighboring tiles, and consult a tile professional about substrate correction, movement accommodation, or an appropriate crack-isolation system. The goal is not to find the toughest tile for losing an argument with the floor; it is to stop the floor from starting the argument.
Conclusion
Learning how to replace a cracked floor tile is mostly an exercise in careful preparation. Remove the surrounding grout, break the damaged tile from the center, clean the substrate, inspect the cause of failure, and install the replacement with compatible mortar and full support. Once the setting material has cured, matching grout completes the repair.
The project can often be completed with basic hand tools, but rushing is the fastest way to damage the tiles around it. Work patiently, wear proper protective equipment, and follow the specific cure times provided by the mortar and grout manufacturers. When multiple tiles are affected or the substrate is moving, solve the underlying problem before treating another tile as a disposable bandage.
Note: Product requirements vary. Always follow the current installation, safety, ventilation, mixing, application, and curing instructions printed by the tile, mortar, grout, membrane, and sealer manufacturers.