

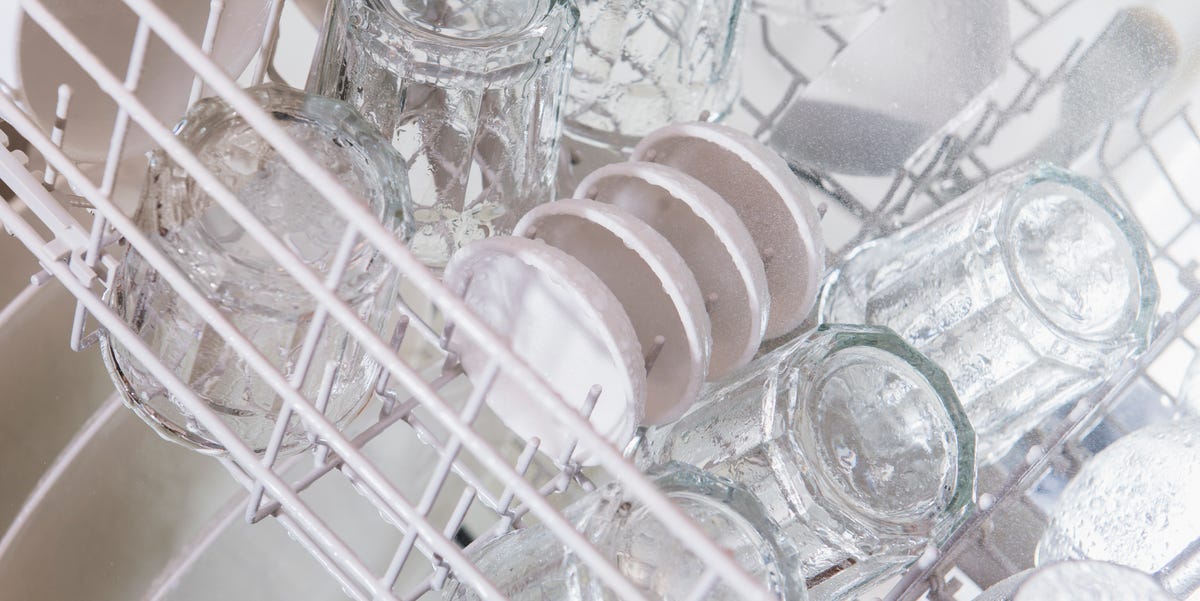
You opened the dishwasher expecting a sparkling little parade of clean plates, dry glasses, and silverware ready to march into the cabinet. Instead, you got a swamp. The mugs have puddles in their bottoms, the plastic containers are sweating like they just ran a 5K, and your “clean” dishes now require a towel encore. Rude? Yes. Uncommon? Not even a little.
If your dishwasher is not drying dishes properly, the problem is usually not that the machine has personally betrayed you. Most of the time, wet dishes come from a mix of cycle settings, missing rinse aid, poor loading habits, hard water, plastic items, or a drying system that needs a little help. Modern dishwashers are designed to clean efficiently, but many no longer blast dishes with the same old-school “hot cave of doom” drying heat that older models used. That is better for energy use, but it also means you have to play the dishwasher game a bit smarter.
The good news: getting your dishwasher to dry dishes better is usually simple. You do not need to stand there with a towel, questioning your life choices. You just need to understand how dishwasher drying works and make a few strategic changes.
Why Your Dishwasher Leaves Dishes Wet
Dishwashers dry dishes in different ways. Some use a heated dry cycle with a heating element. Some use condensation drying, where hot dishes release moisture that collects on the cooler stainless-steel tub. Others use fans, auto-open doors, mineral-based drying systems, or extra-hot final rinses. Fancy? Absolutely. Foolproof? Sadly, no.
The basic idea is this: during the final rinse, the dishwasher heats the dishes. Hot dishes help leftover water evaporate. Rinse aid helps water slide off instead of clinging in droplets. Air movement or extra heat finishes the job. When one part of that chain fails, you get damp plates and plastic lids that behave like tiny swimming pools.
The Most Common Reasons Dishes Stay Wet
Before blaming the dishwasher, check these usual suspects:
- You are not using rinse aid.
- The heated dry, extended dry, or sanitize option is turned off.
- You are using a quick, eco, or air-dry cycle that skips strong drying.
- Plastic items dominate the load.
- Dishes are loaded too close together.
- Bowls, cups, or containers are trapping water.
- The dishwasher filter, vent, fan, or heating element may need attention.
- Your water is not hot enough when the cycle begins.
That list may look long, but most fixes take less effort than finding the matching lid for a food storage container. And we all know that is basically a household mystery novel.
Use Rinse Aid Like You Mean It
If there is one dishwasher drying tip that deserves a tiny trophy, it is this: use rinse aid. Despite the name, rinse aid is not mainly about rinsing. It is more like “drying assistant in a tiny compartment.” It lowers the surface tension of water so droplets sheet off dishes instead of sitting there like stubborn little beads.
Without rinse aid, water clings to glasses, plates, silverware, and especially plastic. With rinse aid, water runs off more easily during the final rinse and drying phase. That means fewer spots, fewer streaks, and fewer moments where you pull out a bowl and accidentally pour yesterday’s dishwasher rain onto your socks.
How to Check Your Rinse Aid Dispenser
Open the dishwasher door and look near the detergent cup. Most dishwashers have a separate rinse aid reservoir with a cap, dial, or indicator window. If it is empty, fill it according to your machine’s manual. Many dishwashers dispense rinse aid automatically during the final rinse, so you do not need to add it every load.
If your glasses still come out spotty or your dishes remain damp, check whether your model lets you adjust the rinse aid setting. Hard water usually needs a higher setting. If you see rainbow-like film or excessive residue, reduce the setting slightly. Think of it like seasoning soup: enough is magic; too much is suspicious.
Choose the Right Drying Cycle
Many people unknowingly sabotage drying by choosing a cycle that is designed to save time or energy, not deliver bone-dry dishes. Quick wash, express wash, eco wash, and air-dry settings can clean lightly soiled dishes, but they may not provide enough final rinse heat or drying time.
If your dishwasher has options such as Heated Dry, Extended Dry, Extra Dry, ProDry, PowerDry, Dry Boost, or Sanitize, use them when drying matters. These settings may add time and use more energy, but they can make a noticeable difference, especially for glassware, silverware, and ceramic dishes.
Best Settings for Dry Dishes
For everyday loads, try Normal Wash plus Heated Dry or Extended Dry. For heavy loads, use Heavy or Pots & Pans with a high-temperature rinse and extended drying. For plastic-heavy loads, choose the strongest drying option your machine offers, but always confirm your items are dishwasher-safe.
If you usually run the dishwasher overnight, an extended dry cycle can be helpful because it gives moisture more time to evaporate before the dishes sit in a closed, humid tub. A dishwasher is not a desert. If steam is trapped inside for hours, some moisture will redeposit on dishes, especially on plastics.
Stop Expecting Plastic to Behave Like Glass
Plastic is the drama queen of dishwasher drying. Plates and glasses usually dry better because they retain heat. Plastic does not hold heat as well, so water evaporates more slowly from its surface. Plastic also tends to have shapes, rims, grooves, and lips that trap water. Translation: your plastic storage lids are not broken; they are just being plastic.
This is why your ceramic plates may be dry while your plastic containers look like they spent the afternoon in a sauna. Lightweight plastic also flips, shifts, or nests during the wash, creating little reservoirs of water. Even a great dishwasher may struggle to dry plastic completely.
How to Help Plastic Dry Better
Place plastic items on the top rack unless your dishwasher manual says otherwise. Angle containers downward so water can drain. Avoid nesting lids together. Use clips, tines, or cup shelves to keep lightweight pieces from flipping. Leave space around plastic items so hot air and steam can move.
If your dishwasher has a special plastic drying option, use it. Some newer models include fan-assisted drying, auto-door opening, or boosted dry cycles designed for hard-to-dry items. If not, accept that some plastic may still need a quick shake or a few minutes on a drying rack. Annoying? Yes. A sign your dishwasher is failing? Not necessarily.
Load the Dishwasher So Water Can Escape
Dishwasher loading is not just about cramming in every plate after taco night. It affects cleaning, rinsing, and drying. When dishes are too close together, water gets trapped. When bowls face the wrong direction, they hold puddles. When cups sit flat, they become tiny bathtubs. Your dishwasher cannot dry water that has nowhere to go.
Smart Loading Tips for Better Drying
Load bowls and cups at an angle. Face concave items downward. Keep dishes separated so air can circulate. Place large items along the sides or back, not where they block spray arms or vents. Put mugs and glasses between tines instead of over them, when possible, so water drains more cleanly.
For silverware, avoid letting spoons spoon. Yes, even utensils need personal space. Mix forks, spoons, and knives in the basket so they do not nest together. If your dishwasher has a third rack, spread utensils out for better rinsing and drying.
When unloading, start with the bottom rack. Why? Because top-rack cups and bowls often hold small puddles. If you unload the top rack first, that water can spill onto the dry dishes below. It is the dishwasher version of betrayal from above.
Let Steam Escape at the Right Time
If your dishwasher does not have an auto-open door feature, cracking the door after the cycle ends can help release trapped steam. Wait until the cycle is completely finished, then open the door slightly for 10 to 20 minutes. This gives humid air a way out instead of letting it settle back onto your clean dishes.
Be careful with very hot steam, especially right after a high-temperature cycle. Open the door slowly and keep your face away from the steam. You are drying dishes, not auditioning for a kitchen volcano scene.
Should You Leave the Door Open Overnight?
Leaving the door slightly open after the cycle can help with drying, especially if you run the dishwasher at night. However, do not open it too early. If you interrupt the drying phase, you may reduce the dishwasher’s ability to finish the job. Let the machine complete its cycle first, then give the steam an exit route.
Check Your Water Temperature
Hot water plays a major role in dishwasher performance. If the incoming water is too cool, the dishwasher may struggle to clean and dry properly. Many dishwashers heat water internally, but starting with warm water can still help the cycle work more efficiently.
Before running a load, turn on the kitchen sink hot water for a few seconds until it gets hot, then start the dishwasher. This sends warmer water into the machine from the beginning instead of making it start with cold water sitting in the pipes.
Do not set your household water heater dangerously high. Follow safe temperature guidance for your home, especially if children or older adults live there. The goal is not to turn your faucet into a dragon. It is simply to help the dishwasher begin with properly heated water.
Clean the Filter and Inspect the Dishwasher Interior
A dirty dishwasher filter can reduce cleaning performance and leave residue that interferes with drying. If your dishes come out wet and gritty, the filter deserves a look. Most modern dishwashers have a removable filter at the bottom of the tub. Twist it out, rinse it under warm water, and gently brush away stuck debris.
Also check the spray arms. If food particles or mineral buildup clog the holes, water may not circulate properly. Poor rinsing leads to poor drying because dishes remain coated with film, detergent, or food residue. That leftover layer can hold moisture like a clingy ex.
Do a Monthly Maintenance Cycle
Run an empty cleaning cycle once a month using a dishwasher cleaner or a manufacturer-approved method. This helps remove grease, mineral deposits, and odors. If you live in a hard water area, routine maintenance matters even more. Mineral buildup can reduce drying performance and leave spots on glasses.
Use the Right Detergent
Detergent affects drying more than most people realize. Low-quality detergent may leave residue that makes water cling to dishes. Too much detergent can also create film, especially in soft water. Too little detergent may leave food soil behind. None of these outcomes are invited to the “dry dishes” party.
Use a high-quality dishwasher detergent and follow the package directions. If you use pods or tablets, make sure they are stored in a dry place so they do not clump or partially dissolve before use. If your dishwasher has hard water issues, look for detergent formulas designed to fight mineral deposits.
Do not rely only on detergent tablets that claim to include rinse aid. They may help, but a filled rinse aid dispenser usually gives more consistent drying because the dishwasher releases it at the right point in the cycle.
Know When It Might Be a Mechanical Problem
If you have tried rinse aid, better loading, hotter cycles, filter cleaning, and extended dry settings, but every item is still soaking wet, your dishwasher may have a mechanical issue. Possible culprits include a faulty heating element, broken vent, failed fan, defective thermostat, control board problem, or rinse aid dispenser that is not releasing properly.
A few clues can help you narrow it down. If dishes are clean but cold at the end of a heated cycle, the heating system may not be working. If the tub stays very humid and no air seems to move, the vent or fan may be the issue. If rinse aid never seems to go down, the dispenser may be blocked or broken.
Check your owner’s manual before attempting any repair. If the dishwasher is under warranty, contact the manufacturer or retailer. For electrical components, it is usually smarter and safer to call a qualified appliance technician than to start poking around with confidence borrowed from a two-minute video.
Quick Troubleshooting Checklist
If your dishwasher is not drying dishes, run through this checklist before panic-shopping for a new machine:
- Fill the rinse aid dispenser.
- Select Heated Dry, Extended Dry, Extra Dry, or Sanitize.
- Avoid quick or eco cycles when you need dry dishes.
- Angle cups, bowls, and containers downward.
- Keep plastic items on the top rack and spaced apart.
- Unload the bottom rack first.
- Crack the door after the cycle ends to release steam.
- Run hot water at the sink before starting the dishwasher.
- Clean the filter and inspect spray arms monthly.
- Call for service if everything stays cold and wet after a heated cycle.
Real-Life Experience: What Actually Works in a Busy Kitchen
In real life, dishwasher drying is less about one magic button and more about building a tiny routine that prevents wet dishes from becoming your evening personality. The biggest change many households notice is simply adding rinse aid and keeping it filled. People often skip it because they assume detergent already does everything. Then they refill the rinse aid compartment once and suddenly the glasses look clearer, the plates dry faster, and the dishwasher stops acting like a humid cave with racks.
Another practical lesson: the “quick wash” button is seductive but sneaky. It sounds efficient, like the dishwasher equivalent of getting through airport security with no line. But quick cycles often reduce drying time or final rinse heat. That may be fine for a few lightly used plates, but it is not ideal for a full dinner load with mugs, bowls, plastic lids, and containers. When drying really matters, a normal cycle with heated dry usually beats a fast cycle that leaves you towel-drying half the rack.
Plastic containers are where expectations need a reality check. Even after doing everything right, plastic may still come out slightly damp. The best real-world trick is to load plastic pieces at sharp angles and avoid letting lids overlap. If a container has a rim, lip, groove, or little foot on the bottom, assume it wants to collect water. Place it so gravity can help. Gravity is free, reliable, and does not require a warranty.
Unloading order also makes a surprisingly big difference. Many people grab the top rack first because glasses and mugs feel easy. Then trapped water spills onto the plates below, and suddenly the bottom rack looks guilty even though it was dry five seconds ago. Start with the bottom rack, then move to the top. It feels like a small habit, but it saves a lot of unnecessary towel work.
For households that run the dishwasher overnight, cracking the door in the morning can help finish the drying process. If the dishes are still warm when the cycle ends and the door stays closed for hours, steam can settle back onto surfaces. Opening the door slightly after the cycle lets moisture escape. Some newer dishwashers do this automatically, which feels like the machine finally learned manners.
Maintenance is the unglamorous hero. A clean filter, clear spray arms, and fresh rinse aid do more for drying than most people expect. When the filter is dirty, dishes may carry residue that holds moisture. When spray arms are clogged, rinsing suffers. When the tub has mineral buildup, glasses spot and plastics stay wetter. A monthly cleaning cycle is not exciting, but neither is hand-drying a salad bowl at 10:47 p.m.
The most useful mindset is this: your dishwasher is not a drying cabinet. It is a washing machine that uses heat, chemistry, airflow, and smart loading to encourage water to leave. Help those systems work together, and your dishes will come out much drier. Ignore them, and your mugs will continue storing tiny surprise puddles like they are preparing for a drought.
Conclusion: Dry Dishes Are Not a Myth
Getting your dishwasher to actually dry your dishes is usually a matter of small, smart changes. Use rinse aid. Choose the right drying cycle. Load dishes so water can drain. Give plastic extra space and realistic expectations. Clean the filter. Let steam escape after the cycle ends. If those steps do not help, then it may be time to inspect the heating element, fan, vent, or rinse aid dispenser.
The dishwasher is supposed to save time, not create a second job called “Towel Manager.” With the right habits, you can open the door to dishes that are clean, shiny, and mostly dry enough to go straight into the cabinet. And if one plastic lid still has a puddle? Shake it off dramatically and move on with your life.
Note: This article is based on synthesized real-world guidance from U.S. appliance manufacturers, energy-efficiency resources, home care experts, and consumer appliance testing information. It is written as original web content for publication and does not include source-link clutter in the article body.