

A DIY house bed frame can turn an ordinary child’s bedroom into a cozy little retreat without filling the room with plastic castles, flashing buttons, or a bed shaped like a race car that requires seventeen mysterious screws.
The familiar house-shaped design combines a low sleeping platform with four upright posts, roof rafters, and a ridge beam. When thoughtfully designed, it can complement a Montessori-inspired bedroom by keeping the mattress accessible, supporting age-appropriate independence, and maintaining a simple, orderly environment.
However, “Montessori-inspired” does not mean “put a mattress on the floor and hope for the best.” The entire room must function as a prepared environment. Furniture should be secured, cords should be inaccessible, the floor should remain clear, and the bed should be appropriate for the child’s age and development.
This guide explains how to build a sturdy twin-size DIY Montessori house bed, from measuring the mattress and creating a cut list to assembling the frame, installing slats, applying a finish, and completing a serious safety inspection.
What Is a Montessori-Inspired House Bed?
A Montessori-inspired floor bed is a low bed that allows a developmentally ready child to get in and out without needing an adult to lift them over high rails. The idea relates to broader Montessori principles such as independence, freedom of movement within safe limits, child-sized furnishings, and a carefully prepared environment.
A house-shaped frame is not a formal requirement of Montessori education. It is primarily a decorative variation of a low platform bed. The roof outline can make the sleeping space feel welcoming, but it should not become a jungle gym, hanging station, or indoor circus rig.
Potential benefits of a low house bed
- It gives a developmentally ready child easier access to the mattress.
- Its low height reduces the distance of a possible fall.
- It can encourage participation in simple routines such as arranging a pillow or straightening a blanket.
- The open design may make a small bedroom feel less crowded than a tall traditional bed.
- A custom build can be sized for the room, mattress, and preferred finish.
These benefits depend on the bed being structurally sound and the entire room being childproofed. A low bed does not automatically create a safe bedroom.
Important Safety Considerations Before Building
This project is intended for a child who is developmentally ready to transition from a crib or other approved infant sleep product. Babies should sleep on a firm, flat surface in an approved crib, bassinet, portable crib, or play yard that meets current safety requirements. Ask your pediatrician when you are uncertain about the appropriate sleep setup for your child.
Childproof the whole room
A child who can independently leave a low bed can also explore the bedroom before an adult arrives. Treat the room almost like one large crib:
- Anchor dressers, bookcases, and other climbable furniture to suitable wall framing.
- Keep the bed away from windows, blind cords, curtain cords, heaters, lamps, outlets, and unstable furniture.
- Use cordless window coverings whenever possible.
- Secure accessible electrical outlets and manage electrical cords.
- Remove small choking hazards, heavy decorative objects, and furniture with sharp corners.
- Install appropriate gates where stairs or unsafe areas could be reached.
- Check smoke alarms and carbon monoxide alarms.
Avoid entrapment gaps
Measure the actual mattress instead of relying only on the size printed on its label. Build the mattress opening with a small, consistent allowanceapproximately 1/2 inch in both width and length is a practical starting point for many projects. The goal is easy mattress removal without leaving a large gap where a child’s arm, leg, or body could become trapped.
Recheck the fit after assembly. Wood can bow, measurements can drift, and mattresses do not always match their advertised dimensions perfectly.
Keep the roof frame decorative
The upper house structure is not designed for climbing, swinging, or supporting an adult’s weight. Do not attach hammocks, gym rings, swings, ropes, heavy decorations, or fabric that can wrap around a child. Avoid string lights and dangling garlands near a young child’s sleeping area.
DIY House Bed Design and Dimensions
The sample plan below is for a standard twin mattress measuring approximately 38 by 75 inches. Measure your mattress before cutting lumber and adjust every relevant dimension accordingly.
For a mattress measuring exactly 38 by 75 inches, this plan uses an interior opening of approximately 38 1/2 by 75 1/2 inches. The mattress rests on ventilated wood slats inside a low 2-by-6 perimeter frame.
Suggested finished dimensions
- Interior mattress opening: 38 1/2 by 75 1/2 inches
- Approximate exterior base: 41 1/2 by 78 1/2 inches
- Height from floor to roof eaves: about 52 inches
- Approximate height at ridge: 64 to 66 inches
Roof height is flexible. Before finalizing it, check ceiling height, ceiling-fan clearance, sprinkler locations, wall shelves, and the proportions of the room. A cardboard or painter’s-tape outline on the wall makes the design much easier to visualize.
Materials and Tools
Sample lumber list for a twin bed
- Two 2-by-6 boards cut to 78 1/2 inches for the long base rails
- Two 2-by-6 boards cut to 38 1/2 inches for the end rails
- Two 1-by-2 boards cut to 75 1/2 inches for slat ledgers
- One 2-by-4 board cut to 75 1/2 inches for an optional center support
- Four 2-by-3 or 2-by-4 boards cut to approximately 48 inches for upright posts
- Two top crosspieces cut to match the exterior width of the frame
- Four rafter pieces, cut long initially and trimmed to fit
- One ridge beam cut to approximately 78 1/2 inches
- Fourteen to sixteen 1-by-4 slats cut to fit the interior width
- 3/4-inch plywood scraps for optional corner gussets
Choose straight, dry boards with minimal twisting, large cracks, loose knots, and damaged edges. Place each board on the store floor and look along its length. A board shaped like a banana may be funny for three seconds, but it is not funny during assembly.
Hardware and supplies
- Structural wood screws suitable for the selected lumber
- Pocket-hole screws matched to the actual material thickness
- Wood glue
- Washers and bolts for removable joints, if desired
- Wood filler
- 80-, 120-, 180-, and 220-grit sandpaper
- Water-based interior paint or clear furniture finish
- Primer if required by the paint manufacturer
- Felt pads or a nonslip mat for hard flooring
Recommended tools
- Tape measure and carpenter’s pencil
- Speed square or combination square
- Miter saw or circular saw with a guide
- Drill and impact driver
- Drill bits and countersink bit
- Pocket-hole jig
- Clamps
- Random-orbit sander
- Level
- Stud finder
- Eye protection, hearing protection, and a suitable dust mask or respirator
How to Build the DIY Montessori House Bed
Step 1: Measure the mattress and bedroom
Measure the mattress at several points because soft edges can vary slightly. Record its maximum width, length, and thickness. Add a small fitting allowance, then sketch the interior opening and overall frame.
Mark the proposed bed footprint on the bedroom floor with painter’s tape. Confirm that doors, drawers, vents, closet doors, and walking paths remain usable. Also check that the future bed location is safely separated from windows and cords.
Step 2: Create and label the cut list
Write every component on a cut list before turning on the saw. Label completed pieces with painter’s tape: left rail, right rail, head rail, foot rail, post A, post B, and so on.
Cut the rectangular base components first. Assemble them temporarily on a flat surface and verify the dimensions before cutting the roof pieces. This prevents one early measurement error from spreading through the entire project like glitter at a birthday party.
Step 3: Sand the lumber before assembly
Begin with 80- or 120-grit paper where the lumber is rough, then progress through 180 grit. Use 220 grit for the final smoothing required by your chosen finish. Sand in the direction of the grain and soften exposed corners without dramatically changing the dimensions of the joints.
Pay special attention to the upright posts and roof frame because children are likely to touch them. Remove splinters, sharp corners, pencil marks, and milling ridges. Vacuum the boards and wipe away dust before assembly.
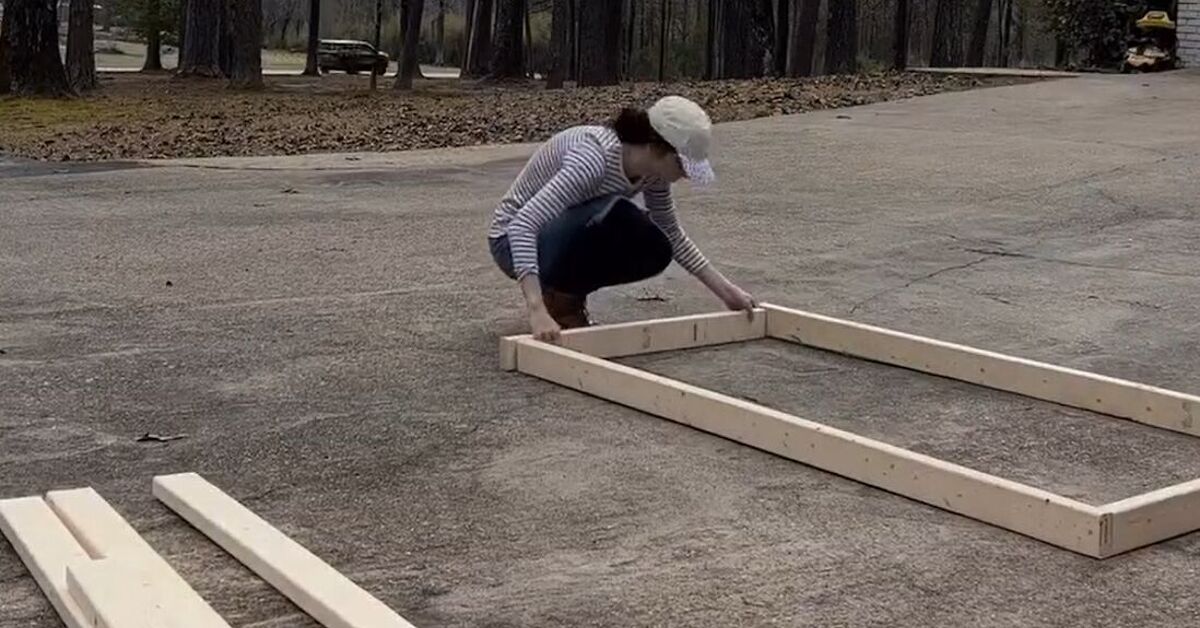
Step 4: Assemble the rectangular base
Arrange the two long rails and two end rails on a flat floor or workbench. In this design, the shorter end rails fit between the longer side rails. Confirm that the interior dimensions match the planned mattress opening.
Apply wood glue to the joints, clamp the frame square, predrill the holes, and install appropriate structural screws. Do not use drywall screws; they are not intended to serve as primary structural fasteners in furniture.
Measure diagonally from corner to corner in both directions. When the two measurements match, the frame is square. Recheck after tightening because enthusiastic screw driving can pull a joint out of alignment.
Step 5: Install the slat ledgers
Attach a 1-by-2 ledger along the inside bottom portion of each long rail. The ledgers support the mattress slats. Use glue and properly spaced screws, and confirm that both ledgers are level with one another.
The slats should hold the mattress low while allowing air to move beneath it. Do not place a foam mattress directly on an unventilated solid panel unless the mattress manufacturer specifically approves that foundation.
Step 6: Add a center support
A twin frame may not always require a center rail, but adding one can reduce slat flex and improve long-term stability. Position a straight 2-by-4 down the center of the opening, supported at both ends by securely attached blocks.
For a larger full- or queen-size version, a center support with floor-contacting legs is usually more important. Follow the support requirements provided by the mattress manufacturer rather than assuming one design works for every mattress.
Step 7: Cut and install the slats
Cut 14 to 16 slats to fit between the long rails. Sand every slat, especially its top edges. Place the first and last slats near the ends, then distribute the remaining pieces evenly.
Many modern mattress manufacturers require closely spaced slats, often around 3 inches apart or less. Check the warranty and foundation instructions for your mattress. Use a scrap spacer block so every gap remains consistent.
Predrill and secure each slat with one screw at each end. This prevents the slats from sliding, rattling, or gathering into one end of the bed during an especially dramatic bedtime story.
Step 8: Attach the four upright posts
Position one upright post at each corner. Check every post with a level in two directions. Clamp it securely before drilling.
Fasten each post to the base using structural screws, bolts, or another connection appropriate for the lumber and design. Pocket-hole screws can help align components, but they should not be the only defense against side-to-side movement in a child’s bed.
Add plywood gussets or solid wood corner braces where needed. These braces greatly reduce racking, which is the wobbly parallelogram movement that makes furniture feel as though it has suddenly developed knees.
Step 9: Build the front and back gables
Attach a horizontal crosspiece between the two front posts and another between the rear posts. These form the roof eaves. Check that both pieces are level and installed at the same height.
Cut one test pair of rafters from inexpensive scrap or cardboard. Hold the pieces above the crosspiece, mark the ridge intersection, and refine the angles before cutting the finished rafters. This real-world fitting method is often more reliable than trusting a theoretical angle while working with slightly imperfect lumber.
Glue and fasten the rafter pairs to create a centered roof peak on the front and rear of the bed. Reinforce the joints discreetly with screws, dowels, plates, or plywood gussets.
Step 10: Install the ridge beam
Connect the front and rear roof peaks with the long ridge beam. Use a helper, clamps, and temporary support blocks so you are not balancing a long board overhead while attempting to operate a drill with the confidence of a television carpenter.
Fasten the ridge beam at both ends and check the entire structure for twisting. The house outline should feel rigid when gently pushed from the side. Remember that the upper frame remains decorative and should never be treated as climbing equipment.
Step 11: Fill, sand, and finish
Fill visible holes and minor imperfections with a compatible wood filler. Allow it to dry, then sand the repaired areas smooth. Remove all dust before applying primer, paint, stain, or a clear finish.
Choose a water-based interior product intended for furniture and follow its label exactly. Apply thin, even coats in a well-ventilated work area. Respect both drying and full-curing times; a finish that feels dry may not yet be completely cured.
Lightly sanding between coats with fine sandpaper can improve smoothness and adhesion when the product instructions permit it. Allow the finished parts to cure fully before bringing them into the child’s room or installing the mattress.
Step 12: Complete a final safety inspection
Before use, inspect the bed from the perspective of a curious child. Crawl around it, reach beneath it, and check every joint.
- Confirm that no screw points or sharp hardware are exposed.
- Remove splinters and rough edges.
- Check that the mattress fits without dangerous gaps.
- Confirm that the slats cannot shift.
- Push the frame from multiple directions and tighten any movement.
- Verify that the bed cannot slide excessively on the flooring.
- Keep the roof frame free from hanging cords, fabric, and heavy objects.
- Recheck nearby furniture anchors and window safety.
Inspect the bed regularly after installation. Wood movement, energetic play, and repeated use can loosen fasteners over time.
How to Make the Bedroom Feel More Montessori-Inspired
The bed is only one part of the environment. A thoughtful bedroom should remain calm, accessible, and manageable for the child.
Keep the layout simple
Leave clear floor space around the bed. Instead of storing every toy the child owns in the bedroom, display a small selection on low, stable shelving and rotate items periodically. Fewer choices can make cleaning and decision-making less overwhelming.
Make everyday items accessible
Use a low basket for pajamas, a child-height hook for a robe, and a small hamper for clothing. These details support participation in daily routines without turning bedtime into a formal training seminar.
Choose calm decorations
Natural wood, simple artwork, soft colors, and a few familiar books can create a restful room. Avoid overcrowding the roof frame with decorations. The house silhouette already provides visual interest.
Common DIY House Bed Mistakes
Building from advertised mattress dimensions
Always measure the real mattress. A small mismatch can create an irritatingly tight fit or an unsafe gap.
Using weak fasteners
Furniture needs suitable wood screws, structural screws, bolts, or joinery. General-purpose drywall screws are not a substitute for structural hardware.
Skipping diagonal measurements
A frame can look rectangular while being noticeably out of square. Check both diagonals before the glue cures.
Installing slats too far apart
Wide gaps may allow a foam mattress to sag and may violate its warranty requirements. Follow the mattress manufacturer’s instructions.
Adding fabric canopies and lights
Flowing fabric looks charming in photographs, but it can introduce entanglement, strangulation, overheating, and fire concerns. A simple uncovered frame is usually the more practical choice for a young child.
Assuming low means automatically safe
A child who can leave the bed has access to the room. Furniture anchors, outlet protection, cord management, gates, alarms, and ongoing supervision remain essential.
Practical Build Experience: Lessons That Matter Most
The following experience-based lessons reflect recurring patterns seen in real DIY furniture projects. The first lesson is that preparation takes longer than assemblyand that is good news. A builder may spend hours measuring the mattress, sorting boards, checking the floor, and creating templates before joining two pieces of wood. Once that work is complete, the actual frame can come together surprisingly quickly.
One especially useful practice is to assemble the base without glue first. Lay the boards on the floor, clamp the corners, place several temporary slats across the opening, and set the mattress on top. This dry fit reveals problems that a drawing may hide. The mattress may have rounded corners, a baseboard may interfere with the frame, or a closet door may stop half an inch before opening completely. Discovering those issues before applying glue is much nicer than discovering them while holding a circular saw and questioning every decision made since breakfast.
Board selection also makes an enormous difference. It is tempting to order lumber for pickup and accept whatever boards are loaded onto the cart. For a house bed, hand-selecting straight pieces saves time later. A twisted upright post can make the roof appear crooked even when every measured length is correct. A bowed side rail can create an uneven mattress gap. Choosing better lumber often produces a more professional result than buying expensive tools.
Another lesson is to cut roof pieces only after assembling the lower structure. Plans may specify a perfect rafter angle, but actual lumber thickness, post placement, saw calibration, and floor level can alter the fit. Builders usually get better results by attaching the posts and eave crosspieces first, then making one disposable rafter template. Once that template fits, it can guide the remaining cuts.
Clamps are equally important. Without clamps, boards tend to move while screws are driven, pulling previously aligned joints out of position. Two or four good clamps can improve the final result more than a large collection of specialty gadgets. They also free both hands, which is preferable to holding a board with one knee while attempting to operate a drill like an underqualified octopus.
Sanding deserves more patience than most beginners expect. A bed can look smooth from across the room while still having rough grain around the posts, slats, and roof joints. Run a clean cotton cloth over the wood after sanding. If fibers catch on the surface, a child’s pajamas or skin may catch there too. Round the exposed edges gently, but avoid sanding joint surfaces so aggressively that the pieces no longer fit correctly.
Finishing is where many weekend schedules collapse. Paint and clear coats need time to dry and cure, and cool or humid conditions can extend that process. A practical schedule is to build and sand during one weekend, finish the components afterward, and assemble the bed in the bedroom only after the coating has fully cured. Rushing the finish can leave fingerprints, odors, tacky surfaces, or marks from the mattress.
It is also wise to design the bed so it can be disassembled. A fully assembled twin house frame may not fit through a doorway or turn around a hallway corner. Bolted side sections, removable ridge connections, or carefully planned screw locations make moving much easier. Photograph hidden connections before installing the mattress so future disassembly does not become an archaeological investigation.
After installation, the most useful habit is a scheduled hardware check. Inspect the joints after the first week, again after the first month, and periodically thereafter. Tighten anything that has loosened, look for cracked wood, and verify that the slats remain secure. Children interact with furniture in wonderfully inventive ways, including several ways no responsible design plan could predict.
Finally, the best house bed is not necessarily the most elaborate one. Extra rails, shelves, curtains, lights, signs, and hanging accessories can make the design more complicated and introduce additional hazards. A strong rectangular base, a smooth decorative house outline, a properly supported mattress, and a carefully prepared room usually produce the most attractive and functional result.
Conclusion
Building a DIY house bed frame inspired by Montessori is an approachable woodworking project when safety, accurate measurement, and structural stability come before decoration. Begin with the actual mattress dimensions, choose straight lumber, create a square low platform, install closely spaced slats, reinforce the upright posts, and fit the roof pieces with a template.
The finished bed should support independence without inviting unsafe climbing or adding unnecessary cords and hanging objects. Pair it with anchored furniture, clear walking space, accessible storage, and a calm bedroom layout. The result is not merely a cute bed shaped like a house. It is a practical, child-centered sleeping space built with careand considerably fewer confusing instructions than the average flat-pack furniture adventure.
Note: This is a general DIY guide, not an engineering plan or pediatric sleep recommendation. Adapt the dimensions to the actual mattress, follow the mattress manufacturer’s foundation requirements, use hardware rated for the materials, and consult a qualified carpenter or pediatrician when safety or developmental readiness is uncertain.