Painting an outdoor concrete patio is one of those DIY projects that looks suspiciously simple. You buy paint, grab a roller, make a dramatic “before” video, and suddenly your patio is supposed to look like a boutique hotel courtyard. Easy, right? Well, yesmostly. The actual painting part is simple. The secret is everything that happens before the roller ever touches the concrete.
Concrete is tough, but it is also porous, dusty, moody, and surprisingly picky about what sticks to it. If the surface is dirty, damp, sealed, cracked, greasy, or painted during bad weather, the new finish may peel faster than a sunburn after a beach weekend. But with the right prep, the right exterior concrete paint, and a little patience, you can turn a tired gray slab into a clean, colorful, weather-resistant outdoor living space.
This guide walks through how to paint an outdoor concrete patio step by step, including cleaning, crack repair, moisture testing, priming, painting, curing, and maintenance. We will keep the process practical, beginner-friendly, and just detailed enough to save you from the classic DIY mistake: doing the exciting part first and the important part never.
Why Paint an Outdoor Concrete Patio?
Outdoor concrete patios take a beating. Sunlight fades them. Rain soaks them. Leaves stain them. Grill grease attacks them. Patio furniture scrapes them. And if your concrete has been around for a while, it may have the charming personality of an old sidewalk outside a bus station.
Painting gives the patio a fresh, solid-color finish that can hide discoloration, improve curb appeal, and help protect the surface from everyday wear. Unlike concrete stain, which penetrates the surface and creates a more translucent look, concrete paint sits on top and provides fuller coverage. That makes paint a strong choice when your patio has blotches, old patch marks, or a color that can best be described as “weathered oatmeal.”
Paint is also a budget-friendly update. Instead of tearing out the slab or covering it with tile, pavers, or decking, you can refresh the space with supplies from a home improvement store and a weekend or two of effort. The result can be subtle and modern, bold and colorful, or even decorative with borders, stencils, or a faux outdoor rug design.
Best Paint for an Outdoor Concrete Patio
The best paint for an outdoor concrete patio is not regular wall paint. Interior latex wall paint belongs on drywall, not under patio chairs, wet shoes, and direct sunlight. For this project, choose a product labeled for exterior concrete, masonry, porch, patio, or floor use.
Concrete Porch and Patio Paint
Concrete porch and patio paint is commonly used for outdoor floors because it is designed to handle foot traffic and weather exposure. Many products are acrylic latex formulas, which are easier to apply and clean up with soap and water. Some are self-priming, while others work best with a concrete bonding primer.
Epoxy or 1-Part Epoxy Concrete Paint
Epoxy-style coatings can be more durable in high-wear areas, but they often require more careful preparation. For patios, a 1-part epoxy or acrylic concrete coating may be easier for a homeowner than a two-part garage-floor epoxy. Always check whether the product is recommended for outdoor horizontal concrete. Some garage coatings are not ideal for patios exposed to UV light or standing water.
Anti-Skid Patio Paint
Outdoor concrete gets slippery when wet. If your patio is near a pool, garden hose, sprinkler, or the world’s messiest golden retriever, consider a non-skid concrete paint or mix a compatible non-skid additive into the final coat. A little texture can make the patio safer without making it feel like walking barefoot across a cheese grater.
Tools and Materials You Will Need
Gathering supplies before you start keeps the project from turning into six emergency trips to the store. You will likely need a broom, stiff scrub brush, garden hose or pressure washer, concrete cleaner or degreaser, painter’s tape, plastic sheeting, crack filler or patching compound, putty knife, concrete bonding primer if required, exterior concrete paint, paint tray, brush, roller frame, roller covers, extension pole, protective gloves, safety glasses, and optional non-slip additive.
For roller nap, follow the paint label. Smooth concrete usually needs a shorter nap roller, while rough or broom-finished concrete may need a thicker nap to reach into the texture. A brush is useful for edges, corners, control joints, and areas around posts or steps.
Step 1: Check the Patio Before You Paint
Before cleaning or painting, inspect the concrete carefully. Look for cracks, spalling, peeling old paint, greasy stains, mildew, moisture problems, and low spots where water sits after rain. Paint can make concrete look better, but it will not magically fix structural problems. It is paint, not a tiny construction wizard in a can.
Small hairline cracks are usually manageable with concrete crack filler. Larger cracks, shifting slabs, deep holes, or crumbling edges may need repair before painting. If your patio has serious drainage issues or water constantly rises through the slab, painting may not last until the moisture problem is solved.
Step 2: Test Whether the Concrete Is Sealed
Paint needs to bond to the concrete. If the patio has an old sealer, the paint may sit on top instead of gripping the surface. A simple water-drop test can help. Place a few drops of water on the concrete and wait about a minute. If the water soaks in, the surface is likely porous enough to accept coating. If it beads up, the concrete may be sealed or too dense, and the coating may not adhere well without extra preparation.
Previously sealed concrete may need sanding, grinding, stripping, or etching, depending on the existing product and the new paint manufacturer’s instructions. Do not guess here. Read the label and, when in doubt, test a small area first.
Step 3: Pick the Right Weather Window
Outdoor painting is partly a home project and partly a negotiation with the sky. Choose a stretch of mild, dry weather. Many concrete coatings recommend application when air and surface temperatures are roughly between 50°F and 90°F, though exact ranges vary by product. Avoid painting in blazing direct sun, heavy humidity, cold nights, high wind, or when rain is expected soon.
Morning or late afternoon is often better than midday sun. Hot concrete can make paint dry too fast, leading to lap marks, poor adhesion, or an uneven finish. Damp concrete is just as bad. The surface must be completely dry before primer or paint goes down.
Step 4: Clear and Clean the Patio
Remove furniture, planters, rugs, grills, toys, and anything else sitting on the patio. Sweep thoroughly. Then wash the entire surface with a concrete cleaner or degreaser, paying extra attention to oily spots, barbecue splatter, leaf stains, and mildew-prone corners.
A pressure washer can be helpful, but do not use so much force that you damage the concrete. If you use a cleaner, rinse well so no residue remains. Paint does not like soap film, grease, dust, or mystery patio gunk. After rinsing, let the concrete dry completely. Depending on weather and surface porosity, this can take at least 24 hours or longer.
Step 5: Repair Cracks and Surface Damage
Once the patio is clean and dry, repair cracks, chips, and holes. Use a concrete crack filler, patching compound, or repair product made for outdoor concrete. Remove loose material first with a brush or putty knife. For larger cracks, follow the repair product’s instructions carefully, including depth, shape, cure time, and whether the crack should be widened before filling.
After patching, allow repairs to cure fully. Sand or scrape down high spots if needed. Paint will highlight raised blobs, ridges, and sloppy patches, so smooth them now while your future self is still willing to speak to you.
Step 6: Etch or Scuff the Concrete if Needed
Some concrete surfaces need etching or mechanical scuffing to create a profile that paint can grip. Smooth, dense, or power-troweled concrete is especially difficult for coatings. Etching opens the surface pores, while sanding or grinding creates texture.
Use only products recommended for your coating system, wear protective gear, and follow the label exactly. Never mix cleaning chemicals. After etching, rinse thoroughly and allow the patio to dry completely. If the concrete still feels slick or water still beads on it, stop and solve the adhesion issue before painting.
Step 7: Tape and Protect the Edges
Use painter’s tape and plastic sheeting to protect siding, posts, steps, door thresholds, and nearby surfaces. If your patio meets the house, take your time along that edge. A crisp line makes the job look professional. A wobbly line says, “I painted this after drinking three iced coffees and losing patience.”
Also plan your exit path. Start painting at the farthest point from your door or walkway and work backward. This simple detail prevents the classic mistake of painting yourself into a corner and having to perform a sad little hop across wet paint.
Step 8: Prime the Concrete
Primer depends on the paint. Some exterior concrete paints are self-priming on properly prepared surfaces. Others require a concrete and masonry bonding primer, especially on bare, porous, stained, patched, or previously painted concrete.
If primer is required, apply it evenly with a brush around the edges and a roller across the main surface. Do not flood the patio. Thin, even coverage is better than thick puddles. Let the primer dry for the time listed on the product label before painting. Cooler temperatures and higher humidity can increase dry time, so do not rush it.
Step 9: Apply the First Coat of Concrete Paint
Stir the paint thoroughly. Cut in around the edges with a brush, then roll the main patio in manageable sections. Keep a wet edge to avoid lap marks. Roll in one direction, then lightly back-roll for even coverage if the product instructions allow it.
Do not apply the paint too thickly. Thick coats may look satisfying at first, but they can dry unevenly, stay soft, peel, or trap moisture. Two thin coats are usually stronger and better-looking than one heroic coat that behaves like frosting.
Let the first coat dry according to the label. Many patio paints allow recoating after several hours under ideal conditions, but always trust the specific product instructions over general advice.
Step 10: Apply the Second Coat
The second coat improves color depth, coverage, and durability. Apply it the same way as the first coat. Some painters roll the second coat perpendicular to the first to improve evenness, especially on textured concrete. If using a non-skid additive, many products recommend adding it to the final coat.
Check for thin spots near edges, joints, and rough texture. These areas often need extra attention. Once the second coat is finished, remove painter’s tape before the coating gets too hard, unless the label says otherwise. Pull tape slowly at an angle for a cleaner line.
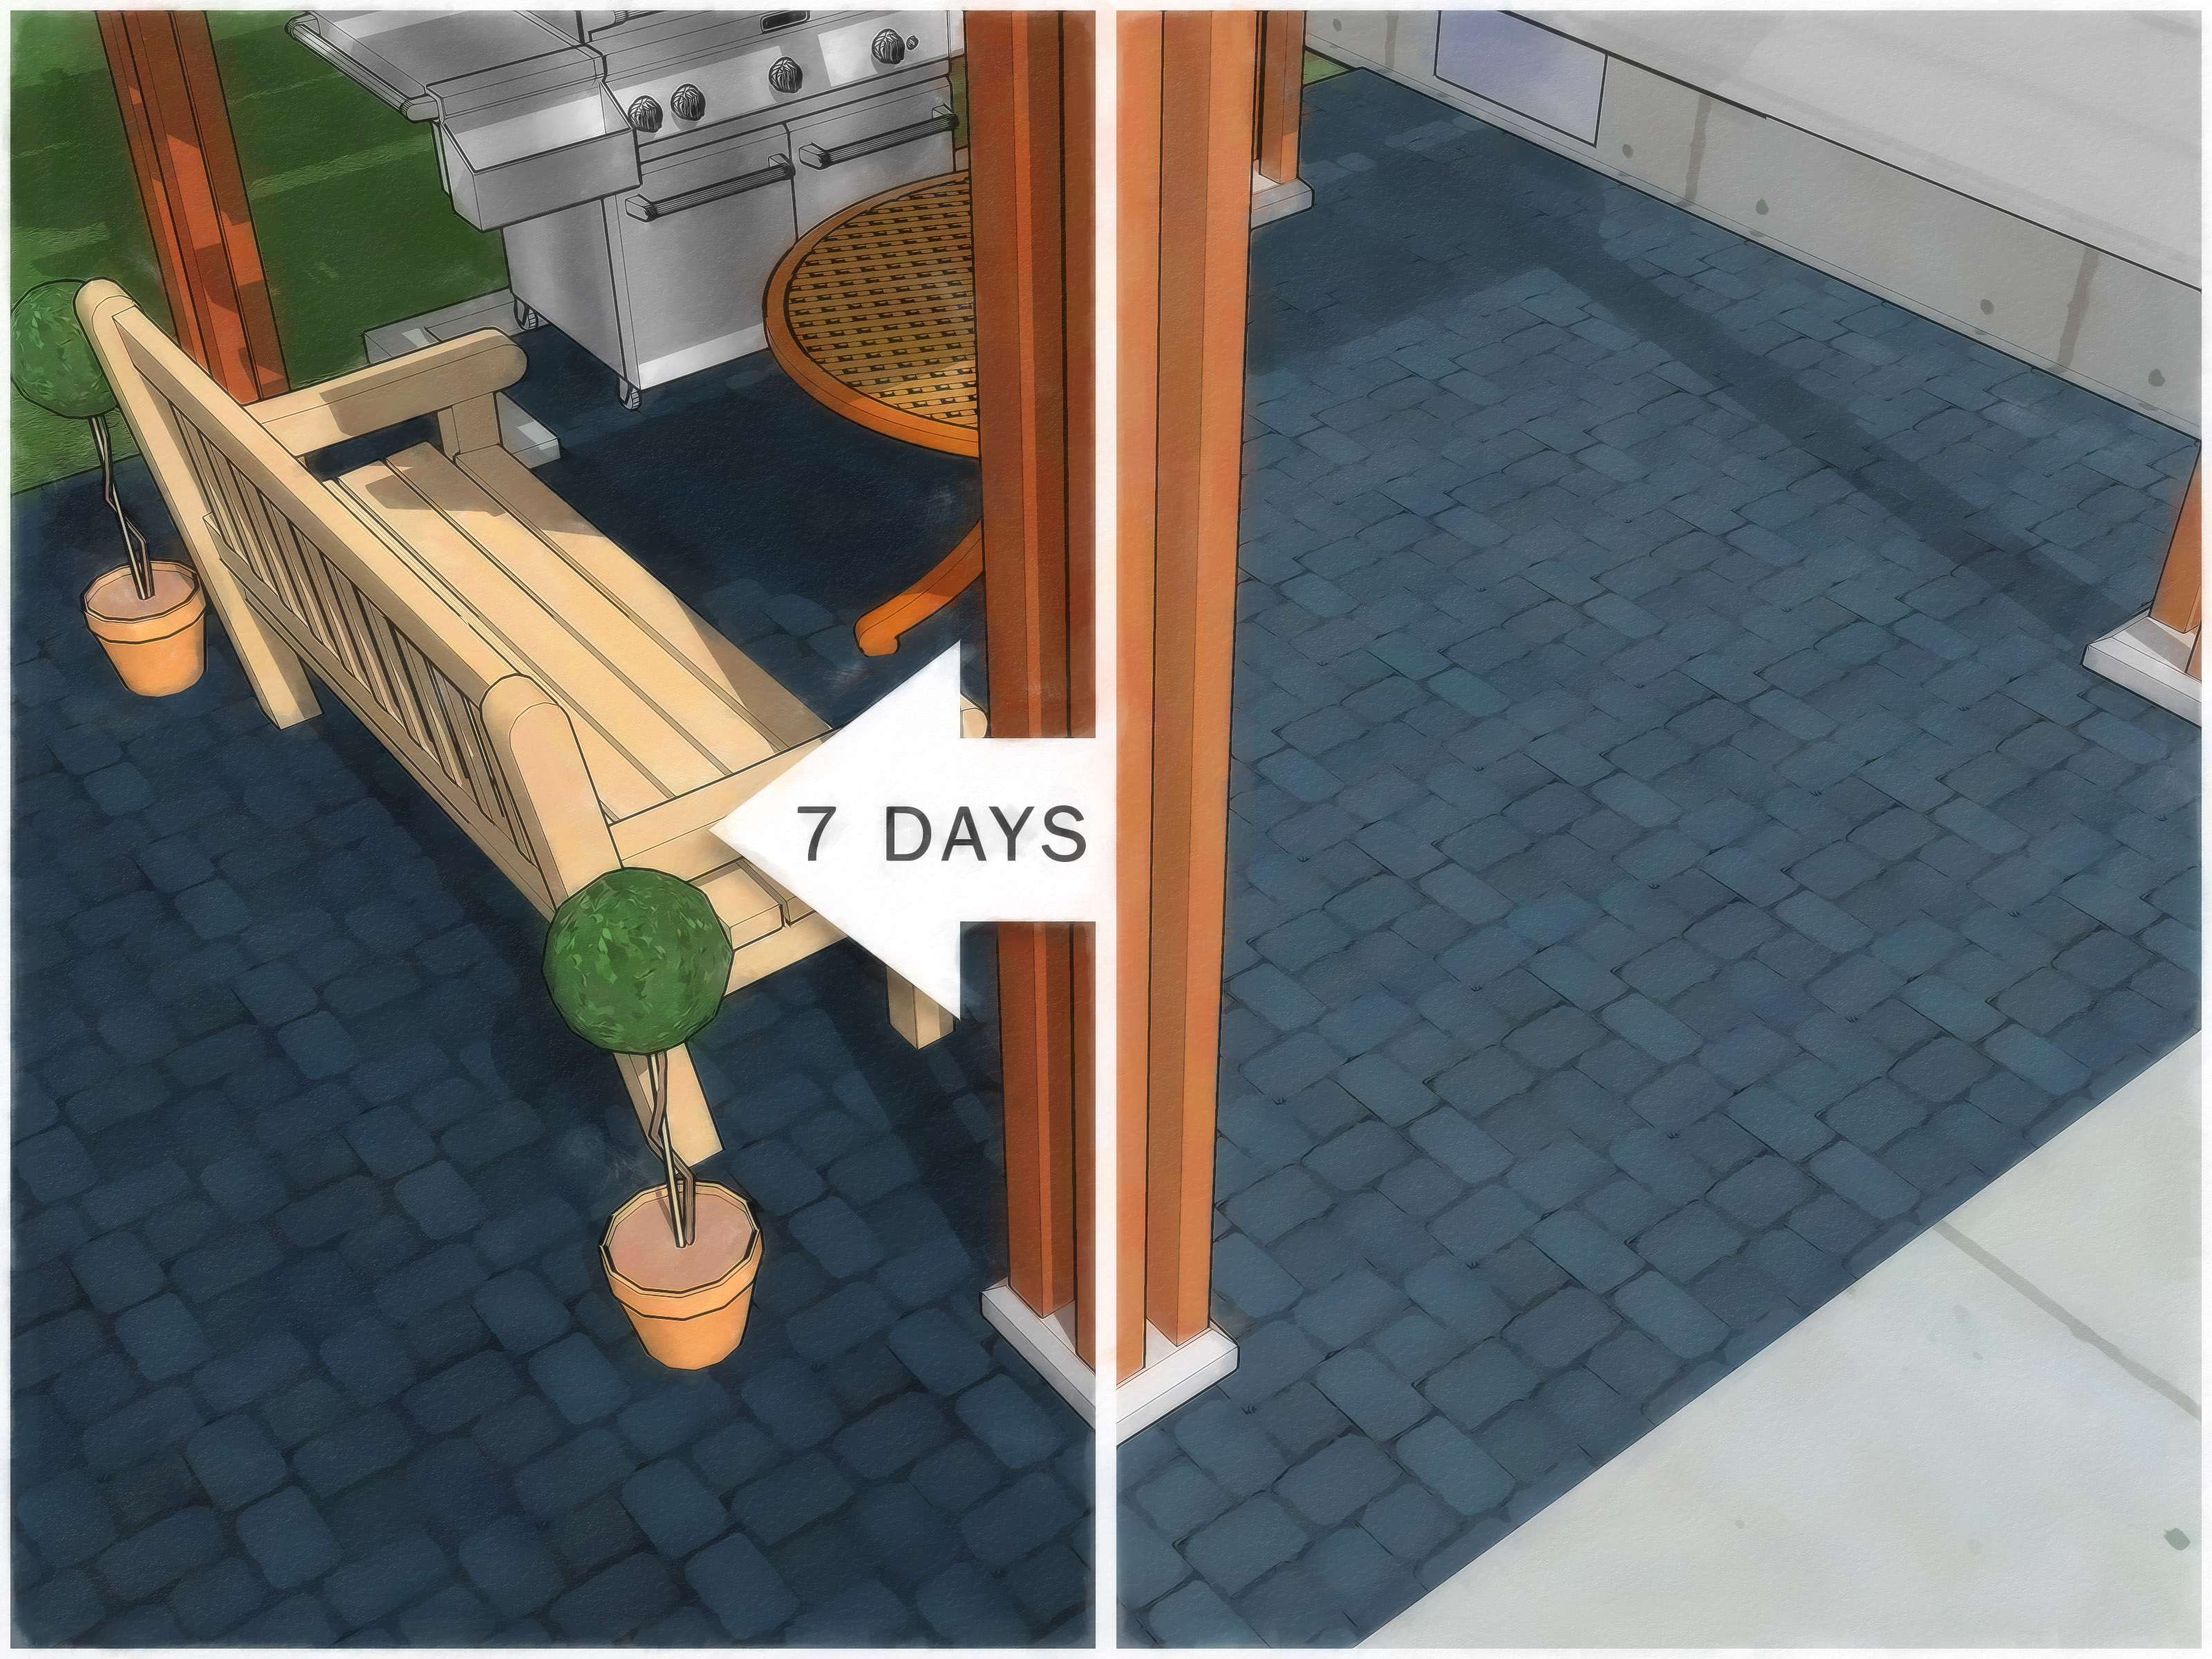
Step 11: Let the Patio Cure Before Using It
Dry and cured are not the same thing. Paint may feel dry to the touch in a few hours, but it can take days or even weeks to reach full hardness. Light foot traffic may be allowed after a short period, but furniture, rugs, planters, and heavy use should wait until the coating has cured enough.
Follow the manufacturer’s cure schedule. Moving furniture back too early can leave marks, stick to the paint, or scrape the finish. Your patio waited years for a makeover. It can wait a few more days before hosting a chair leg parade.
Design Ideas for a Painted Concrete Patio
A painted patio does not have to be plain. A soft gray, warm beige, charcoal, or terracotta color can make the space feel cleaner and more intentional. Darker colors hide stains better but may get hotter in direct sun. Lighter colors stay cooler but show dirt more easily.
For a decorative look, consider a painted border, checkerboard pattern, stencil design, or faux outdoor rug. Use painter’s tape and a measuring tape to keep lines straight. If you stencil, use thin layers and remove excess paint from the brush or foam pouncer before touching the concrete. Too much paint under a stencil creates blurry edges, which is charming only if your design goal is “ancient map discovered in a garage.”
Common Mistakes to Avoid
Painting Dirty Concrete
Dirt, dust, grease, and mildew are the enemies of adhesion. If you skip cleaning, the paint may bond to grime instead of concrete. That is not a long-term relationship.
Painting Damp Concrete
Moisture trapped under paint can cause bubbling, peeling, or cloudy patches. Let the patio dry fully after washing, rain, or morning dew.
Using the Wrong Paint
Use paint made for exterior concrete floors. Regular exterior wall paint is not built for foot traffic. Interior paint is even worse for outdoor patios.
Skipping Cure Time
Putting furniture back too soon can damage the finish. Wait until the coating is ready for normal use.
Ignoring Slip Resistance
Smooth painted concrete can become slippery when wet. Use non-skid paint or an approved additive when traction matters.
How to Maintain a Painted Concrete Patio
Maintenance is simple, but it matters. Sweep regularly to remove grit that can scratch the coating. Wash with mild soap and water when needed. Avoid harsh chemicals, abrasive scrubbers, and pressure washing too aggressively. Place pads under metal furniture legs, and avoid dragging heavy pieces across the surface.
Touch up small chips quickly so water does not creep under the coating. Depending on weather exposure, foot traffic, product quality, and prep work, a painted concrete patio may need refreshing every few years. That is normal. Outdoor coatings live outside, and outside is where weather keeps all its drama.
Personal Experience and Practical Lessons from Painting Outdoor Concrete Patios
The biggest lesson from painting an outdoor concrete patio is that patience is not just a virtue; it is basically a tool. You can have the best roller, the nicest paint, and a color sample that looks like it belongs in an architecture magazine, but if the concrete is dirty or damp, the project will punish you. The patio does not care about your enthusiasm. It cares about adhesion.
One practical experience many DIYers share is underestimating how long cleaning takes. A patio may look clean from standing height, but once you kneel down, you suddenly discover dust in the texture, old leaf stains, barbecue grease, and tiny bits of loose concrete. The washing stage often feels boring because nothing looks “finished” yet, but it is the stage that decides whether the paint will last. A stiff brush, a good concrete cleaner, and a thorough rinse can make the difference between a patio that looks fresh for seasons and one that starts peeling before the next family cookout.
Another lesson is to respect the weather. Painting on a hot afternoon can feel productive until the paint starts drying almost as soon as it hits the slab. That can create roller marks and uneven sheen. Painting too late in the day can be just as annoying if evening moisture settles before the coating has dried properly. The sweet spot is usually a mild, dry day with no rain in the forecast and no extreme heat baking the surface.
Color choice also deserves more thought than people expect. A very light patio can brighten the space beautifully, but it may show muddy footprints and leaf stains faster. A very dark patio can look modern and dramatic, but it may get hot under bare feet. Mid-tone grays, taupes, warm stone colors, and muted clay shades are often forgiving choices. They hide everyday dust without turning the patio into a frying pan.
When applying paint, thin coats feel less satisfying at first, but they perform better. A thick coat can look rich while wet, then dry unevenly or stay soft longer. Rolling slowly and evenly gives a cleaner finish. It also helps to keep checking the patio from different angles. Wet paint can hide missed spots when viewed straight on, especially on rough concrete. Looking across the surface in natural light reveals thin areas before they become permanent little reminders of impatience.
Finally, curing time is where many beautiful patio projects get injured. The paint may feel dry, but setting a heavy table on it too soon can leave dents or peel marks. Waiting is not glamorous, but it is cheaper than repainting. Once the patio is cured, add furniture carefully, use protective pads, and avoid dragging planters or chairs. A painted concrete patio is durable, but it still appreciates manners.
Note: This article is written for general DIY guidance. Always follow the instructions on the exact concrete paint, primer, cleaner, repair compound, and sealer you choose, because dry times, temperature limits, surface preparation, and cure times vary by product.
Conclusion
Learning how to paint an outdoor concrete patio is really learning how to prepare concrete properly. The painting itself is simple: brush the edges, roll the field, apply thin coats, and wait. The long-lasting results come from cleaning thoroughly, repairing damage, checking for moisture or sealer, choosing exterior concrete paint, working in the right weather, and allowing the finish to cure before normal use.
A painted patio can make your outdoor space feel cleaner, brighter, and more inviting without a major renovation. Whether you choose a calm neutral, a bold color, or a decorative stencil, the key is to treat the project like a surface system, not just a paint job. Give the concrete what it needs, and it will reward you with a patio that looks less like a forgotten slab and more like a place where lemonade, string lights, and suspiciously comfortable chairs belong.