Planting an orchid in a pot sounds simple until you realize orchids are the houseplant equivalent of that friend who says, “I’m low-maintenance,” while owning six serums, a silk pillowcase, and a dedicated water bottle. The good news? Orchids are not impossible. They are just different. Most common indoor orchids, especially Phalaenopsis, do not want regular potting soil, soggy roots, or a giant container that turns into a swamp. What they do want is air, drainage, a snug pot, and a grower who resists the urge to love them to death with too much water.
This guide walks you through exactly how to plant orchids in a pot in 13 practical steps. Whether you are potting a brand-new orchid, repotting one that has outgrown its container, or rescuing a plant whose bark has broken down into suspicious brown confetti, these steps will help you do it right. Along the way, you will also learn how to avoid the classic mistakes that send orchids into dramatic decline. Because yes, your orchid can thrive. No, you do not need to whisper motivational speeches to it. Probably.
Before You Begin: What Orchids Actually Need
Most orchids sold as houseplants are epiphytes, which means they naturally grow attached to trees rather than buried in garden soil. That is why orchid roots need excellent airflow and fast drainage. A chunky orchid mix made with bark, perlite, and similar airy materials works far better than standard potting mix. A pot with generous drainage holes is also essential.
If you are growing a common moth orchid, this article will fit your situation almost perfectly. If you have a terrestrial orchid such as a jewel orchid or another type that prefers a finer mix, adjust the medium to match the plant. The basic potting logic still applies: the roots need oxygen, the mix should not stay soggy, and the container should fit the plant rather than your decorating ambitions.
How to Plant Orchids in a Pot: 13 Steps
Step 1: Pick the right time
The best time to plant or repot an orchid is when it is done blooming and starting new root growth. That timing gives the plant the best chance to settle into fresh media without throwing a floral tantrum. If your orchid is covered in gorgeous flowers, admire them first. Repotting during bloom can shorten the show, and nobody wants to be the villain in that story.
Step 2: Choose a pot with serious drainage
An orchid pot should have multiple drainage holes, and side holes are a welcome bonus because they improve airflow around the roots. Clear plastic pots are popular because they let you monitor root health and moisture more easily. Terra-cotta is also a strong option because it breathes well, though it dries faster and may require more attentive watering. Whatever material you choose, the golden rule is simple: no drainage, no deal.
Step 3: Keep the pot snug, not huge
Orchids usually prefer tight quarters. A pot that is just large enough for the root system is usually best. Oversized containers hold too much moisture, which raises the risk of root rot and makes the plant sit in wet media longer than it should. If you are moving up in size, go only a little larger than the previous pot. Think “comfortable apartment,” not “echoing ballroom.”
Step 4: Use orchid mix, never regular potting soil
This is the step that saves beginners from heartbreak. Standard indoor potting soil is too dense for most orchids. Instead, use a commercial orchid potting mix or a coarse blend designed for orchids. For common epiphytic orchids, bark-based mixes are a smart choice because they drain quickly and allow air pockets around the roots. A quality mix may also include perlite, charcoal, or sponge rock for better structure and aeration.
Step 5: Gather clean tools before you touch the roots
You do not need a laboratory setup, but you do need the basics: clean pruners or scissors, fresh orchid mix, the new pot, gloves if you like them, and a clean workspace. Sterilized cutting tools matter because orchid roots and crowns are vulnerable to disease when freshly cut. This is not the moment to use the mystery scissors from the kitchen junk drawer that last saw action during a cardboard-box emergency.
Step 6: Water lightly or soak roots briefly first
If the roots are dry and stiff, give them a short soak or light watering before you start. Slightly hydrated roots are more flexible and less likely to snap while you are working. You want pliable roots, not crunchy noodles. This one small prep step makes the entire process easier, especially if the plant has been living in bark that dries out quickly.
Step 7: Remove the orchid from its old pot gently
Squeeze the sides of a plastic pot, tap the container, or run a clean knife around the inside edge if needed. Then ease the orchid out carefully. Do not yank on the leaves or flower spike. If roots have attached themselves to the pot, work slowly. Orchids do not appreciate rough breakups. The goal is to free the plant while keeping as many healthy roots intact as possible.
Step 8: Strip away the old potting mix
Remove all or nearly all of the old bark, moss, or other medium from the roots. Gently tease apart tangled roots and brush off clinging pieces. Old media often breaks down over time, holding too much water and reducing airflow, which is one of the biggest reasons orchids need repotting in the first place. Fresh mix gives the plant a reset and makes it easier to inspect what is happening below the surface.
Step 9: Inspect the roots like a plant detective
Healthy orchid roots are usually firm and can look white, silvery, or green depending on moisture and exposure to light. Dead or damaged roots are often brown, mushy, hollow, papery, or shriveled. This step matters because the roots tell the real story. If leaves look tired, the problem is often underground. A good root inspection helps you catch rot, dehydration, and overcrowding before the orchid turns your windowsill into a drama set.
Step 10: Trim only what is dead or diseased
Using sterile shears, cut away roots that are clearly dead, mushy, or hollow. Keep healthy roots whenever possible, even if they look a little wild and rebellious. Orchids rely on those roots for both moisture and stability, so aggressive trimming is not a badge of honor. It is more like giving the plant a bad haircut and then acting surprised when it sulks.
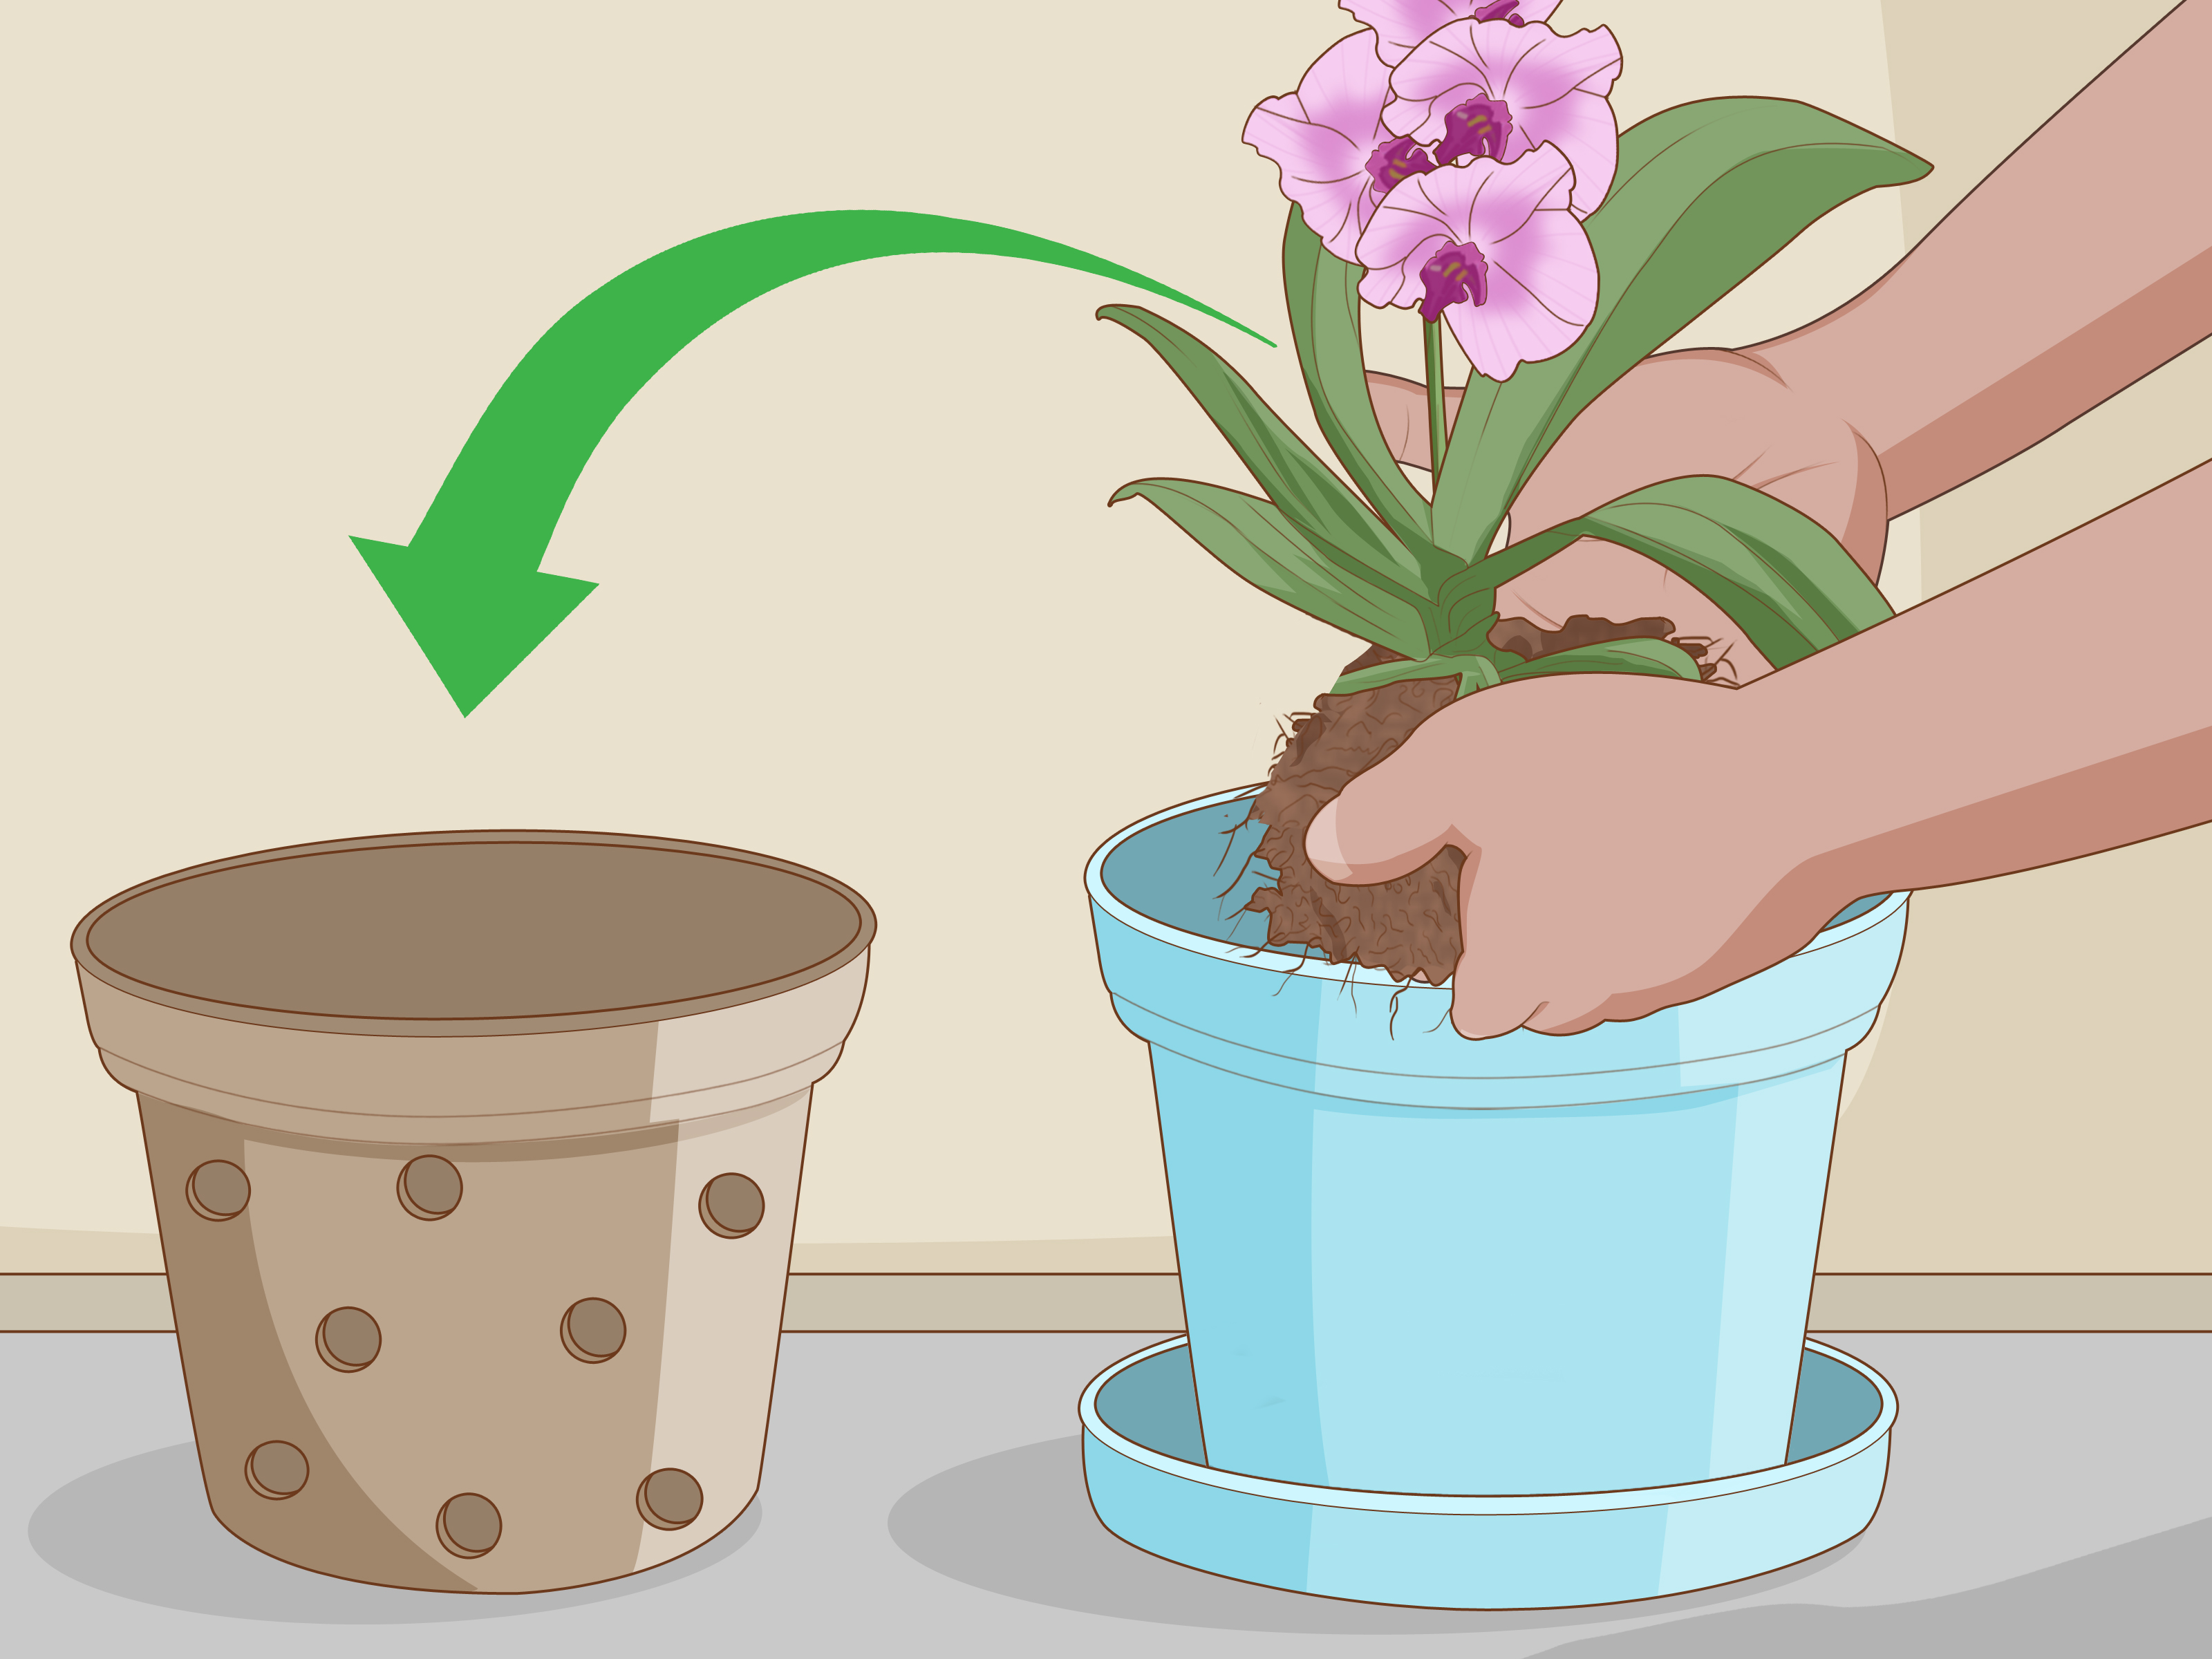
Step 11: Position the orchid correctly in the pot
Place some of the coarsest medium in the bottom if needed, then position the orchid so the plant sits at the right height. For Phalaenopsis and other monopodial orchids, keep the crown above the medium so water does not collect around it. For sympodial orchids such as cattleyas, place the older growth toward one side of the pot so the new growth has room to move forward. In other words, plant for where the orchid is going, not just where it is today.
Step 12: Add fresh mix around the roots
Work the new orchid mix around the roots gradually, tapping the pot or using a stake or dowel to settle the bark into gaps. The orchid should feel anchored, but do not ram the mix in like you are packing a suitcase five minutes before checkout. Firm is good. Crushed is not. The roots need support and contact with the medium, but they also need air spaces to stay healthy.
Step 13: Water well, then go easy on fertilizer
Once the orchid is potted, water it thoroughly so the fresh medium settles and the roots make contact with it. Let excess water drain completely. After that, place the orchid in bright, indirect light and avoid fertilizing immediately if the roots were freshly trimmed. Give the plant a little recovery time before returning to a regular feeding schedule. Right after potting, your job is not to force growth. Your job is to let the orchid catch its breath.
Aftercare: What Happens in the First Few Weeks
The first few weeks after potting are all about stability. Keep your orchid in bright, indirect light rather than harsh direct sun. Water according to the medium and the environment, not according to guilt. Bark dries faster than moss, and a warm bright room dries faster than a cool dim one. A clear pot, the weight of the container, and the appearance of the roots can help you judge when to water.
Do not let the pot sit in standing water. Do not shove decorative moss over the crown. Do not decide that because orchids are tropical, they must want daily watering. That is how good intentions become root rot. If the orchid seems a little still for a while, that is normal. Repotting is change, and plants need time to adjust. Healthy recovery often looks quiet before it looks impressive.
Common Mistakes to Avoid When Planting Orchids
Using regular potting soil
This is probably the fastest route to trouble. Most orchids need much more air around the roots than standard soil can provide.
Choosing a pot that is too large
A huge pot may look generous, but to an orchid it often means extra wet media and a higher chance of rot.
Repotting during heavy bloom
If the plant is thriving in flower, let it finish unless repotting is truly necessary. Blooms are beautiful, but they are also energy-expensive.
Leaving broken-down media in place too long
Orchid bark does not last forever. As it decomposes, it holds more moisture and drains more poorly, which can smother the roots.
Overwatering after potting
Freshly potted orchids do need water, but they do not need to live in a swamp. Good drainage is part of the planting process, not a decorative suggestion.
Experience from the Potting Bench: What Orchid Growers Learn the Hard Way
If you spend enough time with orchids, you eventually collect two things: empty bark bags and humility. Almost everyone who learns how to plant orchids in a pot has a “what was I thinking?” phase. Mine would be the Great Decorative Cachepot Mistake, which sounds grand and was actually just me putting an orchid into a pretty container with poor drainage because it matched the room. The orchid did not care about the room. The orchid cared that its roots were quietly drowning while I admired my design choices.
That experience taught me one of the biggest truths about orchid care: roots are the whole story. If the roots are healthy, the plant has a future. If the roots are failing, the leaves and flowers are basically sending polite emails before the system crashes. Once you start thinking that way, potting becomes much less mysterious. You stop focusing only on the blooms and start paying attention to the hidden mechanics.
Another lesson comes from pot size. Beginners often assume a larger pot will help the orchid “have room to grow.” It feels logical. It also feels logical to bring twelve snacks on a twenty-minute road trip, and both ideas can be excessive. A too-large pot keeps the media wet for too long, which is exactly what many orchids do not want. The happiest orchids I have seen were often in containers that looked almost comically snug, with roots doing their acrobatic thing near the edges and the plant otherwise perfectly content.
Then there is the emotional challenge of trimming roots. New growers tend to either cut nothing or cut everything suspicious. The better approach is calm observation. Mushy, hollow, blackened roots usually have to go. Firm roots, even if they are oddly shaped or sticking out at dramatic angles, are valuable. Orchids are not neat plants by nature. They are survivors with opinions. Aerial roots may look messy, but messiness is not a medical diagnosis.
Patience is another major lesson. After potting, people often stare at the plant for a week and decide it is either a miracle or a tragedy. Usually it is neither. It is just adjusting. Orchids do not reward panic. They reward consistency. Bright indirect light, appropriate watering, fresh media, and time are still the winning recipe. Not constant repositioning. Not fertilizer enthusiasm. Not late-night internet spirals after one limp leaf.
One of the most useful real-world habits is learning to read the pot itself. Lift it. Look at the roots if the pot is clear. Notice how quickly the mix dries in summer versus winter. Observe whether the bark stays chunky or starts breaking down. Orchid care gets easier the moment you stop treating it like a rigid schedule and start treating it like a conversation. The plant gives clues. Your job is to listen without overreacting.
And finally, every orchid grower learns this: repotting is not punishment. It is maintenance. It is a reset button. A repotted orchid may look less glamorous for a little while, but you are investing in future leaves, future roots, and future blooms. In that sense, planting an orchid in a pot is a lot like setting up a good home for anything living. The container matters. The environment matters. The foundation matters. Get those right, and the fancy part comes later.
Conclusion
Learning how to plant orchids in a pot is less about memorizing a secret formula and more about understanding what orchids are asking for: air around the roots, fast drainage, a snug container, and smart timing. Once you stop treating an orchid like a typical leafy houseplant and start treating it like the epiphyte it often is, the whole process becomes more logical. Fresh bark, clean tools, careful root trimming, and proper aftercare can turn a struggling plant into a strong one.
If you remember only one thing, make it this: healthy roots are the priority. Flowers are the reward, but roots are the engine. Plant with that in mind, and your orchid has a much better shot at thriving, reblooming, and proving that it is not actually fussy. It is just very specific. Honestly, relatable.