Adobe Acrobat is powerful, polished, and occasionally guilty of hiding the exact button you need like it is guarding a state secret. One moment you are peacefully reviewing a PDF, and the next you are asking, “Where did my toolbar go, and why is Acrobat acting like we have never met?” Good news: once you understand how Acrobat organizes its toolbars, panels, and shortcut areas, the whole interface becomes much friendlier.
This guide explains how to work with toolbars in Adobe Acrobat in four practical steps. You will learn how to find the main toolbar areas, customize your Quick Action toolbar, show or hide panels, use context toolbars, and build a workflow that does not require hunting through menus every five minutes. Whether you use Acrobat Pro, Acrobat Standard, or Acrobat Reader, the basics are similar: put your most-used PDF tools where your mouse naturally goes, hide the clutter you do not need, and let Acrobat stop feeling like a digital junk drawer.
The instructions below focus on the newer Adobe Acrobat experience, while also mentioning classic interface habits where useful. Acrobat updates its interface from time to time, so a button may move slightly, but the workflow remains the same: locate the tool, add it to a convenient toolbar, test it on a document, and adjust until your workspace feels comfortable.
What Are Toolbars in Adobe Acrobat?
In Adobe Acrobat, toolbars are groups of commands that let you view, edit, comment on, sign, organize, export, print, and share PDF files. Instead of opening a deep menu every time you need to highlight text or rotate a page, you can place commonly used tools in easy-to-reach areas.
Acrobat includes several toolbar-style areas. The global toolbar typically handles broad actions such as opening, creating, saving, searching, printing, and sharing. The Quick Action toolbar gives fast access to tools you use often. The All Tools panel organizes Acrobat features by category. When you select text, images, form fields, or comments, Acrobat may also display a floating context toolbar with actions related to that selection.
Think of these areas like a kitchen. The global toolbar is your countertop, the All Tools panel is the pantry, the Quick Action toolbar is the utensil cup, and the floating toolbar is the little helper who appears exactly when you select something. If you keep your favorite tools nearby, your PDF work becomes much faster and far less dramatic.
Step 1: Get Familiar With the Acrobat Workspace
Before customizing anything, open a PDF in Adobe Acrobat and take a slow tour of the screen. Do not click wildly. That is how people accidentally open three panels, close the one thing they needed, and begin negotiating with their laptop.
Find the main toolbar areas
At the top of the Acrobat window, look for the global controls. Depending on your version and screen size, you may see options for Home, file actions, search, save, print, and share. On one side of the document, you may see the All Tools panel, which contains PDF tools such as Edit, Convert, Combine Files, Organize Pages, Prepare Form, Fill & Sign, Comment, Protect, Scan & OCR, and more.
The Quick Action toolbar is the area you will use most when customizing Acrobat. In the newer Acrobat interface, it may appear as a compact toolbar near the document area. It is designed for quick access rather than full tool browsing. That means you should not try to place every Acrobat command there. Add the tools you use daily, not the tools you use once every solar eclipse.
Understand the difference between tools and toolbars
A tool performs a task, such as highlighting text, adding a signature, editing a PDF, or rotating pages. A toolbar is simply where the shortcut to that tool appears. Some tools open a full workspace with their own controls. For example, when you use Prepare Form, Acrobat displays form-field tools. When you use Fill & Sign, it may display signing and text-entry controls. When you use Comment, it gives you markup tools such as highlight, sticky note, underline, and strikethrough.
This distinction matters because adding a tool to a toolbar does not always mean every sub-option appears directly on the main screen. Sometimes the toolbar shortcut opens a larger tool environment. That is normal. Acrobat is not broken; it is just fond of compartments.
Step 2: Customize the Quick Action Toolbar
The fastest way to improve your Acrobat workflow is to customize the Quick Action toolbar. This is where you place the tools you use constantly. For many users, that includes Comment, Highlight, Edit PDF, Fill & Sign, Organize Pages, Export PDF, Request Signatures, or Prepare Form.
How to customize the toolbar
Open a PDF in Acrobat. Look for the Quick Action toolbar and select the customization option, often shown as three dots or a gear icon. Acrobat will open a customization dialog or panel where you can choose tools, add them to the toolbar, remove tools you do not need, and reorder the buttons.
In some Acrobat layouts, you can right-click an empty area of the toolbar or Quick Tools area and choose a customization option. In the newer interface, the customize option is usually available from the toolbar itself. After opening the customization panel, browse the available categories, select a tool, and add it to your toolbar. Use remove or trash controls to delete unwanted buttons, and drag items to arrange them in your preferred order.
Recommended toolbar setup for everyday PDF work
If you mostly read and review PDFs, add Select, Hand or Pan, Highlight, Add Comment, Search, and Print. This setup is clean, fast, and ideal for students, office workers, editors, and anyone who lives inside documents longer than they care to admit.
If you frequently edit PDF files, add Edit PDF, Organize Pages, Export PDF, Combine Files, and Scan & OCR. These tools help you fix text, reorder pages, turn scanned documents into searchable text, and convert PDFs into formats such as Word or Excel.
If you handle forms and approvals, add Fill & Sign, Prepare Form, Request Signatures, and Protect. This setup is useful for contracts, applications, HR documents, school forms, invoices, and approval workflows.
Do not overload your toolbar
A crowded toolbar defeats the purpose of customization. If every tool is “quick,” none of them are quick. Keep your toolbar focused. Start with five to eight tools. Use Acrobat for a day, then remove anything you did not touch. Your future self will appreciate the mercy.
Step 3: Show, Hide, and Manage Acrobat Toolbars
Sometimes the problem is not adding tools. It is finding the toolbar after Acrobat decides to become minimalist. If your toolbar, menu bar, side panel, or page controls disappear, do not panic. Most of the time, Acrobat is in a different viewing mode or the panels are simply hidden.
Use Show/Hide options
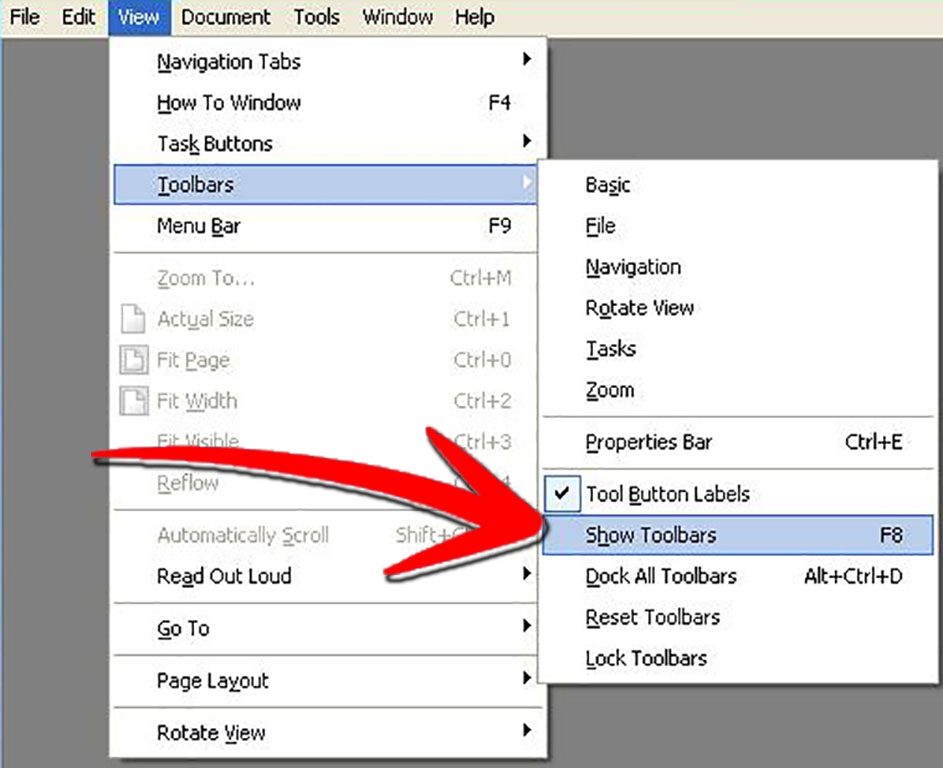
In Acrobat, look for the View menu or the hamburger menu, depending on your operating system and interface version. From there, open Show/Hide. This area lets you display or hide toolbars, side panels, navigation panes, page controls, rulers, grids, and other workspace elements.
If the All Tools panel is taking up too much room, collapse it. If you need bookmarks, page thumbnails, comments, or attachments, open the relevant navigation panel. For long documents, page thumbnails and bookmarks can be lifesavers. For simple reading, hiding extra panels gives the PDF more breathing room.
Use Read Mode and Full Screen carefully
Read Mode and Full Screen Mode are useful when you want fewer distractions. However, they can also make toolbars appear hidden. If Acrobat suddenly looks too clean, check whether you are in Read Mode or Full Screen Mode. Exit that view, and your controls should return.
This is especially common when opening PDFs created with specific initial-view settings. Some documents are designed to open with panels, toolbars, or window controls hidden. Acrobat also has preferences that affect whether last-view settings are restored when reopening documents.
Keyboard shortcuts that help
Keyboard shortcuts are excellent when the mouse route feels too slow. Acrobat supports shortcuts for navigating tools, moving focus to toolbar areas, opening comments, switching tools, searching, printing, and moving through documents. For example, shortcuts can help you move keyboard focus to toolbar areas, use comment tools, or access common document commands without digging through the interface.
Shortcut availability can vary by operating system, Acrobat version, and selected tool. If a shortcut does not behave as expected, check Acrobat’s keyboard shortcut list or your system settings. On some laptops, function keys may require pressing the Fn key as well. Yes, that tiny key can be the villain of the afternoon.
Step 4: Use Context Toolbars and Tool-Specific Workspaces
The best Acrobat users do not rely only on the main toolbar. They also take advantage of context toolbars and tool-specific workspaces. These appear when Acrobat knows what you are trying to do.
Working with comments and markups
When you select text or images, Acrobat may show a floating toolbar with actions such as highlight, underline, strikethrough, add comment, copy text, redact, or edit. This is one of the fastest ways to review a PDF. Instead of opening the full Comment tool first, select the content and choose the action from the floating toolbar.
For heavy review work, open the full Comment tool. This gives you more markup options and a comments list where you can track notes, replies, and changes. It is especially useful when multiple people are reviewing the same PDF, because the comments list becomes the document’s official “please fix this” headquarters.
Working with Fill & Sign
The Fill & Sign tool opens controls for adding text, checkmarks, initials, and signatures. This is ideal for filling out forms that are not interactive. You can click where you want text, type your information, resize it, and add your signature when needed.
A helpful habit is to add Fill & Sign to your Quick Action toolbar if you often complete forms. That turns a multi-click task into a one-click task. If your week includes permission slips, tax forms, rental documents, job paperwork, or client approvals, this shortcut earns its place quickly.
Working with Organize Pages
The Organize Pages tool gives you a page-level view of your PDF. Use it to rotate, delete, extract, insert, replace, split, or reorder pages. If a PDF arrives with page 7 upside down and page 12 pretending it belongs at the beginning, Organize Pages is where you restore order.
After opening Organize Pages, use the page thumbnails to drag pages into a new order. You can also select multiple pages and apply actions to the group. This is much easier than scrolling through a long PDF and hoping you remember where everything lives.
Working with Prepare Form
The Prepare Form tool is for creating or editing fillable PDF forms. When you enter this workspace, Acrobat displays form-field tools such as text fields, checkboxes, radio buttons, dropdowns, signature fields, and buttons. The top toolbar becomes task-specific, which is exactly what you want when building a form.
For best results, label your form fields clearly and test the form after creating it. A form that looks beautiful but confuses users is not a form; it is a puzzle wearing business clothes.
Common Problems With Adobe Acrobat Toolbars
The toolbar disappeared
Check whether you are in Read Mode, Full Screen Mode, or a document view that hides controls. Open the View or hamburger menu, choose Show/Hide, and restore the toolbar or side panels. Also check whether the PDF itself was created with initial-view settings that hide parts of the interface.
The toolbar looks different from a coworker’s Acrobat
This often happens because one person is using the newer Acrobat experience while another is using a classic layout or a different product level, such as Acrobat Pro versus Acrobat Reader. Updates, workplace admin settings, screen size, and operating system differences can also change what appears on screen.
A tool is not available
Some tools require Acrobat Pro or a specific subscription. Acrobat Reader can view, comment, fill, sign, and print many PDFs, but advanced editing, preparing forms, OCR, and certain conversion tools may require a paid version. If a tool is missing, check your Acrobat plan and whether you are signed in with the correct Adobe account.
Custom toolbar changes did not stick
Restart Acrobat and check again. If the toolbar resets repeatedly, make sure Acrobat is updated and that your account or workplace settings are not controlling the interface. In managed business or school environments, administrators may restrict certain customizations.
Best Practices for a Faster Acrobat Workflow
Use the Quick Action toolbar for actions you repeat every day. Use the All Tools panel for occasional tasks. Use context toolbars for fast edits and markups. Use tool-specific workspaces when a job requires several related controls, such as building forms or organizing pages.
Keep your toolbar simple. Put tools in the order you use them. For example, a reviewing workflow might be Select, Highlight, Comment, Save, Print. A forms workflow might be Fill & Sign, Prepare Form, Request Signatures, Protect. A document cleanup workflow might be Organize Pages, Edit PDF, Scan & OCR, Export PDF, Combine Files.
Finally, review your toolbar once a month. If you have not used a button in weeks, remove it. Acrobat is easier to use when the interface reflects your real work instead of your optimistic fantasy of becoming a PDF power wizard by Friday.
Extra Experience: What Working With Acrobat Toolbars Feels Like in Real Life
The first time you customize Adobe Acrobat toolbars, it may feel like organizing a desk that has been collecting paper since the Bronze Age. At first, everything seems important. You want Edit PDF, Comment, Fill & Sign, Organize Pages, Export PDF, Scan & OCR, Protect, Prepare Form, Certificates, Measure, Compare Files, and possibly a button that makes coffee. But after a few real work sessions, the truth becomes clear: only a handful of tools deserve permanent toolbar real estate.
For example, if you review documents for school or work, the Highlight and Add Comment tools quickly become essential. You open a PDF, select a sentence, highlight the useful part, add a note, and move on. A clean toolbar makes this feel smooth. A messy toolbar makes you pause every time, which breaks concentration. Those tiny pauses add up, especially when reading long reports, contracts, manuals, academic articles, or technical documents.
Another common experience is the “missing toolbar panic.” You open a PDF and suddenly the interface looks different. The side panel is gone, the toolbar is thinner, or your favorite button has vanished like it owed someone money. Usually, the fix is simple: check View, Show/Hide, Read Mode, Full Screen Mode, or the customization menu. Once you learn where these controls live, the panic disappears. You stop assuming Acrobat is broken and start treating it like a workspace you can rearrange.
People who handle forms often benefit the most from toolbar customization. Filling out one form is easy. Filling out twenty forms is when every extra click starts sounding like a tiny insult. Adding Fill & Sign to the Quick Action toolbar saves time immediately. If you create forms, adding Prepare Form is equally useful because it opens the field tools without requiring a menu expedition.
Organize Pages is another tool that earns a toolbar spot for anyone who assembles PDFs. Real-world PDFs are rarely perfect. Pages arrive upside down, duplicate pages sneak in, blank pages appear mysteriously, and scanned packets often look like they were assembled during a windstorm. With Organize Pages nearby, you can rotate, delete, insert, extract, and reorder pages quickly. It turns PDF cleanup from a chore into a surprisingly satisfying drag-and-drop session.
The best experience comes from treating Acrobat toolbars as personal workflow tools, not decoration. Your toolbar should match your habits. A legal assistant, teacher, student, designer, accountant, and HR coordinator may all use Acrobat daily, but their ideal toolbars will look different. That is the point. Acrobat becomes easier when it stops being a generic interface and starts becoming your interface.
One practical trick is to build your toolbar around verbs: read, mark, edit, sign, organize, export, protect. If a tool supports one of those verbs and you use it often, add it. If not, leave it in All Tools. This approach keeps the toolbar useful without turning it into a crowded airport departure board.
Over time, you will probably adjust your toolbar more than once. That is not a mistake. It means your workflow is getting clearer. The goal is not to create the “perfect” Acrobat toolbar forever. The goal is to remove friction from today’s work. When your most-used tools are one click away, Acrobat feels faster, calmer, and much less like a software maze with a PDF trapped in the middle.
Conclusion
Learning how to work with toolbars in Adobe Acrobat is one of the easiest ways to make PDF tasks faster and less frustrating. Start by understanding the workspace, then customize the Quick Action toolbar, manage hidden panels through Show/Hide options, and use context toolbars for selected text, images, comments, forms, and pages. Keep the toolbar lean, practical, and based on your real habits.
Acrobat has plenty of tools, but you do not need all of them staring at you every day. Put your favorites within reach, hide the clutter, and let the All Tools panel handle the occasional jobs. Once your toolbar fits your workflow, editing, reviewing, signing, and organizing PDFs becomes noticeably smoother. Your PDFs may still be long, but at least your toolbar will not be part of the problem.