Note: This article is written from synthesized research across reputable U.S.-focused craft, art-supply, home-organization, and DIY resources, including polymer clay baking guidance, glow-in-the-dark clay tips, jewelry storage advice, and handmade home decor best practices. No external source links are included so the content is ready for web publishing.
A Tiny Street Scene for Rings, Whimsy, and Midnight Magic
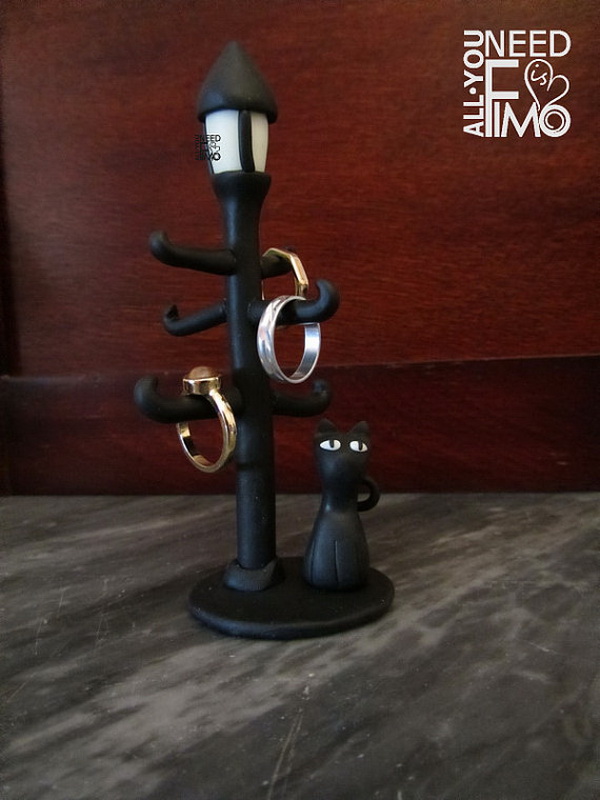
Some DIY projects begin with a practical problem. Others begin because your brain whispers, “What if a cat lived beside a lamppost and guarded my rings like a tiny glowing goblin?” This polymer clay ring holder belongs firmly in the second category, although it does solve a real problem: keeping rings from disappearing into that mysterious household portal known as “somewhere on the dresser.”
The idea was simple but charming: create a miniature lamppost scene out of polymer clay, add a curious little cat, shape a secure place for rings, and use glow-in-the-dark details so the lamppost and the cat’s eyes shine after the lights go out. The result is part jewelry organizer, part nightstand decor, and part tiny fantasy movie set. It looks sweet during the day, then becomes delightfully dramatic at nightlike the cat is about to reveal a secret passage behind the sock drawer.
Polymer clay is perfect for this kind of project because it is flexible before baking, durable after curing, and friendly to small sculptural details. You can roll it, carve it, texture it, blend colors, add powders or mica, and bake it in a regular oven according to the clay brand’s directions. For jewelry dishes, miniature sculptures, trinket holders, and decorative catchalls, polymer clay offers that satisfying mix of control and chaos every crafter secretly enjoys.
Why Polymer Clay Works So Well for a Ring Holder
A good ring holder must do more than look cute. It needs balance, strength, smooth surfaces, and enough structure to hold jewelry without tipping over like a dramatic actor in a thunderstorm. Polymer clay checks all those boxes when handled properly.
Unlike air-dry clay, oven-bake polymer clay stays workable until it is cured. That gives you time to fuss over details, smooth fingerprints, reshape the cat’s ears for the seventh time, and decide whether the lamppost should look Victorian, storybook, or “mysterious alley where the cat definitely knows things.” Once baked at the correct temperature, the clay hardens into a sturdy piece suitable for light daily use.
For this project, the design combines two functions. The base acts as a small tray for rings, earrings, or charms. The lamppost becomes a vertical accent that adds height and personality. The cat provides the emotional center, because every handmade object improves by at least 37 percent when a tiny cat is involved. That statistic is not scientific, but it feels spiritually accurate.
Functional Decor with Personality
Ring dishes and jewelry holders are popular because they make everyday routines easier. Instead of dropping rings beside the sink, on a book, under a receipt, or into the alternate dimension between the bed and nightstand, a dedicated holder gives jewelry a safe landing zone. This is especially useful for rings you remove before washing hands, sleeping, applying lotion, cooking, gardening, or doing anything involving sticky substances and regret.
What makes this polymer clay version special is the storytelling. A plain dish is useful. A dish with a lamppost and glowing cat eyes is useful and suspiciously enchanting. It turns storage into a tiny ritual: place the ring beside the lamppost, let the cat watch over it, turn off the lights, and admire the glow.
Design Inspiration: A Lamppost, a Cat, and a Little Nighttime Drama
The theme works because it has contrast. A lamppost suggests warmth, guidance, city streets, evening walks, and old storybook corners. A cat suggests curiosity, independence, and the possibility that it will knock something off a shelf just to study gravity. Together, they create a miniature scene that feels alive.
For the base, a cobblestone texture or moonlit street effect adds depth. A slightly raised rim helps keep rings in place. The lamppost can be built from a narrow clay column strengthened with internal support, such as a wire armature if needed. The cat can sit at the base, tail curled around its paws, eyes facing outward like two glowing beads of judgment.
The glow-in-the-dark feature should be used thoughtfully. Too much glow can make the piece look gimmicky. A focused glow in the lamppost and cat’s eyes feels more magical. The goal is not to create a miniature airport runway. The goal is a quiet little surprise when the room goes dark.
Materials You May Need
The exact supplies can vary depending on the style, but a project like this usually starts with the following basics:
- Oven-bake polymer clay in colors such as black, gray, brown, white, translucent, and glow-in-the-dark
- A smooth work surface, ceramic tile, glass board, or silicone craft mat
- Clay blade, craft knife, needle tool, dotting tool, or toothpicks
- Small roller or acrylic clay roller
- Aluminum foil for shaping forms or supporting pieces while baking
- Fine sandpaper for smoothing after baking
- Acrylic paint, mica powder, chalk pastel, or alcohol ink for surface effects
- Polymer clay glaze or compatible varnish for selected shiny areas
- Optional wire armature for the lamppost
- Oven thermometer to help confirm baking temperature
Choose clay based on the project’s needs. Softer clay is easier to shape, especially for beginners, while stronger clay formulas are often better for thin or delicate elements. For a ring holder, strength matters most in the lamppost and any raised details. If the clay is too soft, let it rest briefly or leach it between sheets of paper to firm it up. If it is crumbly, condition it patiently until it becomes smooth and flexible.
How the Ring Holder Comes Together
Step 1: Shape the Base
Start with the base because everything depends on it. Roll out a slab of clay thick enough to feel sturdy but not so thick that baking becomes uneven. A round, oval, or softly irregular shape works beautifully for a street-scene design. Slightly lift the edges to create a shallow tray. This keeps rings from sliding away and gives the piece a finished look.
Texture the surface before adding the sculptural elements. For cobblestones, press small irregular shapes into the clay with a rounded tool or toothpick. For a smoother moonlit-street effect, blend gray and black clay lightly to create a marbled surface. Do not overmix unless you want one flat color. Marble clay is like soup seasoning: a little swirl is elegant; too much stirring becomes “why is everything beige?”
Step 2: Build the Lamppost
The lamppost is the tallest part, so it needs structure. A thin column of clay can work if it is short and thick enough, but a wire core adds confidence. Wrap conditioned clay around the wire, smooth the seam, and add small decorative bands at the top and bottom. A tiny lantern shape can be made from translucent or glow-in-the-dark clay. If you want the lamp to glow brighter, keep the glowing part light in color and avoid burying glow clay under dark paint.
Attach the lamppost securely to the base with gentle pressure and clay adhesive if your brand recommends it. Blend the connection point so it looks intentional, not like the lamppost crash-landed. Decorative stones, vines, or a small mound of clay around the base can hide joins while adding charm.
Step 3: Sculpt the Cat
The cat is the soul of the project. Begin with a simple oval body, a rounded head, two triangular ears, and a curled tail. Tiny paws can be suggested with small marks rather than fully sculpted toes. Unless you enjoy sculpting microscopic beans, keep it simple.
For the glowing eyes, use tiny dots of glow-in-the-dark clay, glow pigment mixed into translucent clay, or a compatible glow paint after baking. The eyes do not need to be large. In fact, small glowing eyes are funnier and more mysterious. They give the impression that the cat has been quietly judging your jewelry choices for generations.
Step 4: Add Ring-Friendly Details
Think about how the holder will actually be used. Rings can rest in the tray, stack around a short cone, or lean against the lamppost. If you add a ring cone, keep it smooth, tapered, and securely attached. The cone should not be too tall or thin, because delicate clay projections can be vulnerable if bumped.
Another option is to make the lamppost itself slightly ring-friendly by ensuring the base area is wide enough for rings to sit around it. However, avoid placing rings directly on fragile lamp details. A ring holder should not require the careful motor skills of a museum conservator before bedtime.
Glow-in-the-Dark Tips for Better Results
Glow-in-the-dark polymer clay and glow pigments work best when they can absorb light and release it in darkness. The effect is strongest when the glowing material is pale, exposed, and not covered by opaque colors. If you mix glow clay with dark clay, the glow usually becomes weaker because the pigment particles are hidden.
For a brighter lamppost, use glow clay in the lamp area itself and keep the surrounding frame dark for contrast. For the cat’s eyes, use tiny raised dots or inlaid pieces of glow clay. Charge the finished piece under bright light before viewing it in the dark. Sunlight, LED lamps, and strong desk lights can all help activate the glow.
Modern glow pigments are typically phosphorescent, meaning they absorb light and slowly release it. Many crafters prefer newer glow powders for stronger and longer-lasting effects, especially when mixed into translucent clay or clear media. For polymer clay projects, the key is heat compatibility and proper curing. Always follow the product instructions for both the clay and any pigment, paint, or coating you add.
Baking and Safety: The Not-So-Scary Science Part
Polymer clay must be baked according to the manufacturer’s directions. Many common oven-bake polymer clays cure at low temperatures around 275°F, but baking time varies by brand, clay line, and thickness. Some glow-in-the-dark clay products recommend shorter cure times per quarter inch, while stronger jewelry clays may require longer curing. Always check the package instead of trusting a random memory, because your oven does not care about your confidence.
An oven thermometer is a smart tool because home ovens can run hotter or cooler than the dial suggests. Too low, and the clay may remain weak. Too hot, and the clay can discolor or burn. Use parchment paper, cardstock, ceramic tile, or another recommended baking surface. Let the piece cool fully before handling or sanding, because polymer clay reaches its final firmness after cooling.
Good ventilation is also sensible. Use materials as directed, keep craft tools separate from food tools when possible, and avoid microwaving polymer clay. If children participate, adult supervision is important, especially during cutting, baking, sanding, and handling small parts.
Finishing Touches That Make It Look Handmade, Not Homemade-in-a-Panic
After baking and cooling, inspect the piece. Small rough edges can be sanded gently. Acrylic paint can add shadows between cobblestones, highlights on the lamppost, or soft blush tones inside the cat’s ears. Use a dry-brush technique for weathered metal or stone effects. A tiny bit of metallic paint on the lamppost can make it look antique without turning it into a disco pole.
Glaze is optional. A glossy finish on the lamp glass can look wonderful, while a matte finish on the cobblestone base may feel more natural. Be careful with coatings over glow areas, because some finishes may reduce the effect. Test first if possible. The safest artistic sentence in DIY history is: “I tested it on a scrap piece.” The second safest is: “I did not bake it on my favorite cookie sheet.”
SEO-Friendly Craft Value: Why Readers Love Projects Like This
A handmade polymer clay ring holder has strong appeal because it combines several popular interests: DIY jewelry storage, miniature sculpture, cottagecore decor, cat-themed gifts, glow-in-the-dark crafts, and personalized handmade home accessories. It is not just a craft tutorial; it is a story object.
Readers searching for “polymer clay ring holder,” “DIY ring dish,” “glow in the dark polymer clay,” or “cat ring holder” are often looking for ideas that feel personal. They want something more memorable than a plain tray from a store. They may want a handmade birthday gift, a craft fair product idea, a nightstand organizer, or a weekend project that justifies buying seven clay colors and calling it self-care.
This project also photographs well, which matters for web publishing. Daytime photos can show texture, sculpting, and color. Low-light photos can show the glowing lamppost and cat eyes. Step-by-step images help readers understand scale and process. A final photo with rings in place makes the function clear.
Common Mistakes and How to Avoid Them
Making the Lamppost Too Thin
A skinny lamppost may look elegant, but it can become fragile. Add a wire armature or build the post slightly thicker. Strength is more important than extreme delicacy, especially if the holder will be used daily.
Overloading the Glow Effect
Glow details are most charming when they are intentional. Keep the glow focused on the lamp and cat eyes. This makes the night effect stronger and more stylish.
Skipping the Base Rim
A flat base can work, but a slight rim helps keep jewelry contained. Even a subtle raised edge makes the holder more functional.
Underbaking the Clay
Underbaked polymer clay may look finished but remain weak. Follow the package instructions, measure the thickest part, and allow the piece to cool completely.
Using the Wrong Finish
Not every varnish works well with polymer clay. Use a glaze or finish known to be compatible, and avoid sticky coatings that never fully cure. A beautiful ring holder should not feel like it was dipped in maple syrup.
Creative Variations to Try
Once the basic lamppost-and-cat idea works, the design can go in many directions. Try a snowy winter version with a white base, pale blue shadows, and a warm yellow glow. Make a Halloween version with a black cat, crooked fence, tiny pumpkin, and green glowing eyes. Create a Paris-inspired scene with cobblestones and a romantic streetlamp. Add tiny stars, mushrooms, vines, or a crescent moon for a fantasy style.
You can also personalize the cat. Give it stripes, a white chest patch, a curled sleeping pose, or a raised paw. For gift projects, match the cat to a real pet. This immediately upgrades the holder from “cute craft” to “emotionally dangerous present that may cause squealing.”
of Personal Experience: What This Project Taught Me
Making this polymer clay ring holder felt like building a tiny world one fingerprint at a time. At first, I thought the hardest part would be sculpting the cat, but the real challenge was patience. Polymer clay rewards slow hands. If I rushed, the lamppost leaned. If I pressed too hard, the cobblestones looked like they had survived a cartoon earthquake. If I tried to fix one detail, I accidentally squished another. In other words, the project behaved exactly like a cat.
The best moment came when the main shape finally looked balanced. The base had enough weight to feel stable, the lamppost stood upright, and the cat sat beside it like a tiny night guard. Before baking, the whole thing still felt soft and uncertain, almost like it could change its mind. That is one of the strange pleasures of polymer clay: until it goes into the oven, the project is still negotiable.
I learned that glow-in-the-dark details need planning. At first, I wanted to add glow everywhere because restraint is apparently not my natural setting. But the more I looked at the design, the more I realized the glow would be more magical if it appeared only in the lamppost and the cat’s eyes. That small decision changed the mood. Instead of looking like a novelty toy, the piece became a little scene with atmosphere. In daylight, it looked like a sweet handmade ring holder. In darkness, it looked like the beginning of a cozy mystery novel.
The cat’s eyes were the funniest detail. They were tiny, but once charged under light, they gave the whole sculpture personality. I placed the finished holder on a nightstand, turned off the room light, and saw two little glowing dots staring back at me. It was adorable, slightly dramatic, and mildly accusing. Perfect cat energy.
The project also reminded me why handmade objects feel different from store-bought ones. A factory-made ring dish may be smoother, more symmetrical, and less likely to contain a tiny accidental thumbprint near the cat’s tail. But a handmade piece carries the story of its making. You remember shaping the base, fixing the lamppost, choosing the glow placement, sanding the edge, and hoping the oven behaves itself. Those details become part of the charm.
Functionally, the ring holder worked best when I kept the jewelry area simple. The tray portion holds everyday rings, while the lamppost and cat provide decoration rather than doing all the heavy lifting. That balance matters. A beautiful object is more satisfying when it also does its job without drama. Nobody wants to perform a balancing act just to remove a ring before washing dishes.
If I made another version, I would test more glow materials on scrap clay before committing. I would also photograph each stage, because small changes are easy to forget once the piece is finished. Most importantly, I would make the base slightly larger. Tiny scenes are charming, but rings need breathing room. Jewelry is small, yes, but it has a talent for spreading out like it pays rent.
Overall, this polymer clay ring holder became more than a craft project. It became a miniature reminder that practical things can still be playful. A place to store rings does not have to be boring. It can have a lamppost, a cat, glowing eyes, and just enough whimsy to make bedtime feel a little more enchanted.
Conclusion
A polymer clay ring holder shaped like a lamppost scene with glow-in-the-dark cat eyes is the kind of DIY project that proves useful objects can still have personality. It organizes jewelry, decorates a nightstand, and adds a little after-dark magic without requiring advanced sculpting skills. With careful shaping, proper baking, smart glow placement, and a few finishing details, this handmade holder becomes both functional and memorable.
The beauty of this project is its flexibility. You can make it spooky, cozy, romantic, modern, or cartoonishly cute. You can personalize the cat, change the base, adjust the glow, or turn the whole scene into a gift. Most of all, it gives your rings a home guarded by a tiny glowing-eyed feline, which is honestly more security than most jewelry dishes provide.