

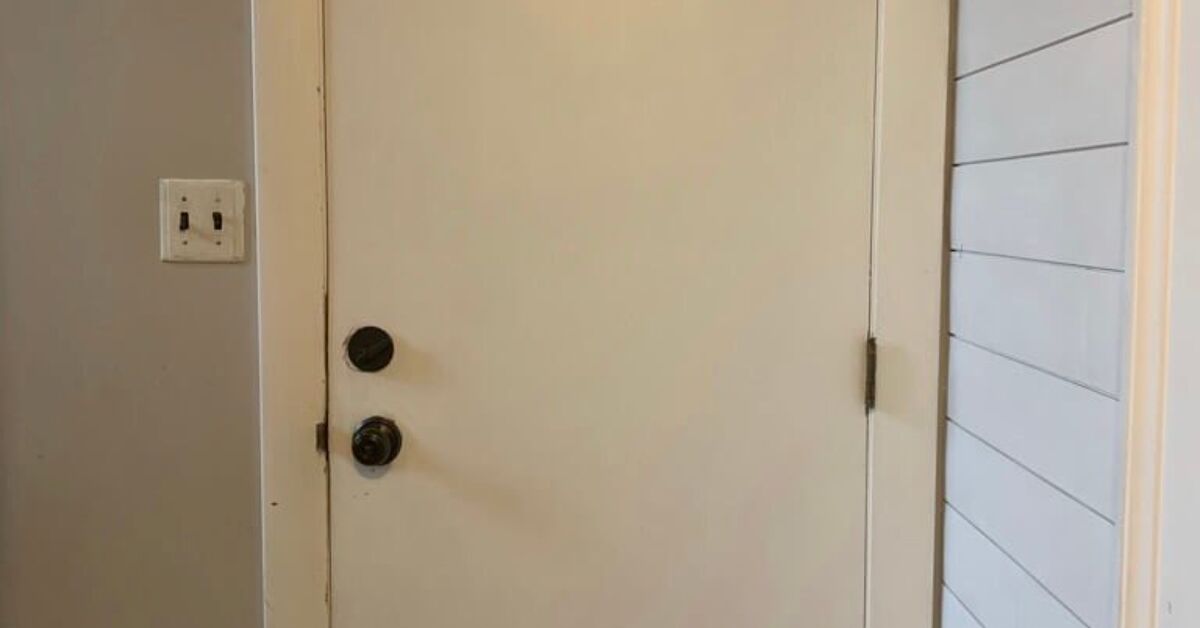
An old door can make an otherwise attractive room feel unfinished, especially when it is covered with scratches, yellowing paint, tired hardware, or enough mystery stains to qualify for its own detective series. Fortunately, replacing the entire door is rarely the only solution. A simple old door makeover can deliver a dramatic transformation using paint, basic tools, inexpensive trim, and one free weekend.
This budget-friendly DIY project works for interior doors, closet doors, pantry doors, laundry-room doors, and even some exterior doors. The key is to spend money where it matterssurface preparation, suitable primer, and durable paintwhile getting creative with affordable decorative details.
Why Make Over an Old Door Instead of Replacing It?
A solid older door may be better built than many low-cost replacements. If it hangs correctly, closes securely, and has no major rot or structural damage, a cosmetic makeover can save money and reduce waste.
A replacement door can also create additional work. The new slab may need trimming, drilling, hinge mortising, painting, and careful alignment. A prehung door may require removing trim and adjusting the frame. By comparison, repainting and updating an existing door keeps the project manageable for a beginner.
A door makeover can also produce a surprisingly large visual effect. Doors occupy plenty of vertical space, so changing one from dull beige to deep green, warm white, charcoal, dusty blue, or another intentional color can alter the mood of an entire room.
Inspect the Door Before Starting
Before buying paint, examine the door carefully. A makeover is worthwhile when the door is structurally sound and its problems are mostly cosmetic.
Look for Repairable Problems
- Small dents, nail holes, scratches, and shallow gouges
- Loose knobs, pulls, hinges, or strike plates
- Peeling paint limited to small areas
- Minor surface rust on metal hardware
- Dirty, faded, or outdated finishes
- Gaps around decorative trim that can be caulked
Know When Replacement Is More Practical
Consider replacing the door when it has extensive rot, major water damage, severe warping, broken joints, large cracks, or a damaged core. An exterior door that no longer seals properly may also affect security and energy efficiency.
Check for Possible Lead Paint
Older painted doors require special caution. Homes built before 1978 may contain lead-based paint, and sanding, scraping, or heating that paint can release hazardous dust and chips. Determine the age and history of the door before disturbing its finish. When lead may be present, use an appropriate test and follow current lead-safe renovation practices. For a heavily deteriorated antique door, hiring a certified professional may be the safest choice.
Budget and Materials for an Easy Old Door Makeover
The final cost depends on what you already own. A basic paint refresh may cost less than purchasing a new door, while decorative molding and new hardware will increase the budget.
| Item | Typical Budget Range | Money-Saving Option |
|---|---|---|
| Cleaner and rags | $3–$10 | Use mild dish soap already at home |
| Wood filler or patching compound | $5–$12 | Buy a small container for minor repairs |
| Sandpaper or sanding sponge | $4–$12 | Purchase a small multipack of grits |
| Primer | $12–$30 | Use leftover compatible primer |
| Door and trim paint | $20–$45 | Look for discounted mistint paint |
| Decorative trim | $10–$35 | Use thin lattice or leftover molding |
| Hardware update | $0–$50 | Clean and reuse existing hardware |
Basic Tool List
- Screwdriver or drill
- Drop cloth or plastic sheeting
- Degreasing cleaner
- Clean rags or sponges
- Wood filler and putty knife
- Sandpaper or sanding sponges
- Painter’s tape
- Angled paintbrush
- High-density foam or low-nap mini roller
- Paint tray
- Primer appropriate for the door material
- Interior or exterior door paint
Step-by-Step Quick Door Makeover
Step 1: Choose Whether to Remove the Door
Removing the door and placing it horizontally on padded sawhorses makes it easier to reach the edges. A flat position can also reduce drips. This method is especially useful when you are adding molding, repairing significant damage, or painting both sides.
However, an interior door can be painted in place when speed is the priority. Open it fully, protect the floor, and make sure it cannot swing while you work. Remove the knob and lock when practical. Otherwise, cover the hardware carefully with painter’s tape or foil.
Step 2: Remove and Label the Hardware
Take off knobs, pulls, locks, hooks, and removable decorative pieces. Keep screws and small components in a labeled bag. This simple habit prevents the traditional end-of-project ceremony known as crawling around the floor and asking, “Where did that tiny screw go?”
If the hinges are being removed, label their positions. Older doors sometimes fit best when each hinge returns to its original location.
Step 3: Clean the Door Thoroughly
Paint does not bond well to grease, dust, wax, fingerprints, or cleaning-product residue. Wash the door using a mild degreasing cleaner, paying extra attention to the area around the knob and the lower section where shoes, pets, and household traffic leave marks.
Rinse away cleaner residue and allow the door to dry completely. Skipping this step can create peeling or uneven paint later, even when the paint itself is excellent.
Step 4: Repair Dents and Holes
Fill nail holes, dents, and shallow scratches with a sandable wood filler or patching compound suitable for the door material. Use a putty knife to press the filler into the damage, then remove the excess. Let it dry according to the product instructions.
Sand the repair until it is level with the surrounding surface. Deep damage may require two thin applications rather than one enormous blob that takes until next Tuesday to dry.
Step 5: Lightly Sand the Surface
For a previously painted door in sound condition, the goal is generally to dull the glossy finish and smooth imperfectionsnot to grind the door back to its childhood. A medium-to-fine sanding sponge is usually sufficient for ordinary scuff sanding.
Sand in the direction of the wood grain when it is visible. Feather the edges of chipped paint so the damaged area does not create a noticeable ridge. After sanding, remove every trace of dust with a vacuum and a clean damp cloth or tack cloth.
Step 6: Add Decorative Trim if Desired
A plain hollow-core door can look more substantial with thin wood strips arranged as rectangles, squares, or a simple geometric pattern. Plan the layout on paper, measure carefully, and mark the design lightly with a pencil.
Cut the trim with a miter box, hand saw, or power saw. Attach lightweight pieces with suitable construction adhesive and small brad nails when appropriate. Fill nail holes, caulk small seams, and sand the completed design before priming.
Keep the pattern simple for a fast project. Two tall rectangles can create a convincing paneled appearance without turning the door into a geometry final exam.
Step 7: Apply the Correct Primer
Primer improves adhesion, helps cover repairs, and creates a more consistent base. It is especially important on bare wood, patched areas, glossy finishes, dark colors, stained surfaces, and doors with unknown previous coatings.
Use a bonding primer for difficult slick surfaces. Choose a stain-blocking product when discoloration or wood tannins might bleed through. Metal doors require a compatible metal primer, especially where rust or bare metal is visible.
Apply primer in a thin, even coat. Use an angled brush for recessed panels and detailed edges, followed by a mini roller on broad flat areas. Let it dry fully. For an especially smooth finish, lightly sand the dried primer with fine-grit sandpaper and remove the dust.
Step 8: Paint in the Right Order
On a paneled door, paint recessed areas and molded details first. Continue with the center panels, horizontal rails, vertical stiles, and outer edges. Work in manageable sections so wet edges blend together.
Use a quality angled brush for corners and a high-density foam or low-nap roller for flat surfaces. Apply thin coats instead of trying to achieve full coverage in one pass. Heavy paint is more likely to sag, drip, and collect around trim.
Allow the first coat to dry for the time stated by the manufacturer. Lightly sand away dust nibs or rough spots if necessary, clean the surface, and apply a second coat. Some dramatic color changes may require an additional coat.
Step 9: Let the Paint Cure
Dry paint is not necessarily fully cured paint. A door may feel dry while the finish is still vulnerable to dents, sticking, and scratches. Avoid reinstalling hardware too aggressively or closing the door tightly before the coating has hardened sufficiently.
Follow the paint manufacturer’s drying and curing instructions, especially for exterior doors exposed to humidity, heat, or cold.
Step 10: Reinstall or Refresh the Hardware
Clean reusable hardware with a method suitable for its material and finish. Tighten loose components and replace stripped screws. If the knob is unattractive or unreliable, a modest new handle can make the completed makeover feel far more expensive.
Decorative hardware may be refinished, but frequently touched pieces can chip if they are not prepared and coated correctly. Do not paint locks, moving mechanisms, latch components, or surfaces where added thickness could interfere with operation.
Affordable Design Ideas for an Old Door
Use a Bold Solid Color
A single rich color is the fastest way to create impact. Black, navy, forest green, muted terracotta, and smoky blue can turn the door into an accent feature. Warm white, greige, and soft gray offer a quieter update.
Create a Two-Tone Door
Paint the panels one shade and the surrounding rails another. Closely related colors create subtle depth, while contrasting colors make the design playful. Painter’s tape is essential for crisp lines.
Add a Geometric Painted Pattern
Use painter’s tape to create stripes, arches, diamonds, or color-blocked sections. Test the layout with removable tape before painting. Seal tape edges firmly, apply thin coats, and remove the tape before the paint becomes fully hardened.
Turn a Door Into a Message Center
A pantry or kitchen door can become a practical message board with chalkboard-style paint. Use it for grocery lists, weekly menus, reminders, or suspiciously optimistic exercise schedules.
Apply Removable Wallpaper
Peel-and-stick wallpaper can add pattern without requiring detailed hand painting. It works best on a clean, smooth door. Recessed panels can be papered individually for a framed appearance.
Add Inexpensive Molding
Thin trim can give a basic slab door architectural character. Rectangular paneling suits traditional rooms, while diagonal strips and asymmetrical patterns create a modern look.
Reuse Vintage Details
An old glass knob, brass backplate, small hook, house number, or salvaged escutcheon can become a focal point. Use decorative pieces only when they do not interfere with the door’s safe operation.
How to Keep the Project on Budget
- Shop your storage area first: Leftover primer, paint, sandpaper, and trim may cover most of the project.
- Check discounted paint: Mistint sections often contain high-quality paint at reduced prices.
- Reuse sound hardware: Cleaning and tightening an old knob may be enough.
- Choose one decorative upgrade: Paint plus simple molding usually creates more impact than several competing additions.
- Borrow specialty tools: A miter saw or nailer may not be worth purchasing for one door.
- Measure before shopping: Accurate measurements prevent buying too much trim or wallpaper.
- Use sample paint strategically: A small amount may be sufficient for panels, patterns, or accents, provided the product is suitable for the surface.
Common Door Makeover Mistakes
Painting Over Dirt
Grease around handles can prevent adhesion. Clean first, even when the door appears reasonably tidy.
Skipping Sanding on a Glossy Surface
A slick finish offers poor grip. Light scuff sanding or a suitable deglossing method helps create a paint-ready surface.
Using Wall Paint on a Hardworking Door
Doors endure frequent touching and cleaning. A durable product formulated for doors, trim, cabinets, or comparable high-contact surfaces is generally a better choice than basic flat wall paint.
Applying Thick Coats
Heavy coats dry slowly and are more likely to sag. Two or three thin coats usually look smoother than one heroic avalanche of paint.
Reassembling Too Soon
Hardware can mark soft paint, and closing the door prematurely may cause sticking. Give the coating adequate time to dry and cure.
Ignoring the Door Edges
Visible edges should look intentional, but excessive paint buildup can make the door rub against the frame. Apply controlled, thin coats and test the fit carefully.
Experiences From Budget Old Door Makeover Projects
The most important lesson from working on an old door is that the visible painting stage is usually the easiest part. Preparation consumes more time, but it determines whether the finished surface looks polished or like a hurried craft project completed five minutes before guests arrived.
One common experience is underestimating how dirty a door can be. A door may look merely faded until it is washed and the cleaning cloth turns a color that was definitely not listed on the paint sample. Areas near knobs collect skin oils and residue, while bottom corners accumulate dust and shoe marks. Cleaning twice often produces better results than immediately reaching for sandpaper.
Another practical lesson is to test paint color on the actual door. A moody green that looks elegant on a sample card may appear nearly black in a dim hallway. Conversely, a bright color can become much more intense when spread across a full-size door. Painting a large sample board and viewing it throughout the day helps prevent expensive second thoughts.
Decorative trim is also easier when the entire pattern is planned before any adhesive is opened. Dry-fitting the pieces allows spacing adjustments and reveals cutting mistakes early. Marking each piece on the backtop left, lower right, and so onsaves confusion during installation. This sounds overly organized until eight nearly identical strips are lying on the floor and none of them seem willing to cooperate.
For a first makeover, a simple design usually creates the most professional result. Two or three rectangular panels are easier to measure, align, caulk, and paint than an elaborate geometric arrangement. Clean spacing and smooth seams matter more than complexity.
Painting with the door laid flat can reduce runs, but it requires enough space and patience to complete one side before turning it over. Painting the door while it remains hung is faster for a basic refresh, especially when only one side is visible. The best approach depends on the repair work, available workspace, drying conditions, and whether household members can survive temporarily without that particular door.
A mini roller is helpful on broad areas, while an angled brush reaches panel corners and molded details. The best results often come from combining both tools rather than declaring loyalty to one. Brushing detailed sections first and immediately rolling the flat surfaces creates a more uniform texture.
Hardware can transform the final appearance, but replacement is not always necessary. On one budget-conscious project, simply cleaning the existing hinges, tightening the screws, and replacing only the worn knob made the door feel new. Selective spending kept the makeover affordable without making it look cheap.
Drying time is another repeated source of trouble. It is tempting to reinstall the hardware as soon as the paint no longer feels wet. Waiting longer, however, reduces fingerprints, dents, and sticking. A makeover completed patiently often lasts longer than one rushed to meet an imaginary deadline.
Finally, keep a small labeled container of leftover paint. Doors eventually collect chips and scratches, particularly around the latch and lower edge. A tiny touch-up is much easier when the original paint is available and identifiable. Without a label, every half-empty can in the garage will suddenly claim to be the correct shade.
The overall experience is encouraging: an unattractive door rarely needs a complicated rescue. Careful cleaning, modest repairs, suitable primer, durable paint, and one well-chosen decorative detail can produce a major change for a relatively small investment.
Conclusion
A quick and easy old door makeover is one of the most approachable ways to update a room without paying for a major renovation. The project can be as simple as cleaning, sanding, priming, and repainting, or it can include decorative trim, wallpaper, a two-tone pattern, and refreshed hardware.
Focus on creating a clean, stable surface before adding color. Use products suited to the door material and location, respect drying times, and address possible lead paint safely. With thoughtful preparation and a restrained design, even a scratched or outdated door can become a stylish feature instead of something hidden behind a coat rack.