Some furniture projects are practical. Some are pretty. And then there are the rare overachievers that manage to be practical, pretty, and wildly charming at the same time. Turning vintage sewing tables into beachy nightstands falls squarely into that third category. It is the kind of makeover that makes guests ask, “Where did you get those?” and lets you smugly answer, “Actually, they used to hold a sewing machine and a whole lot of mystery.”
If you love coastal decor but do not want your bedroom to look like a souvenir shop exploded in it, this project hits the sweet spot. Vintage sewing tables already come with character, storage, and compact dimensions that work beautifully beside a bed. Give them a soft coastal palette, a weathered finish, and a few smart updates, and suddenly they look like custom beach house nightstands with a backstory.
Better yet, this is a realistic DIY. You do not need a professional workshop, a TV crew, or a magical ability to paint without getting at least one accidental streak on your forearm. You just need a solid piece, a good plan, and a little patience during prep. The prep is not glamorous, but neither is flossing, and both prevent future regret.
Why Vintage Sewing Tables Make Great Nightstands
Old sewing tables are basically waiting for a second life. Many were built from real wood or wood veneer, which means they bring warmth and texture that a lot of flat-pack furniture cannot fake. They are often narrow enough for small bedrooms, yet still offer useful surface space for a lamp, a book, a glass of water, and the phone you swear you are putting down for the night in just one more minute.
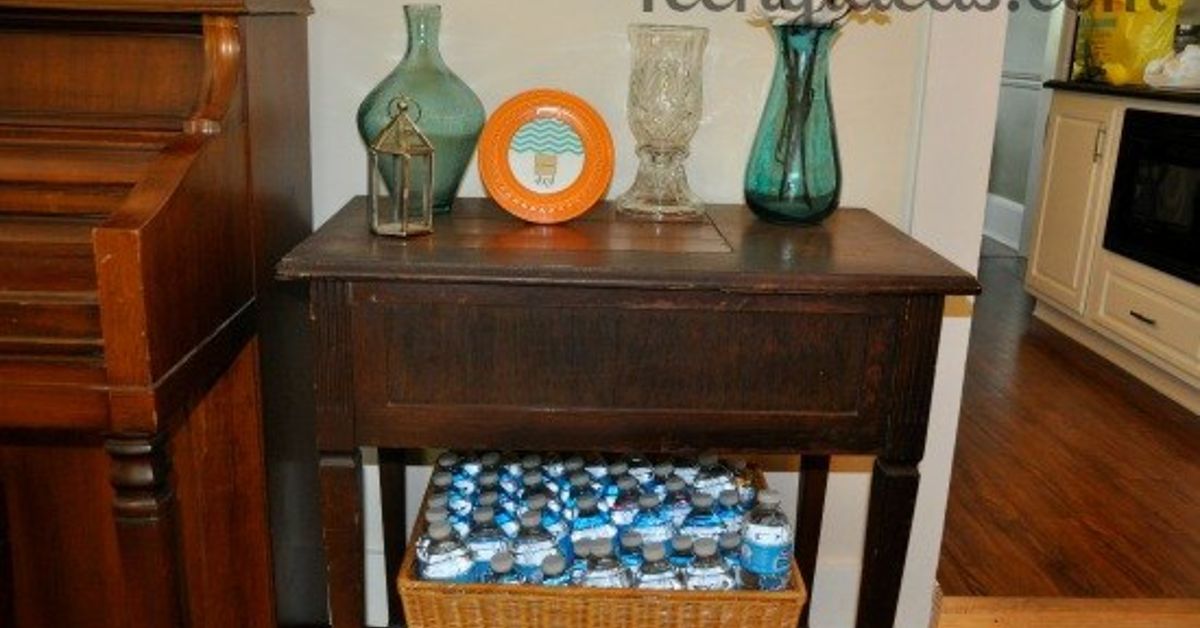
They also tend to have built-in storage. Some have drawers for chargers, lip balm, and reading glasses. Others have cabinet doors, fold-out leaves, or open leg space that can hold a basket. Even the opening where the sewing machine once sat can become an asset. Depending on the design, you can cover it with a wood top, add a tray, create a cubby, or use it as a decorative shelf.
From a design perspective, vintage sewing tables fit the modern coastal look especially well because today’s beach-inspired interiors lean more collected and relaxed than overly themed. Think weathered wood, soft whites, pale blues, sandy neutrals, woven textures, and pieces that feel discovered rather than ordered in bulk on a Tuesday night.
What to Look for Before You Buy
Not every vintage sewing table is worth hauling home. Some are treasures. Some are termite condos with hinges. Before you commit, inspect the piece carefully.
Check the structure first
Look for sturdy legs, stable joints, and a top that is not severely warped. A little wobble can often be fixed with wood glue or tightening hardware, but major structural damage can turn a fun weekend project into a relationship test.
Pay attention to the top surface
Many vintage sewing tables have veneer, not solid wood. That is not a dealbreaker, but it changes how aggressively you can sand. If the veneer is chipped, bubbled, or lifting badly, plan for repairs before painting or staining.
Think about bedside function
Choose a height that works with your bed. In general, the nightstand top should feel easy to reach from a lying or seated position. Drawers are a bonus. Cabinet versions are even better if you want hidden storage for all the glamorous bedtime essentials, like hand cream and the remote you can never find in daylight.
Do not fear outdated finishes
Orange stain, dull lacquer, scratched tops, and dated hardware may look rough now, but they are often exactly what makes the makeover satisfying. Ugly is not fatal. Unstable is.
How to Create the Beachy Look Without Going Overboard
Let us define “beachy” for grown-ups. It does not mean coating everything in navy anchors and slapping a sign on top that says Seas the Day. A better coastal bedroom style feels airy, relaxed, slightly sun-faded, and layered with natural texture.
For a sewing table turned nightstand, that usually means choosing one of these directions:
- Soft white and sand: clean, bright, and easy to style with rattan, linen, and light woods.
- Sea-glass blue or green: subtle color that still feels calm and bedroom-friendly.
- Weathered driftwood stain: ideal if the wood grain is attractive and you want a more natural finish.
- Layered paint with light distressing: perfect for a cottage-coastal or beach farmhouse feel.
To keep the look sophisticated, pair the finish with simple hardware, woven baskets, ceramic lamps, white bedding, and maybe one striped pillow. One striped pillow says “coastal retreat.” Nine striped pillows say “nautical emergency.”
Supplies You Will Likely Need
- Screwdriver for removing old hardware
- Cleaner or degreaser
- Wood filler for dents or holes
- Sandpaper in medium and fine grits
- Tack cloth or microfiber cloth
- Bonding primer
- Paint or stain
- Clear protective topcoat
- Paintbrush, foam roller, or small sprayer
- Optional new knobs, feet pads, basket, or tray insert
If the original sewing machine is still inside, remove it carefully. Some people save the base or hardware for future decor projects. Some donate it. Some stare at it for ten minutes and wonder how previous generations made everything look effortless.
Step-by-Step: Turn the Sewing Table into a Nightstand
1. Remove hardware and clean everything
Take off knobs, hinges, and any removable parts. Clean the entire piece well, especially around handles and edges where years of dust, polish, and mystery residue like to hide. If you skip cleaning, paint adhesion can suffer, and your fresh finish may fail faster than your willpower in the candle aisle.
2. Repair the obvious flaws
Fill dents, scratches, and unused holes with wood filler. Tighten loose joints. Reglue anything that shifts. If the sewing machine opening is exposed, decide whether you want to cover it with a custom-cut wood panel, drop in a tray, or create an inset shelf.
3. Sand, but do it with respect
Scuff-sand the surface to help primer or paint grip properly. If you are stripping and staining, sand more thoroughly and work with the grain. On veneered tops, go gently. This is a furniture makeover, not a treasure hunt for the layer underneath.
4. Remove dust completely
Vacuum the surface, then wipe it with a tack cloth or damp lint-free cloth. Dust left behind can ruin a beautiful paint job by creating grit and drag in the finish.
5. Prime if painting
Primer helps with adhesion, evens out the surface, and reduces bleed-through from older finishes. This is especially important on stained wood and glossy surfaces. Apply a smooth coat and let it dry fully before lightly sanding if needed.
6. Apply paint or stain
For paint, use thin, even coats rather than one heavy layer. Two coats usually look far better than one thick attempt. For stain, test a hidden area first to make sure the wood takes the color evenly. If you are aiming for a coastal look, soft matte or satin finishes tend to feel more relaxed than high gloss.
7. Add subtle distressing if desired
If you want that sunwashed, time-softened look, lightly sand the edges after the paint cures. Focus on areas that would naturally wear, such as corners, drawer fronts, and the lip of the top. The goal is character, not total chaos.
8. Seal for durability
Nightstands handle water glasses, skincare bottles, jewelry, and the occasional panicked midnight phone drop. Protect the finish with a clear topcoat. A water-based polycrylic or clear furniture topcoat is a smart choice when you want durability without a yellowed cast.
9. Update the hardware
Swap clunky or dated knobs for simple wood, ceramic, brushed nickel, aged brass, or glass pulls. The hardware can quietly steer the final style. Rope pulls sound fun until they snag your pajama sleeve at 2 a.m., so maybe test your commitment there.
Best Finish Ideas for a Coastal Bedroom
Whitewashed wood
If the wood has nice grain, a whitewashed finish can keep the texture visible while making the piece feel lighter and breezier. This works especially well in rooms with linen bedding, woven shades, and natural-fiber rugs.
Pale blue painted base with natural wood top
This combination feels classic and collected. The painted base brings in the beachy color, while the stained or sealed wood top keeps the piece grounded and warm.
Soft sage or sea-glass green
If blue feels too obvious, sea-glass greens are a great coastal alternative. They read calm and fresh without shouting “themed room.”
Sand-tone neutral
A sandy beige or creamy mushroom tone can be stunning if you want a more elevated, less expected beach look. Pair it with crisp white bedding and a textured lamp for quiet luxury without the attitude.
How to Style Your New Nightstands
Once the makeover is done, style the nightstand like it belongs in the room, not like it is auditioning for a decorating contest.
- Add a ceramic or glass lamp in white, pale blue, or woven texture.
- Use a small tray for jewelry, hand cream, or a candle.
- Tuck a basket below for books, chargers, or slippers.
- Lean in to natural materials like linen, jute, cane, driftwood, or seagrass.
- Keep accessories edited so the vintage table remains the star.
If the piece has a fold-out leaf, you can keep it functional for extra surface space. It is ideal for small rooms where every square inch matters. A vintage table that suddenly holds your book, tea, and glasses without complaint? That is not just decor. That is emotional support furniture.
Common Mistakes to Avoid
- Skipping prep: poor cleaning and sanding lead to chipping paint.
- Using overly glossy paint: high shine can fight the relaxed coastal vibe.
- Over-distressing: there is a fine line between charming patina and “found after a storm.”
- Ignoring proportion: a table that is too low or too bulky will not feel right next to the bed.
- Forgetting protection: nightstands need a durable topcoat, especially in everyday use.
Why This DIY Is Worth It
Repurposing a vintage sewing table is one of those projects that checks all the right boxes. It is budget-friendly compared with buying designer coastal nightstands. It keeps a well-made piece out of the waste stream. It gives your room a collected look that feels personal. And it delivers that rare decorating win where function and charm actually get along.
Most importantly, it gives old furniture a future. That table may have started life in a sewing room decades ago. Now it can hold a lamp, your current read, and whatever sleepy little bedside rituals make your room feel like home. That is the beauty of good design. It does not erase history. It gives it a softer landing and better lighting.
Real-Life Experiences and Lessons from This Kind of Makeover
The most interesting part of turning vintage sewing tables into beachy nightstands is not just the final reveal. It is the experience of working with a piece that clearly had another life before it met your bedroom. Unlike buying a brand-new table from a store, vintage projects make you slow down and pay attention. You notice the old hinge marks, the worn corners, the little drawer that sticks on humid days, and the faded finish that probably once looked very fashionable under somebody’s lamp fifty years ago.
Many people expect this project to be quick because the furniture is small. In reality, compact pieces can be sneaky. They have lots of edges, trim details, and tight corners that demand patience. The first experience most DIYers mention is surprise. Surprise that such a small piece needs careful prep. Surprise that cleaning old furniture is a full event. Surprise that a simple sanding session somehow produces enough dust to suggest you refinished an entire boardwalk.
Then comes the fun part: watching the table change personality. A dark, dated sewing cabinet can look heavy and old-fashioned at first. But once you add a pale coastal color, tone down the finish, and swap the hardware, it starts to feel completely different. That transformation is what makes the project satisfying. It is not only about making something prettier. It is about seeing potential where other people might only see old furniture and a confusing hole where a sewing machine used to live.
There is also a real emotional payoff in making a bedroom feel more personal. A beachy nightstand made from a vintage sewing table does not look mass-produced. It feels found, not manufactured. Even when the finish is imperfect, those imperfections often make the piece better. A lightly weathered corner or slightly uneven grain can help the table feel relaxed and believable, which is exactly what coastal style is supposed to do.
Another common experience is learning restraint. At first, it is tempting to add every “beach” idea at once: blue paint, rope handles, shell knobs, driftwood stain, striped fabric, maybe a starfish if things really get out of hand. But the best results usually come from editing. One soft color, one natural texture, one or two thoughtful accessories. That lesson tends to carry over into the rest of the room. Suddenly the whole bedroom starts looking calmer.
Finally, there is the pride factor. You stop seeing the nightstand as just furniture. You remember carrying it in, removing the old machine, patching the scratches, choosing the paint, and waiting for the topcoat to dry. Every time you set down a book or switch off the lamp, the piece feels a little more meaningful because you helped it become what it is. That is the hidden reward of this project. You are not just decorating a room. You are creating a story beside the bed.
Conclusion
Turning vintage sewing tables into beachy nightstands is a smart way to blend storage, style, and character in one compact piece. With careful prep, the right paint or stain, and a restrained coastal palette, these forgotten tables can become standout bedroom furniture that feels relaxed, useful, and full of charm. Whether you choose a whitewashed finish, a sea-glass color, or a natural wood-and-paint combination, the result is a nightstand that looks custom, collected, and far more interesting than anything straight out of a box.