Installing a bathroom sink drain assembly sounds like one of those jobs that requires a truck full of tools, a mysterious plumber’s vocabulary, and at least one dramatic sigh. Good news: most homeowners can handle it with patience, a bucket, a few basic tools, and the emotional strength to work inside a vanity cabinet that was clearly designed for raccoons.
A bathroom sink drain assembly is the hardware that connects the sink basin to the drainpipe below. Depending on your setup, it may include a drain flange, gasket, locknut, tailpiece, pop-up stopper, pivot rod, lift rod, clevis strap, P-trap, washers, and slip nuts. In plain English, it is the system that lets water leave the sink without also leaving a puddle inside your vanity.
This guide explains how to install a bathroom sink drain assembly step by step, including how to remove the old drain, seal the new flange, connect the tailpiece, adjust the pop-up stopper, reinstall the P-trap, and test for leaks. We will also cover common mistakes, troubleshooting tips, and real-world experience notes that can save you from crawling under the sink twice.
Before You Start: Know Your Bathroom Sink Drain Parts
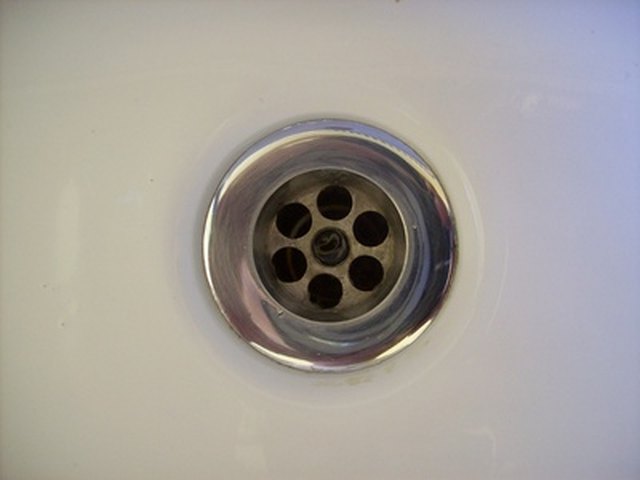
Before grabbing pliers, it helps to know what each part does. A typical bathroom sink drain assembly begins at the top with the drain flange, the shiny ring visible inside the sink bowl. Below that sits the drain body or tailpiece, which passes through the sink opening. Rubber gaskets and washers seal the underside of the sink, while a locknut holds everything in place.
If your sink has a traditional pop-up drain, the stopper is controlled by a lift rod behind the faucet. That lift rod connects to a horizontal pivot rod under the sink. When adjusted properly, the stopper rises and lowers smoothly. When adjusted poorly, it behaves like a tiny chrome diva and refuses to cooperate.
The P-trap is the curved pipe under the sink. Its job is not just to move water away. It also holds a small amount of water in the bend, which helps block sewer gases from coming back into the bathroom. That means the P-trap is both plumbing and an unsung bathroom hero.
Choose the Right Drain Assembly
With Overflow vs. Without Overflow
One of the most important decisions is choosing a drain assembly that matches your sink. Many bathroom sinks have an overflow hole near the upper inside rim. If your sink has an overflow, buy a drain assembly with overflow openings. If your sink does not have an overflow, choose a drain without overflow openings.
Using the wrong type can cause slow drainage, poor function, or leaks under the sink. Vessel sinks are especially important to check because many do not have overflow channels. Before buying parts, inspect the sink bowl and read the drain packaging carefully.
Pop-Up Drain vs. Push-Button Drain
A traditional pop-up drain uses a lift rod and pivot rod. A push-button or “clicker” drain opens and closes when you press the stopper itself. Push-button drains are often easier to install because they do not require linkage adjustments, but traditional pop-ups are still common and work well when installed correctly.
Tools and Materials You Will Need
- New bathroom sink drain assembly
- Plumber’s putty or silicone sealant, depending on the sink and manufacturer’s instructions
- Adjustable wrench or channel-lock pliers
- Bucket or shallow pan
- Old towel or rags
- Putty knife or plastic scraper
- Pipe cutter or hacksaw, if trimming a tailpiece or wall tube
- Measuring tape
- Flashlight
- Replacement P-trap washers, if needed
- Gloves and safety glasses
Most bathroom sink drain piping is commonly 1-1/4 inches, but you should always check your existing wall connection before buying parts. Some homes use adapters or larger wall drains, especially after renovations.
Step-by-Step Guide: How to Install a Bathroom Sink Drain Assembly
Step 1: Clear the Vanity and Set Up a Bucket
Remove everything from the cabinet under the sink. Yes, even the mysterious half-empty bottle of cleaner from 2017. Place a bucket or shallow pan under the P-trap to catch standing water. Lay a towel on the cabinet floor to protect the surface and make cleanup easier.
Step 2: Turn Off the Water Supply
Technically, you are working on the drain, not the faucet supply lines. Still, turning off the water at the shutoff valves is a smart habit. It prevents accidental faucet use while the drain is disconnected. Turn the hot and cold shutoff valves clockwise until closed.
Step 3: Remove the P-Trap
Loosen the slip nuts connecting the P-trap to the sink tailpiece and the wall drain arm. Many plastic slip nuts can be loosened by hand. If they are stubborn, use pliers gently. Do not crush plastic fittings by going full superhero.
Lower the P-trap carefully into the bucket. It will contain water, and possibly hair, soap buildup, and other things you did not invite to the party. Clean the P-trap while it is off. A clean trap helps water drain faster and makes the final installation more pleasant.
Step 4: Disconnect the Pop-Up Mechanism
If you have a traditional pop-up stopper, locate the pivot rod entering the side of the drain tailpiece. Remove the spring clip and disconnect the pivot rod from the clevis strap. Unscrew the pivot rod nut and slide the rod out. Then lift the stopper out from the top of the sink.
Take a quick photo before disassembly if you are new to this. A photo can be more useful than memory, especially when you are upside down under a sink wondering why a tiny metal clip has developed a personal grudge against you.
Step 5: Remove the Old Drain Assembly
Under the sink, loosen the locknut holding the drain body against the basin. Once loose, push the drain upward to break the old seal. From above, remove the old flange. If old plumber’s putty or sealant is holding it tight, wiggle the drain body gently until it releases.
Do not pry aggressively against porcelain, ceramic, glass, or stone. Scratches and chips are much harder to fix than a stubborn drain.
Step 6: Clean the Sink Opening Thoroughly
This is the step many people rush, and it is also where many leaks are born. Scrape away old plumber’s putty, silicone, mineral deposits, and grime from the drain opening. Clean both the top and underside of the sink. Dry the area completely before installing the new drain.
A drain flange needs a smooth, clean surface to seal properly. If old putty remains, the new flange may sit unevenly, leaving a tiny pathway for water. Tiny pathways become big annoyances very quickly.
Step 7: Apply Plumber’s Putty or Silicone Sealant
Read the drain assembly instructions before choosing sealant. Plumber’s putty is commonly used under metal drain flanges on many porcelain or stainless surfaces. However, some materials, such as natural stone, plastic, or certain specialty sinks, may require silicone instead.
If using plumber’s putty, roll it into a rope about the thickness of a pencil. Wrap it around the underside of the drain flange, making a continuous ring. When the flange is tightened, excess putty should squeeze out around the edge. That is normal and usually a sign that the seal has good coverage.
Do not overtighten. The goal is snug and sealed, not “I am trying to compress the earth’s crust.” Overtightening can distort gaskets, crack plastic parts, or damage the sink.
Step 8: Insert the New Drain Flange
Place the drain flange into the sink opening from above. Press it down firmly and keep it centered. If the sink has an overflow and the drain body has overflow openings, make sure the drain is oriented correctly so the overflow channel can function.
Step 9: Install the Gasket, Washer, and Locknut
From below the sink, slide the rubber gasket onto the drain body, followed by the washer and locknut. The gasket usually sits directly against the underside of the sink. Hand-tighten the locknut first, then use pliers for a final snug turn if needed.
Keep the drain body aligned while tightening. For a traditional pop-up drain, the pivot rod opening should face the back of the sink, toward the faucet lift rod. Once tightened, avoid twisting the drain body, because movement can break the seal you just created.
Step 10: Attach the Tailpiece
Thread the tailpiece into the bottom of the drain body if it is not already attached. Some kits include a one-piece drain body and tailpiece, while others require assembly. Use the washers included with your kit and follow the manufacturer’s order exactly.
If the tailpiece is too long to connect neatly to the P-trap, mark it and trim it with a pipe cutter or hacksaw. Cut straight, remove burrs, and test-fit before final assembly.
Step 11: Reinstall the Stopper and Pivot Rod
Drop the stopper into the drain opening from above. For many pop-up drains, the hole or slot at the bottom of the stopper should face the back of the sink. From below, slide the pivot rod into the drain body so it catches the stopper.
Thread the pivot rod nut onto the drain body. Tighten it by hand, then test the stopper. It should move up and down smoothly. If the action feels stiff, the pivot nut may be too tight. If the stopper does not move, the pivot rod may not be seated in the stopper slot.
Step 12: Connect the Lift Rod and Clevis Strap
Feed the vertical lift rod through the faucet body. Attach it to the clevis strap under the sink. Connect the horizontal pivot rod to the clevis strap using the spring clip. Test the drain several times by pulling and pushing the lift rod.
Adjust the spring clip position until the stopper opens enough for good drainage and closes fully enough to hold water. This part can take a little fiddling. Consider it the fine-tuning stage, or the plumbing version of adjusting a guitar string.
Step 13: Reconnect the P-Trap
Slide the slip nut and washer onto the tailpiece. Connect the J-bend of the P-trap to the tailpiece and the trap arm to the wall drain. Make sure the beveled side of each washer faces the fitting it seals against.
Hand-tighten the slip nuts first. For plastic fittings, hand-tight plus a small additional turn is usually enough. Over-tightening can deform washers and create leaks instead of preventing them.
Step 14: Test for Leaks
Turn the water supply valves back on if you closed them. Run water into the sink for at least one minute while watching every connection: the flange, gasket, locknut, pivot rod nut, tailpiece, and P-trap slip joints.
Then close the stopper and fill the basin with a few inches of water. Let it sit briefly, then release it all at once. This creates a stronger flow through the drain and is a better test than a gentle trickle. Wipe each joint with a dry tissue. If the tissue comes away wet, you have found the leak.
Common Bathroom Sink Drain Installation Mistakes
Using the Wrong Drain Type
A sink with an overflow should use a drain with overflow openings. A sink without overflow should use a non-overflow drain. Matching these parts is essential for proper function and leak prevention.
Skipping Surface Cleaning
Old putty, silicone, and mineral buildup can prevent the new flange from sealing. Clean the drain opening until it is smooth and dry.
Overtightening the Locknut
More force does not always mean fewer leaks. Overtightening can squeeze gaskets out of position or crack plastic components. Tighten gradually and test.
Misaligning the P-Trap
The tailpiece and P-trap should line up without stress. If you have to force pipes into place, use the correct extension, adapter, or trimmed wall tube. Forced connections often leak later.
Forgetting to Test the Stopper
A leak-free drain is great, but the stopper also needs to work. Test the lift rod before you put everything back in the cabinet.
Troubleshooting: Why Is My New Bathroom Sink Drain Leaking?
Leak Around the Drain Flange
If water appears around the top of the drain flange, the putty or sealant may be uneven, missing, or disturbed. You may need to remove the drain, clean the opening, and reseal it.
Leak Under the Sink at the Rubber Gasket
Check that the gasket is installed in the correct direction and seated flat against the sink. Tighten the locknut slightly, then test again. If the gasket is pinched or distorted, replace it.
Leak at the Pivot Rod Nut
The pivot rod ball and washers must sit properly inside the drain body. If the nut is loose, tighten it gently. If it is too tight, the stopper may bind. Balance is key.
Leak at the P-Trap
Remove and inspect the slip joint washers. Make sure they are not cracked, reversed, or missing. Reassemble the trap so the pipes insert fully and align naturally.
Maintenance Tips After Installation
Once the bathroom sink drain assembly is installed, keep it working well by cleaning the stopper regularly. Hair, toothpaste, soap film, and shaving residue love to collect around the pop-up mechanism. Remove the stopper when possible and wipe it down.
Avoid pouring grease, heavy cosmetics, candle wax, or thick clay masks down the sink. Bathroom drains are not impressed by spa night leftovers. Use a small drain screen if hair buildup is common.
Check under the sink a day after installation and again after a week. Some small leaks only appear after normal use, vibration, or temperature changes. A quick inspection can prevent cabinet damage.
When to Call a Plumber
Many bathroom sink drain assembly installations are DIY-friendly, but some situations deserve professional help. Call a plumber if the wall drain is corroded, the trap arm is glued in place incorrectly, the drain line smells strongly of sewer gas, the sink or countertop is cracked, or your local code requires permitted plumbing work.
You should also get help if the drain continues leaking after careful reinstallation. A persistent leak may indicate a damaged sink surface, mismatched parts, or a deeper drainpipe issue.
Real-World Experience Notes: What Actually Makes This Job Easier
After doing a few bathroom sink drain installations, you learn that the job is less about brute strength and more about preparation. The best installs usually begin before the old drain comes out. Clear the cabinet completely, place a bright light inside, and take photos of the existing setup. Those photos are useful because under-sink plumbing has a way of looking obvious until all the parts are lying on a towel and you are trying to remember which washer faced which direction.
One practical habit is to dry-fit the entire drain and P-trap before applying putty or sealant. This shows whether the tailpiece lines up with the trap and whether anything needs trimming. If the P-trap is slightly offset, do not force it. Forced pipes may hold for a day, then drip slowly enough to ruin the cabinet floor while pretending everything is fine. Use the proper extension tube or adapter instead.
Another experience-based tip is to treat plumber’s putty like a gasket, not like frosting on a cupcake. You want a continuous rope under the flange, not random blobs. When you tighten the drain, putty should squeeze out evenly around the rim. If it only appears on one side, the flange may be crooked or the putty ring may be uneven. Remove the excess putty with a plastic scraper or your fingers, then wipe the area clean.
Pop-up linkage adjustment is often the most annoying part of the project. The drain can be perfectly sealed, the trap can be leak-free, and yet the stopper refuses to close all the way. Start with the stopper in the open position, connect the pivot rod, then move the spring clip on the clevis strap one hole at a time. Small changes make a big difference. If the lift rod feels stiff, loosen the pivot nut slightly. If the stopper barely moves, make sure the rod is actually passing through the stopper’s slot.
Leak testing should be more dramatic than simply running a tiny stream of water. Fill the sink partway, open the stopper, and let the water rush through. That stronger flow tests the drain, tailpiece, and P-trap under real use. Wipe every joint with a dry paper towel. Fingers can miss small moisture; paper makes leaks confess immediately.
Finally, do not reload the vanity cabinet right away. Leave the area empty overnight if possible. Put a dry paper towel under the trap and check it the next day. If the towel is dry, you have earned the right to return the cleaning bottles, spare soap, and that one mystery object nobody in the house admits buying. A careful installation may take a little longer, but it is far better than discovering a slow leak after the cabinet base has turned into oatmeal.
Conclusion
Learning how to install a bathroom sink drain assembly is a useful DIY skill that can save money, prevent leaks, and make a bathroom refresh feel complete. The process is straightforward when you work in order: remove the old drain, clean the sink opening, apply the right sealant, install the new flange and gasket, connect the stopper mechanism, reassemble the P-trap, and test everything thoroughly.
The secret is not speed. The secret is alignment, clean surfaces, correct parts, and patient leak testing. Treat each washer, nut, and gasket like it matters, because it does. With the right setup and a little under-sink flexibility, you can install a bathroom sink drain assembly that works smoothly, drains properly, and does not surprise you with a puddle two days later.