

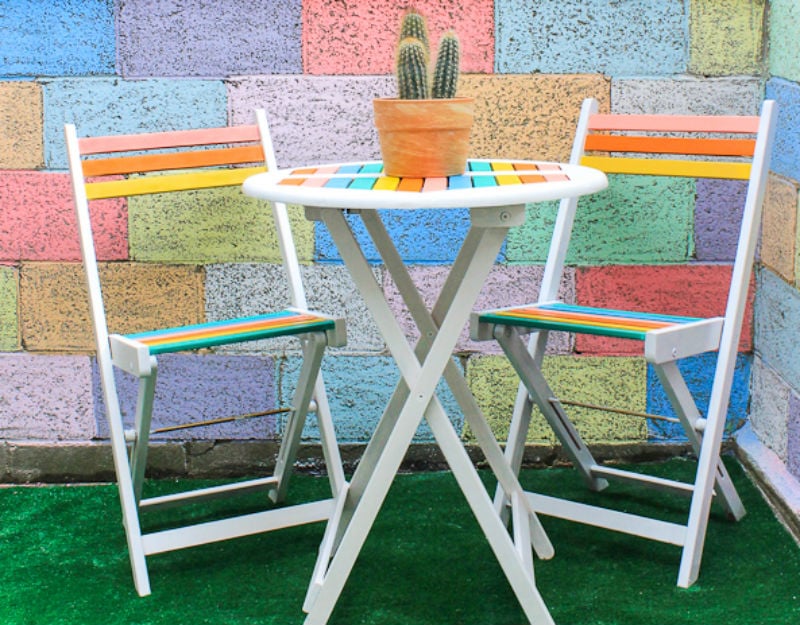
Old furniture has a funny way of staring at you from the corner of a room like it knows too much. Maybe it is a scratched coffee table, a dresser with knobs from three different decades, or a chair that technically still works but looks like it has survived a pirate ship. The good news? You do not need a giant renovation budget to give tired pieces a second life. With smart prep, paint, stain, hardware, fabric, and a tiny bit of patience, DIY furniture makeover projects can turn “please hide that” into “where did you buy that?”
This guide covers 20 practical, stylish, and beginner-friendly furniture makeover ideas that work for thrift-store finds, hand-me-downs, garage-sale treasures, and the suspiciously wobbly table you keep promising to fix. We will talk about painting furniture, refinishing wood, updating hardware, using peel-and-stick materials, adding texture, reupholstering seats, and making pieces look custom without spending custom-furniture money. Your furniture may not know what hit it. Ideally, that hit is not a hammer unless the project specifically calls for one.
Before You Begin: The Makeover Rules That Save Your Sanity
Every successful DIY furniture makeover starts before the pretty color appears. First, clean the piece thoroughly. Dust, grease, wax, and mystery garage residue can stop paint or stain from bonding properly. Use mild dish soap and warm water for basic cleaning, then let the piece dry completely. Remove drawers, cushions, knobs, pulls, hinges, and any hardware you do not want accidentally painted into permanent modern art.
Next, inspect the furniture. Tighten screws, glue loose joints, fill dents with wood filler, and sand rough patches smooth. For glossy surfaces, laminate, factory finishes, or slick veneer, scuff sanding helps primer grip. Solid wood pieces may be stained, painted, whitewashed, or sealed; particleboard and laminate usually need bonding primer; outdoor metal furniture may need rust treatment and exterior paint. The boring prep stage is where the makeover either becomes durable or begins plotting its dramatic peeling scene two weeks later.
20 DIY Furniture Makeover Projects to Try
1. Paint an Old Dresser in a Bold New Color
A painted dresser is the classic furniture makeover because it delivers maximum drama with basic supplies. Choose a color that fits your room: deep navy for a tailored look, sage green for calm cottage style, black for modern contrast, or coral if your dresser has decided it wants a personality. Clean, sand, prime if needed, then apply two thin coats of furniture paint. Finish with a clear topcoat for durability, especially on the top surface and drawer fronts.
2. Create an Ombre Chest of Drawers
An ombre dresser turns basic storage into a statement piece. Paint the frame a clean neutral shade, then paint each drawer in a gradual range of color from light to dark. Blues, greens, pinks, and warm terracotta tones work beautifully. This project is ideal for kids’ rooms, creative studios, guest rooms, or anywhere that could use a little “I have excellent taste and maybe three paint samples too many” energy.
3. Replace Hardware for an Instant Upgrade
Sometimes the fastest DIY furniture makeover is simply replacing outdated knobs and pulls. A plain white dresser with brass handles looks polished. A black cabinet with leather pulls feels modern. A thrifted nightstand with ceramic knobs becomes charming instead of “found behind a shed.” Measure the existing hole spacing before buying new pulls. If the new hardware does not match the old holes, fill the previous holes with wood filler, sand smooth, and drill new ones.
4. Refinish a Wood Dining Table
A scratched dining table can often be saved with refinishing. Strip or sand away the old finish, working with the grain, then repair dents and wipe away dust. Apply stain in your chosen shade, test it first on an inconspicuous spot, and protect the surface with polyurethane or another clear finish. This project takes time, but the payoff is huge: a table that looks warm, rich, and ready for dinner guests who promise not to drag ceramic plates across it like tiny bulldozers.
5. Whitewash a Coffee Table
Whitewashing is perfect when you want a lighter, softer look without completely hiding the wood grain. Sand the table lightly, wipe it clean, then brush on thinned white paint or a whitewash product. Wipe off the excess with a lint-free cloth so the grain still shows. Seal the piece once dry. This technique works well for coastal, farmhouse, Scandinavian, and relaxed modern interiors.
6. Add Cane Webbing to Cabinet Doors
Cane webbing can make a basic cabinet look expensive in a single afternoon. Remove the door panel or attach cane over an inset section, then secure it neatly with staples, trim, or small molding. Pair natural cane with warm wood, black paint, olive green, or creamy white. The result feels airy, textured, and custom. It is especially good for media cabinets because cane can hide electronics while still allowing ventilation.
7. Turn a Bookshelf Into a Built-In Look
A freestanding bookshelf can look more polished with trim, paint, and styling. Add molding along the top and bottom, attach a backing panel if the shelf is open, and paint the whole piece to match the wall or contrast with it. For a designer touch, wallpaper or paint the back panel. Suddenly, the humble bookshelf that once held cables and one lonely cookbook becomes a focal point.
8. Use Peel-and-Stick Wallpaper on Drawer Fronts
Peel-and-stick wallpaper is a low-mess way to give furniture personality. Apply it to drawer fronts, cabinet panels, the back of a bookshelf, or the top of a side table protected under glass. Botanical prints, grasscloth textures, geometric patterns, and faux marble can all work. The trick is to measure carefully, smooth slowly, and avoid rushing unless you enjoy bubbles, wrinkles, and personal growth.
9. Reupholster Dining Chair Seats
Dining chairs often look tired because of stained or dated fabric. Remove the seat, pull off the old fabric, replace worn padding if needed, and staple new upholstery fabric tightly around the underside. Choose performance fabric for families, pets, or anyone who believes spaghetti sauce is a lifestyle. This is one of the easiest DIY furniture makeover projects for beginners because the transformation is immediate.
10. Paint Fabric Furniture Carefully
Yes, fabric furniture can be painted, but it needs realistic expectations. Tightly woven fabric usually works better than loose or heavily textured fabric. Use fabric medium or paint made for upholstery, apply thin coats, and allow proper drying time. Painted fabric may feel firmer than regular upholstery, so this method is best for accent chairs, decorative benches, or pieces that need a visual refresh more than a cloud-soft sitting experience.
11. Add Fluted Trim to a Plain Dresser
Fluted furniture is having a major design moment, and you can create the look with half-round molding or pole wrap. Attach vertical strips to drawer fronts, trim the edges neatly, then paint or stain the piece. This project adds texture and makes flat furniture look architectural. It is especially effective on IKEA-style pieces, plain dressers, and media consoles.
12. Turn a Cabinet Door Into an Ottoman Tray
An old cabinet door can become a stylish tray with sanding, paint or stain, handles, and a protective finish. Add felt pads underneath so it does not scratch your ottoman or table. Use it for books, remotes, candles, or snacks. Congratulations, your old cabinet door now has a social life.
13. Distress Painted Furniture for Vintage Character
Distressing gives furniture a timeworn look without waiting 80 years and inheriting a barn. Paint the piece, let it dry, then lightly sand edges, corners, and raised details where natural wear would occur. Apply dark wax or glaze if you want extra age and depth. Use restraint; the goal is charmingly vintage, not “attacked by raccoons.”
14. Refresh Outdoor Metal Furniture
Patio chairs and tables can often be revived with cleaning, sanding, rust removal, primer, and exterior-grade spray paint. Choose paint designed for metal and outdoor conditions. Apply light coats rather than one heavy, drippy coat. This project is budget-friendly and perfect before summer gatherings, when you realize your patio set looks less “outdoor oasis” and more “abandoned theme park.”
15. Paint a Laminate Desk the Right Way
Laminate furniture can be painted, but it demands better prep than raw wood. Clean thoroughly, dull the glossy surface with fine-grit sandpaper, wipe away dust, and apply a bonding primer. Use a durable enamel, cabinet paint, or furniture paint, then seal if the desk will get heavy use. A painted laminate desk can become a chic home-office piece instead of a reminder that remote work deserves better lighting.
16. Add a Faux Marble Top
A faux marble top works well on side tables, nightstands, vanity desks, and small cabinets. You can use marble-look contact paper for a quick update or paint a faux marble effect with white paint, gray veining, and a clear protective coat. The painted version takes more patience, while contact paper is faster and renter-friendly. Either way, your table gets to pretend it came from a boutique hotel.
17. Convert a Dresser Into a Bathroom Vanity
A solid dresser can become a custom bathroom vanity with careful planning. You will need to cut openings for plumbing, seal the wood against moisture, add a sink, and choose a durable countertop or protective finish. This project is more advanced, but it can create a warm, one-of-a-kind bathroom focal point. Make sure the dresser is sturdy and the final height is comfortable.
18. Paint a Two-Tone Nightstand
Two-tone furniture is great when you want contrast without covering every inch. Paint the frame and leave drawers stained, or paint drawers and keep the legs natural. Black and walnut, white and oak, navy and brass, or beige and cane are reliable pairings. This technique works especially well when the wood grain is too pretty to hide completely.
19. Turn an Old Trunk Into a Coffee Table
A vintage trunk can become a coffee table with cleaning, odor removal, new legs or casters, and a protective finish. If the inside is clean, it doubles as storage for blankets, games, or the throw pillows no one is allowed to actually use. Add a glass top if the trunk surface is uneven or delicate.
20. Give a Bench a Mudroom Makeover
A tired bench can become a functional mudroom hero. Paint or stain the frame, add hooks above it, place baskets underneath, and upholster the seat with durable fabric or vinyl. This project improves entryway organization and gives shoes a place to gather that is not directly in the walking path like tiny household traps.
Best Paint, Stain, and Finish Options for DIY Furniture Makeovers
The right product depends on the furniture material and how the piece will be used. Chalk-style paint creates a matte, vintage-friendly finish and often requires less sanding, though high-use pieces still need sealing. Acrylic, latex, mineral, and enamel paints can work well for dressers, cabinets, desks, and tables when properly prepped. Spray paint is helpful for chairs, metal patio pieces, small stools, and furniture with detailed shapes.
For wood furniture makeover projects where the grain deserves attention, stain is often better than paint. Stain enhances wood instead of covering it. A pre-stain conditioner can help reduce blotchiness on certain woods, and a clear protective finish adds durability. For tabletops, desks, and nightstands, do not skip the topcoat unless you enjoy coaster rings as permanent decor.
Common DIY Furniture Makeover Mistakes to Avoid
The biggest mistake is painting dirty furniture. The second biggest is pretending “dry to the touch” means “ready for daily life.” Paint and clear coats need curing time, not just drying time. Be gentle with freshly finished furniture for the first several days. Another common mistake is using leftover wall paint on high-traffic furniture without a durable topcoat. Walls do not have coffee mugs, elbows, pets, backpacks, and toddlers climbing on them. Furniture does.
Also, think carefully before painting antiques, valuable midcentury pieces, cedar outdoor furniture, or high-quality veneer. Some items are worth restoring rather than covering. When in doubt, research the piece before grabbing a brush. A makeover should add value, function, and joynot accidentally erase craftsmanship.
My Practical Experience With DIY Furniture Makeover Projects
The best lesson I have learned from furniture makeovers is that every piece tells you what it wants, usually after you have already bought the wrong supplies. A small side table might look like an easy paint project, then reveal a peeling factory finish that needs sanding and bonding primer. A dresser might seem destined for bold color, then show off gorgeous wood grain under the old varnish. The trick is to slow down long enough to listen before charging ahead with a roller and blind optimism.
One of the most satisfying projects is a basic dresser makeover. Start with a plain, slightly scratched dresser. Remove the hardware, clean the surface, fill the dents, sand lightly, and prime. At this stage, it looks worse before it looks better, which is normal and emotionally rude. Then comes the first coat of paint. Do not panic if it looks streaky. Thin coats are stronger than thick coats. The second coat usually brings the magic. Add new hardware, and suddenly the dresser looks like it has a design degree.
Another memorable project is reupholstering dining chair seats. It feels intimidating until you realize the underside of a chair seat is basically a secret zone where staples live. The key is pulling the fabric evenly, working from the center outward, and folding corners neatly. A patterned fabric can hide minor mistakes, which makes it a loyal friend to beginners. When the chair is reassembled, the whole dining set looks cleaner, fresher, and more intentional.
Refinishing a table is slower but deeply rewarding. Sanding can be tedious, especially if the old finish is stubborn, but watching dull wood come back to life under stain is worth it. Always test stain first, because wood can surprise you. A color that looks warm and medium on the can may turn orange, red, gray, or “grandma’s basement” depending on the wood species and previous finish. Testing prevents drama, and furniture drama is best kept fictional.
For beginners, I recommend starting with a small nightstand, stool, tray, or chair seat rather than a giant dining table or heirloom cabinet. Small projects teach the full process without taking over your garage for a month. You learn how paint behaves, how much sanding is enough, why dust removal matters, and how sealing changes the finish. You also learn that patience is not just a virtue; it is a topcoat strategy.
The most important experience-based advice is this: budget time for prep and curing, not just painting. A project that takes two hours to paint may need a full weekend when you include cleaning, sanding, priming, drying, sealing, and reassembly. That does not mean DIY furniture makeovers are hard. It means they are honest. They reward careful work, creative choices, and the willingness to laugh when a drawer pull is installed upside down. Yes, you can fix that. No, the furniture will not tell anyone.
Conclusion
DIY furniture makeover projects are one of the smartest ways to refresh your home without buying everything new. A painted dresser, refinished table, reupholstered chair, updated nightstand, or revived patio set can change the feeling of an entire room. The secret is not expensive tools or professional training. It is good prep, the right product for the surface, thin coats, proper drying time, and a clear plan before you start.
Whether you love colorful furniture, natural wood, vintage distressing, modern black finishes, cane details, peel-and-stick patterns, or simple hardware upgrades, there is a makeover project that fits your skill level and budget. Start small, choose a piece that does not terrify you, and let creativity do the heavy lifting. Your old furniture may be tired, but with a little DIY attention, it can absolutely make a comeback. Honestly, it might come back with better style than the rest of us.
Note: This article is written for web publishing in standard American English and is based on real DIY furniture refinishing, painting, staining, upholstery, and upcycling practices from reputable home-improvement guidance.